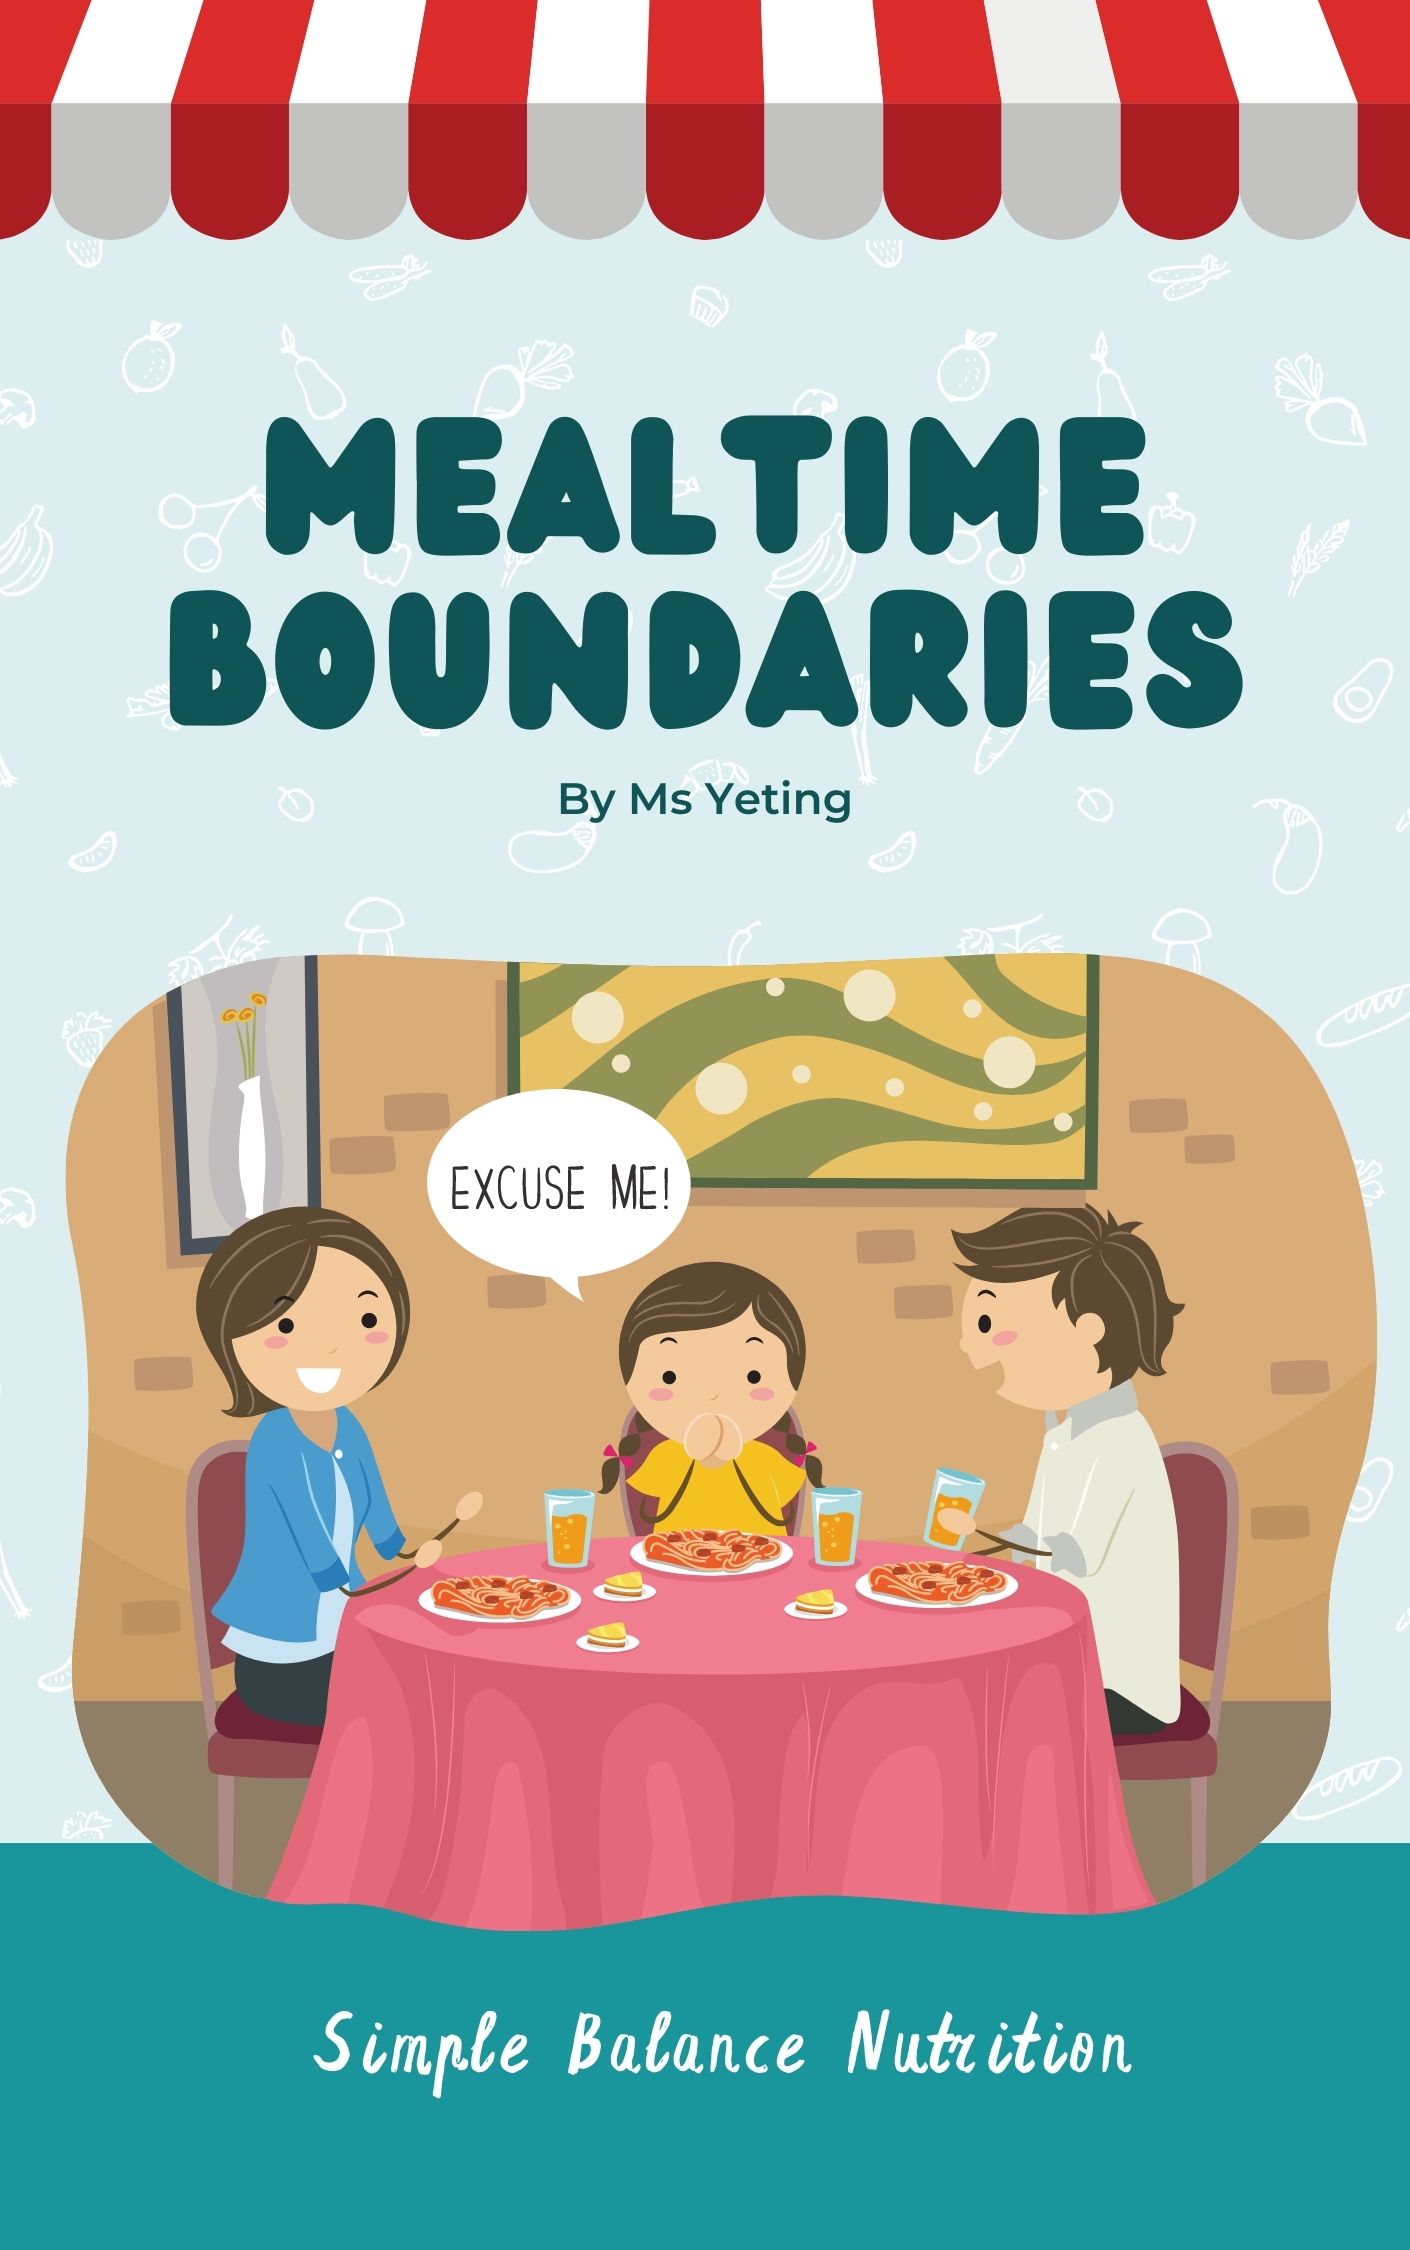
Mealtime Boundaries for Picky Eaters Tips and Strategies

Mealtime Boundaries for Picky Eaters: Tips and Strategies

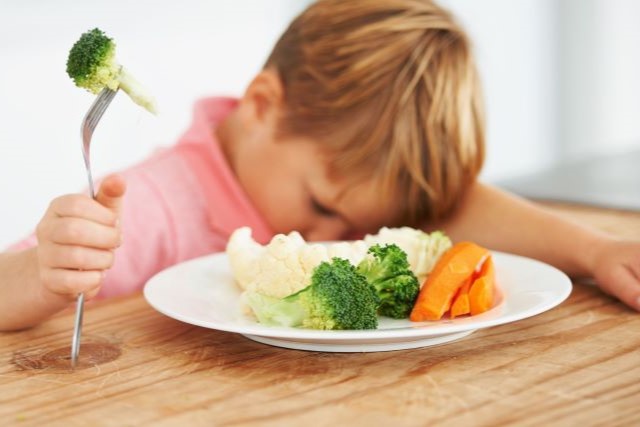
Mealtimes with young children can be challenging, especially if they’re picky eaters. Family dinners can easily turn into a power struggle, where parents struggling to get their children to eat certain foods, but facing even more resistance.

Parents often feel like their children are in control, while they desperately try to make them eat something healthy. They end up making special meals, using pleading phrases, coaxing, and even bribing, which only adds to the stress and leaves them feeling hopeless.

MEALTIMES FOR MANY PARENTS ARE ANYTHING BUT PLEASANT

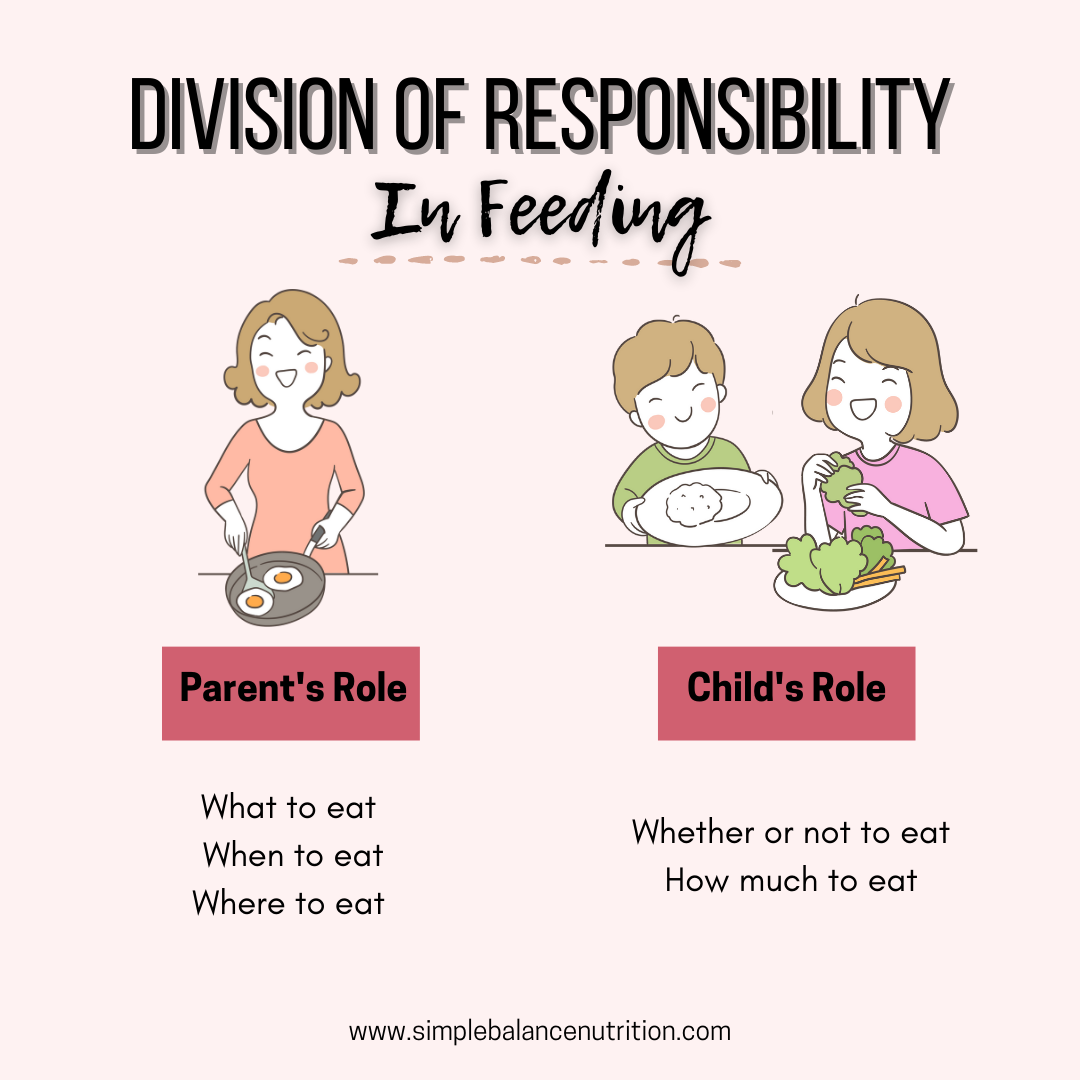
When I encounter this dysfunctional and stressful feeding dynamic in my practice, it becomes evident that the roles of feeding within the household are completely reversed, and parents are unaware of it. Ultimately, children are in control of WHAT, WHEN and WHERE food is served, while parents exert great effort to control whether and how much their children eat.

THIS IS ACTUALLY THE OPPOSITE OF WHAT IT SHOULD BE!

To raise children who are healthy, happy, and self-assured when it comes to eating, parents need to establish clear boundaries and maintain their role as the ones in charge of WHAT, WHEN and WHERE food is served. Meanwhile, children should be allowed to fulfill their role as the ones who decide whether and how much they eat. This forms the foundation of the Division of Responsibility in Feeding (DOR), an approach advocated by Feeding and Childhood Nutrition Expert, Ellyn Satter.

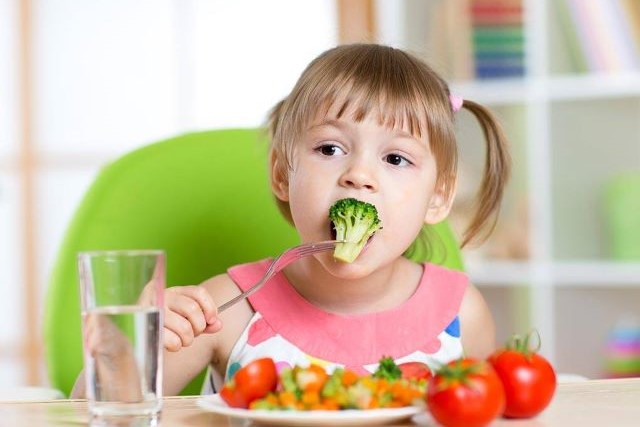
By following the principles of DOR, you can create mealtimes that are more peaceful, reduce stress around eating, and raise children who are capable and confident eaters.

Does this sound familiar?

Your child refuses to eat, so you give in and stop asking him to come to the table for meals. 

He complains about what’s served, so you make him a peanut butter sandwich because you know he’ll eat it. 

He whines about feeling hungry before bed (Even though he didn’t eat at dinnertime an hour earlier) so you give him yogurt and a banana in hopes that he’ll go to bed peacefully and not wake up hungry.

If it does, you’re certainly not alone.

Here is my top strategy for creating more peaceful mealtimes and minimizing stress when it comes to feeding:

SET HEALTHY MEALTIME BOUNDARIES AND STICK TO THEM

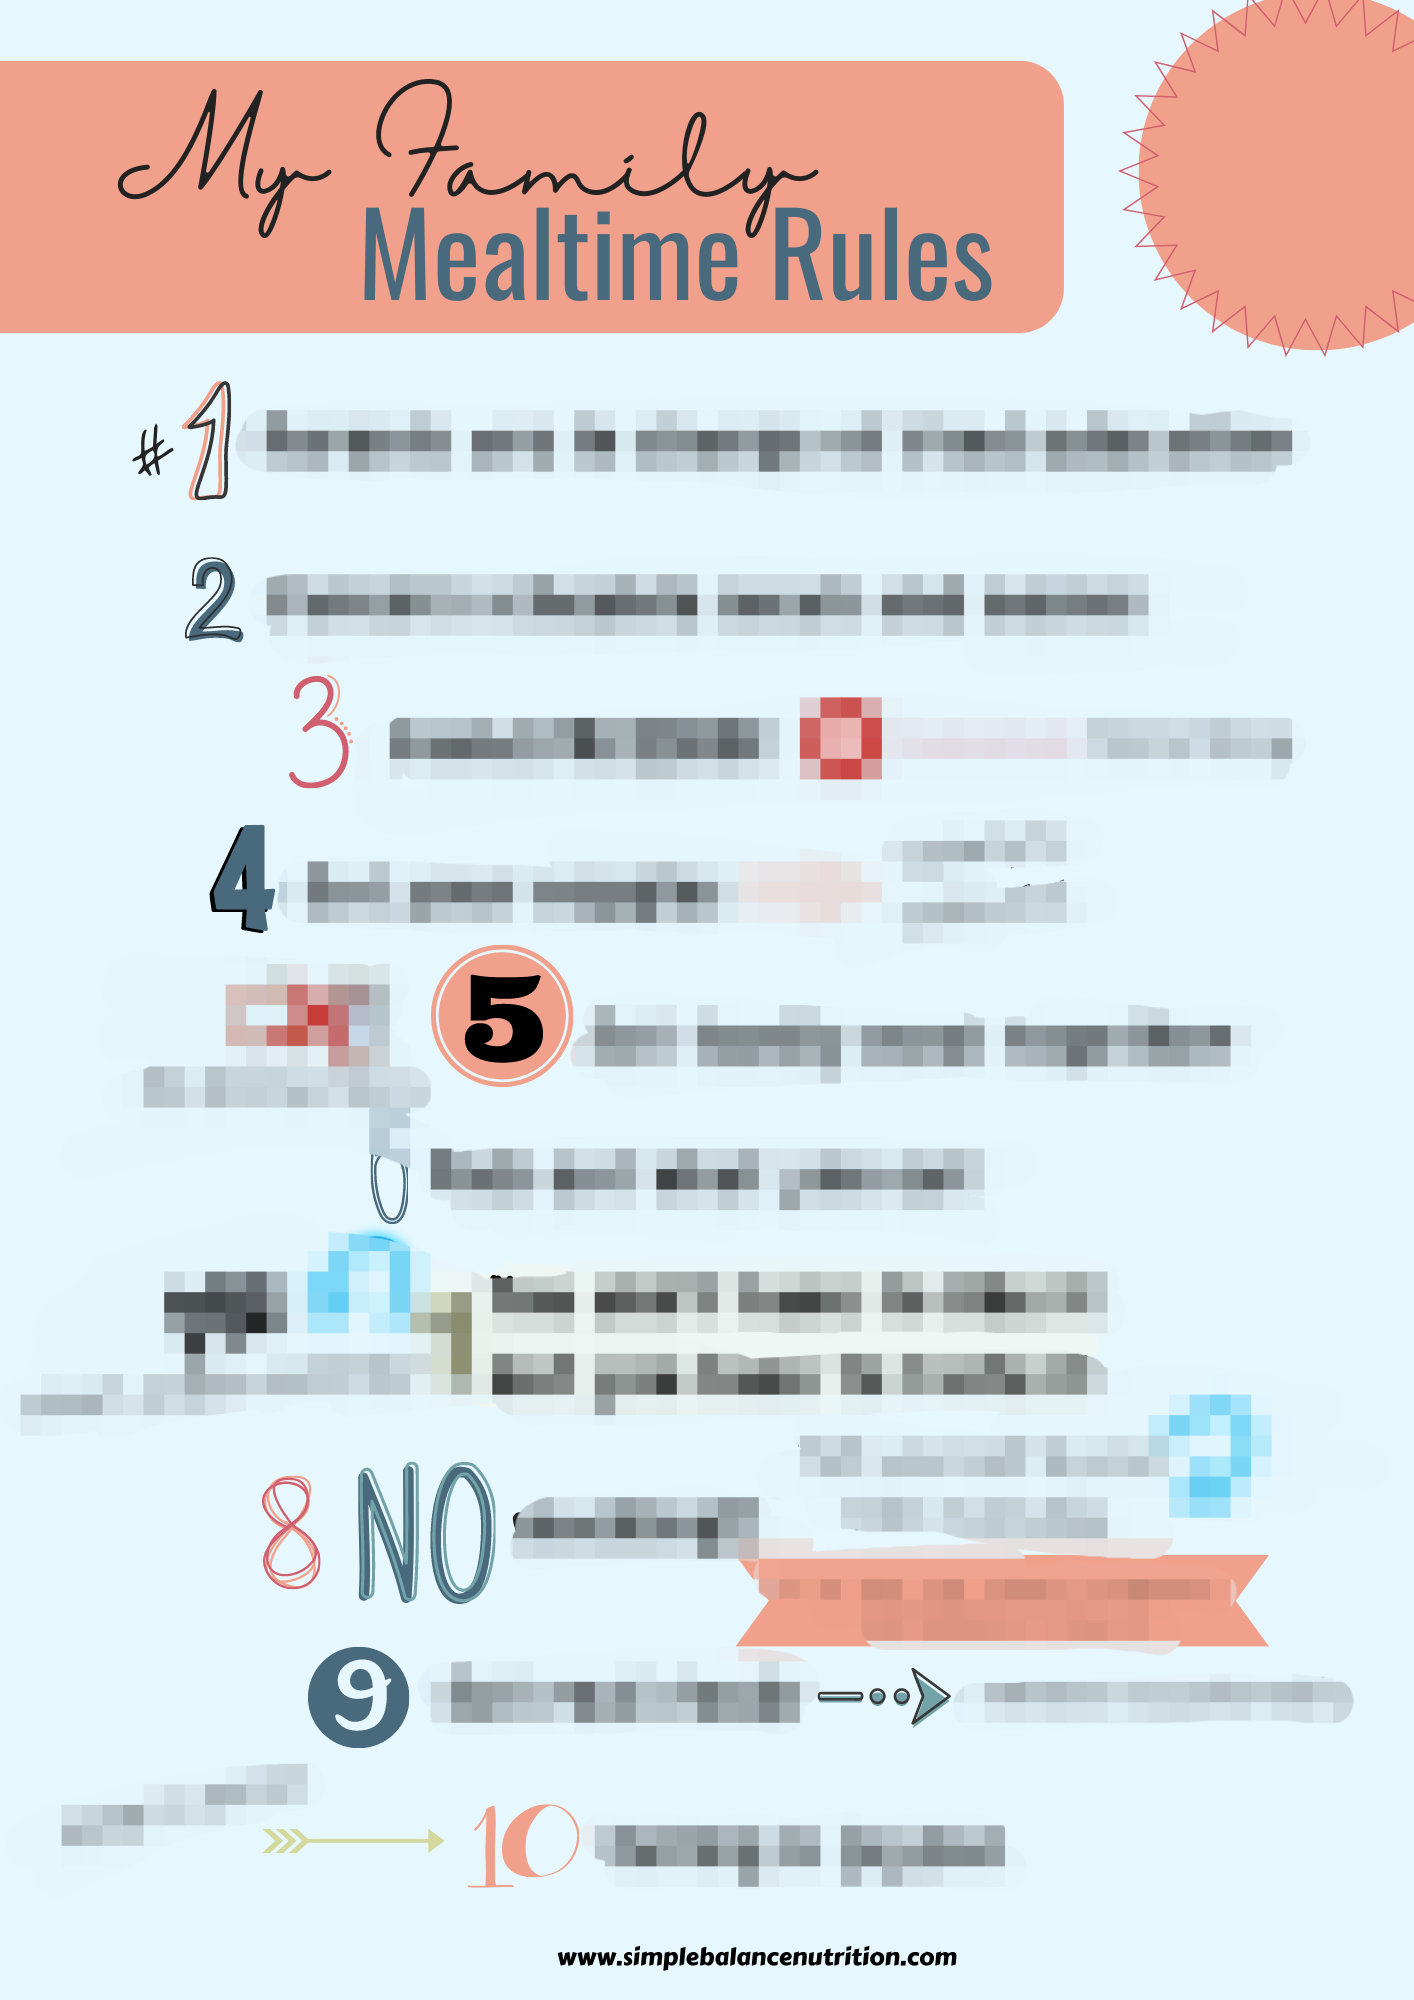
By setting and consistently enforcing appropriate mealtime boundaries with your children, you can regain control over mealtimes and empower your children to take responsibility for the rest. It is ideal to establish these boundaries early, during infancy and early toddlerhood, but they can be implemented at any stage. Keep in mind that mealtime boundaries may vary among families, but here are some examples of ours:

1. Everyone MUST come to the table for meals, regardless if they plan to eat or not

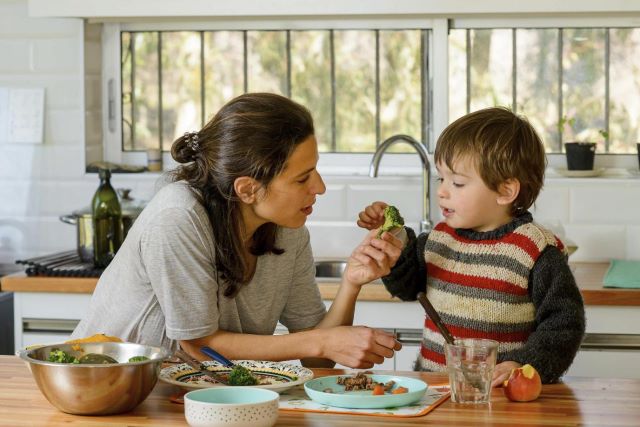
A phrase you will frequently use is YOU DON’T HAVE TO EAT.” If your child says, “But I’m not hungry” or “I don’t want rice again!” calmly respond with, “You don’t have to eat, but it’s mealtime and you must come to the table.” In most cases, your child will happily eat a fair amount of his/her meal. To ensure proper mealtime etiquette, your children should remain at the table for at least 10-15 minutes and ask to be excused. If you have a slow eater, consider setting a timer for 30 minutes to prevent meals from dragging on indefinitely. This approach allows your child to pace themselves during the meal.

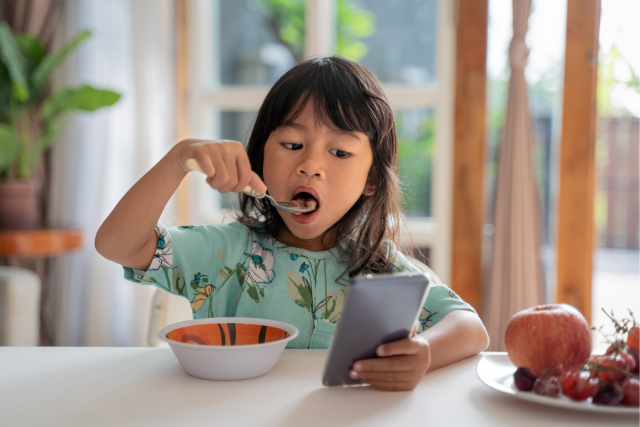
2. There are NO toys, screens, or other distractions at meal

The goal is to keep mealtime as a special moment for family to connect and have conversations, discouraging any form of mindless or distracted eating.

3. Being rude ISN’T OK

In my household, I have certain rules that we follow during mealtime. These include sitting properly at the table, refraining from throwing food or making rude comments, using age appropriate utensils, and practicing good table manners and politeness.

4. There are NO special meals

I provide a wide range of food options and always include at least one dish that I know my children enjoy. However, I only serve one meal, and I do not cater to individual requests as a short-order cook would.

5. The kitchen is CLOSED after mealtime

If I believe my children haven’t eaten enough, I gently remind them that it’s important to ensure their tummies are satisfied because the kitchen will be closed until a certain time, like X o’clock or the next morning. Any requests or demands for snacks outside of these designated times are kindly declined, along with a reminder that they had an opportunity to eat at the previous meal or snack but chose not to. By consistently applying this approach, children gradually learn how to regulate their appetite in a healthy manner.

6. There’s NO grazing

I politely decline random requests for snacks or milk, and instead, I establish specific snack times based on our meal schedule. I typically offer a snack between meals and occasionally before bedtime, although not frequently. This allows for eating opportunities every 2-3 hours or so. It’s important to note that children have smaller tummies and require regular meals, but it’s not necessary for them to constantly graze throughout the day. In fact, excessive grazing can often lead to mealtime struggles.

Grab your FREE Mealtimes Boundaries Rules HERE .

BOTTOM LINE

These are my personal mealtime boundaries, which may also work well for your family. Remember that every family is unique, so it’s important to customize your own boundaries based on what works best for you and your family.

To assist you in establishing healthy mealtime boundaries, I have a printable kitchen resource available that outlines my family’s mealtime boundaries in a colorful and visually appealing format. It can serve as a starting point for you to create your own boundaries that align with your family’s needs and preferences.

If you’re facing challenges with a picky eater and would like to explore methods for reducing pressure on your child to eat, I recommend checking out my online course PEACEFUL MEALTIMES. This course provides comprehensive guidance on dealing with picky eaters and supports the development of a healthy relationship with food as your child grows. It covers everything you need to know to navigate mealtimes more peacefully and successfully.

Benefits of Introduction Solids with Baby Led Weaning

Benefits of Introducing Solids with Baby Led Weaning

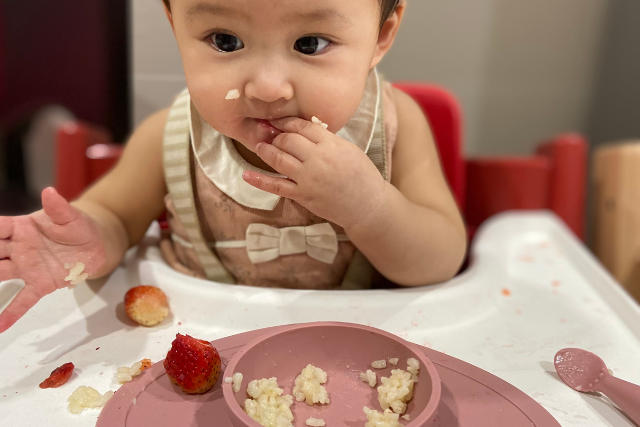
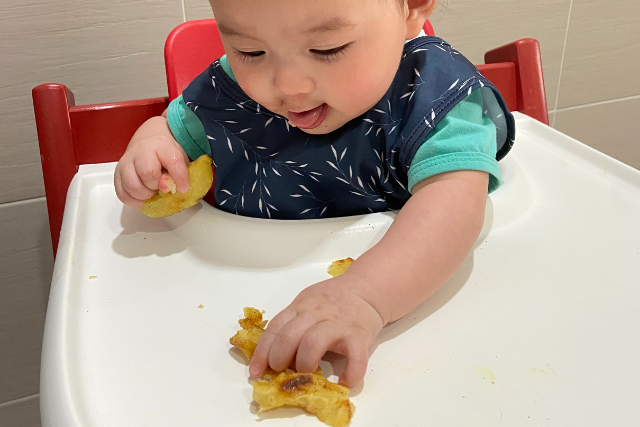
Baby-led weaning (BLW) is an approach to introducing solid foods to babies that emphasizes self-feeding and allowing the baby to explore a variety of foods at their own pace. While BLW does offer several practical benefits, such as convenience and cost-effectiveness, there are also physiological reasons why it can be advantageous for your child. Here are some ways in which these benefits of baby led weaning can extend into your child’s lifetime:

INDEPENDENCE & AUTONOMY

BLW fosters independence and autonomy from an early age. By allowing babies to self-feed and choose what to eat, they gain a sense of control over their food choices. This empowerment can positively impact their self-esteem, decision-making skills, and confidence in their ability to make healthy food choices throughout their lives.

SELF-REGULATION & PORTION CONTROL

One of the key principles of BLW is allowing babies to control their own food intake. By offering a variety of nutritious foods in appropriate sizes and shapes, babies learn to recognize their hunger and fullness cues, promoting self-regulation of food intake. This self-regulation can help prevent overeating or undereating. It sets the stage for portion control and can reduce the risk of developing unhealthy eating patterns or weight-related issues as they grow older.

MOTOR DEVELOPMENT

BLW encourages the development of fine motor skills, hand-eye coordination, and chewing abilities. By allowing babies to handle food and feed themselves, they have the opportunity to practice and refine their motor skills, including grasping, picking up small pieces of food, and bringing it to their mouths. This can contribute to their overall motor development.

SENSORY EXPLORATION 

BLW exposes babies to a variety of textures, flavors, and smells from a wide range of foods. This early sensory exposure can help in developing their taste preferences, expanding their palate, and promoting a positive relationship with food. Research suggests that babies who experience a variety of flavors during weaning are less likely to develop texture aversions or picky eating behaviors later in life.

ORAL DEVELOPMENT 

The process of chewing and self-feeding during BLW stimulates the muscles involved in oral development. It encourages the baby to move their tongue and jaw, promoting the development of oral motor skills necessary for speech and swallowing. BLW can also contribute to the strengthening of jaw muscles, which may aid in preventing issues such as oral aversions or delayed speech development.

FAMILY MEALTIME DYNAMICS

BLW promotes the inclusion of infants in family mealtimes from the start. This practice creates a foundation for regular family meals, which have been associated with numerous benefits. Eating meals together as a family encourages communication, bonding, and social interaction. It also provides an opportunity for parents to role model healthy eating behaviors, table manners, and conversation skills. These positive mealtime habits established during BLW can carry over into adulthood, fostering healthier eating patterns and stronger family connections.

OTHER BENEFITS OF BABY LED WEANING BASED ON MY PERSONAL EXPERIENCES 

TIME & MONEY SAVING 

As a parent practicing BLW, I have experienced firsthand the practical benefits it offers. By allowing my twins to self-feed with appropriately-sized pieces of our family meals, I have saved time that would have been spent making or buying separate baby food. This has not only made meal preparation more convenient but has also resulted in reduced stress levels for me, as I can focus on enjoying mealtime and fostering a positive relationship with food for my twins, without the pressure of spoon-feeding or monitoring exact amounts consumed.

STRESS-FREE

With this approach, I found myself less concerned about my baby’s weight and felt less inclined to apply pressure or restrictions during feeding. This allowed for a more enjoyable and relaxed mealtime experience. Moreover, I noticed that my twins displayed a remarkable openness to different flavors and textures. Additionally, the early exposure to a variety of flavors and textures helps expand their palate, promoting a willingness to try new foods.

BOTTOM LINE 

Indeed, the benefits of introducing solids through baby-led weaning can have long-lasting effects on your baby’s eating habits and overall well-being. However, it’s important to note that while BLW can have physiological benefits, it may not be suitable for every baby or family. It’s always recommended to consult with a pediatrician or a dietitian to determine if it’s appropriate for your baby based on their individual needs and development readiness.

Personally, as a dietitian, I loved baby-led weaning as a way to start solids and totally recommend it! Two years later I still see so many benefits of doing it. I’m happy to answer any questions you may have about baby-led weaning. Just leave them in the comments and I’ll respond!

Happy Feeding!

You might also interested in reading about Introducing Solids To Your Baby: Baby-Led Weaning Vs. Spoon Feeding.

Healthy After School Snacks That Won't Ruin Dinner

Healthy After School Snacks That Won’t Ruin Dinner

Children are back to school! Busy schedule and active day. For many children after school is the hungriest time of the day. Often times children get home ravenous and ready to eat down the fridge. Many parents and caregivers struggle to figure out the best options to feed ravenous hangry children so that it won’t spoil their appetite for dinner.

WHAT MAKES A GOOD AFTER SCHOOL SNACK?

Children are going through an enormous amount of growth and development and need nourishment. Consider offering some of the foods that are often trickier to get them to eat since this is a time they are most hungry. For example, if your child doesn’t love veggies at lunch be sure to offer some of these such as raw veggies with hummus or Greek yogurt, celery with nut butter, smoothie or veggies muffins.

WHY AFTER SCHOOL SNACKS ARE TRICKY?

Depending on what time your family eats dinner, a hearty after school snack can cause children to be too full at dinner time. And children who come to the table full won’t want to eat much (if any) dinner and they definitely won’t be as receptive to trying new foods or recipes. Your goal is to strike a balance between quelling hunger and making sure they still have an appetite at dinner.

IDEAS FOR AFTER SCHOOL SNACKS 

Every child is different and that includes their appetite. Yours may be going through a growth spurt that makes them perpetually hungry. Or your child may have a smaller appetite and tend to fill up faster.

You know your children best, and different families need different solutions. But here are some ideas to get you started, depending on how far out you are from sitting down to dinner.

I always try to include at least two foods in my children’s snacks – something rich in protein (milk, yogurt, cheese, beans, lentils, nuts, seeds, meat, etc.) and a fruit or vegetables or a whole grain food.

IF DINNER IS 3 (OR MORE) HOURS AWAY 

You want a snack with some staying power, including carbohydrates for energy, and protein and fat to keep them fuller longer.

  • Greek yogurt parfait
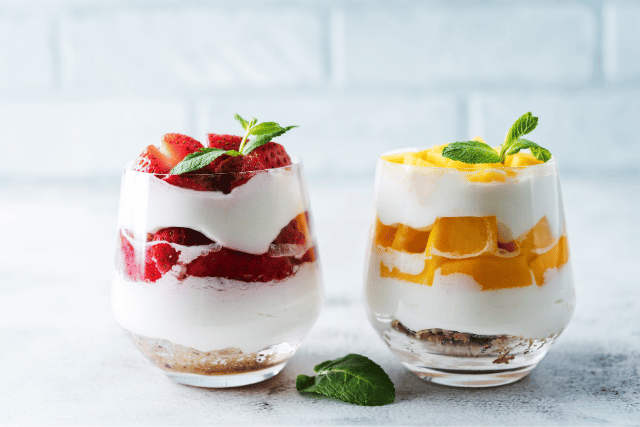
Greek Yogurt Parfait

Layer greek yogurt with fresh or frozen berries in a tall glass. Top with a sprinkle of granola.

  • Mashed avocado on toast
  • Nut butter with banana wrap
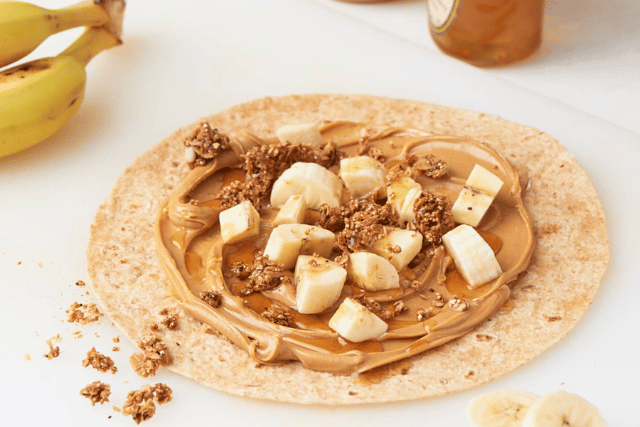
Nut butter with banana wrap

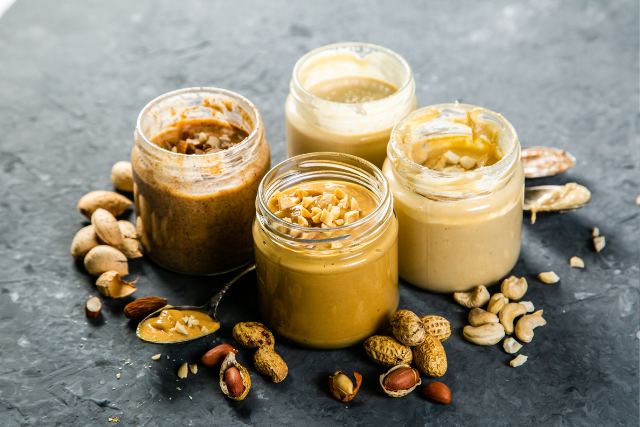
Spread 2 tbsp of nut butter (any kind of nut or seed butter) onto a whole grain wrap and top with a sliced banana. Wrap the tortilla up, cut the wrap into bite sized pieces.

  • Tortilla chips with hummus
  • Half of sandwich and a glass of milk
  • Overnight oats
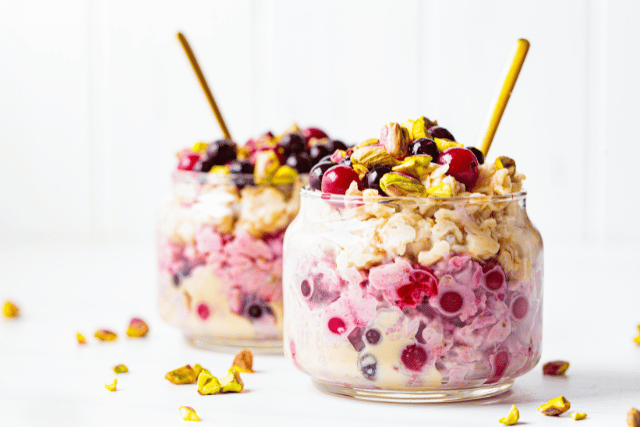
Overnight oats

This version of oats requires no cooking and is prepared the night before. The basic recipe is equal parts milk, greek yogurt and rolled oats. Place the ingredients in a container in the fridge and the oats will soak up the liquids overnight. Toss in your favourite toppings such as fresh fruit, cinnamon, or nuts in the morning.

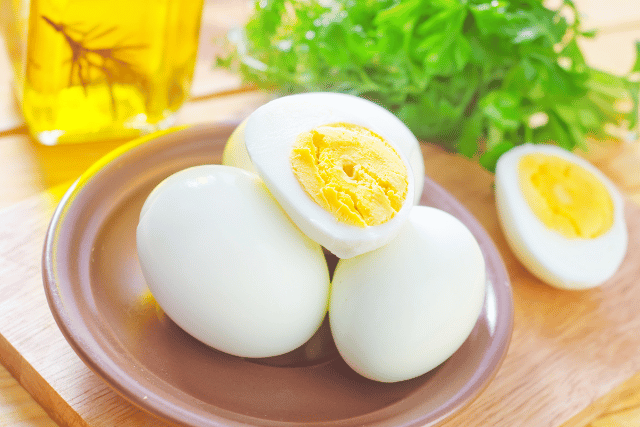
Hard-boiled egg

These can made up to a week ahead of time and stored in the fridge with the shells on.

  • Small bowl of granola (recipe 1 & 2)
  • Nut butter with waffle

IF DINNER IS 2 HOURS AWAY 

The idea is to suppress their hunger with foods that are tasty but quick and easy to digest, so they’re still hungry for dinner later. Serve something light but satisfying.

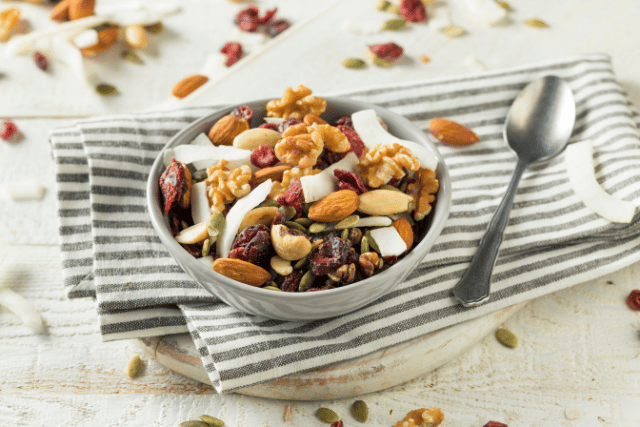
  • Trail mix
Trail mix

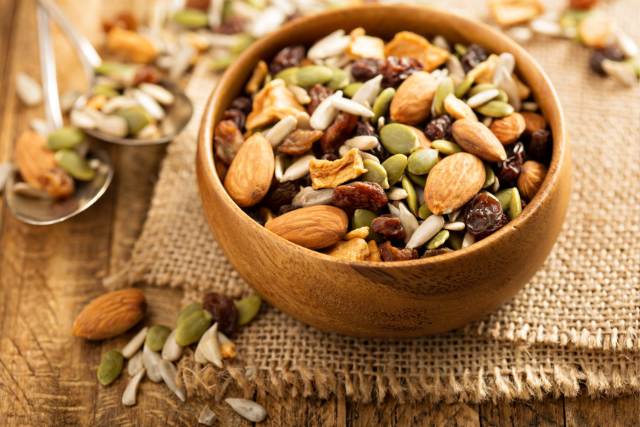
A very easy recipe includes: plain Cheerios, raisins, almonds, pecan, pumpkin seeds, the ingredients can be easily customized to your tastes.

  • Homemade popcorn + apple slices or berries
  • Whole grain crackers + banana
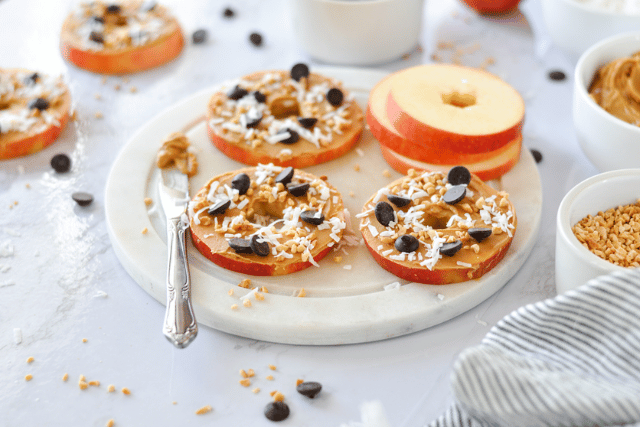
  • Apple slices with nut or seed butter
Apple slices with nut or seed butter

Pre-slice an apple with 2 tbsp of nut butter to dip.

  • Homemade smoothie popsicle
  • Small bowl of whole grain cereal
  • Edamame beans
Edamame beans

These can usually be found in the frozen aisle.

  • Cheese stick + pretzels
  • Small handful of nuts + cup of unsweetened applesauce)
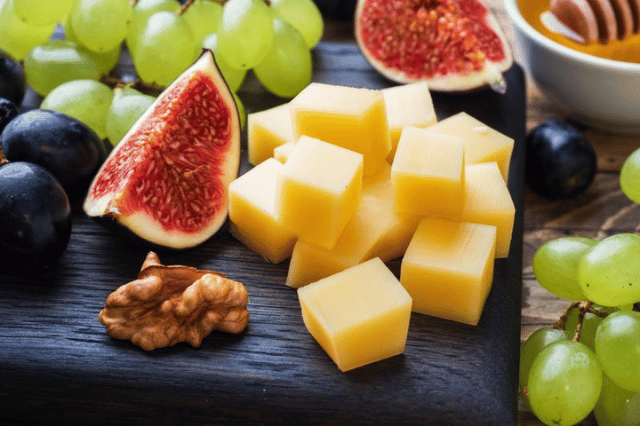
  • Cheese cubes and fruits
Cheese cubes and fruits

Cube a palm-sized amount of cheese to go along with grapes, strawberries, kiwi or other fruits of your choice.

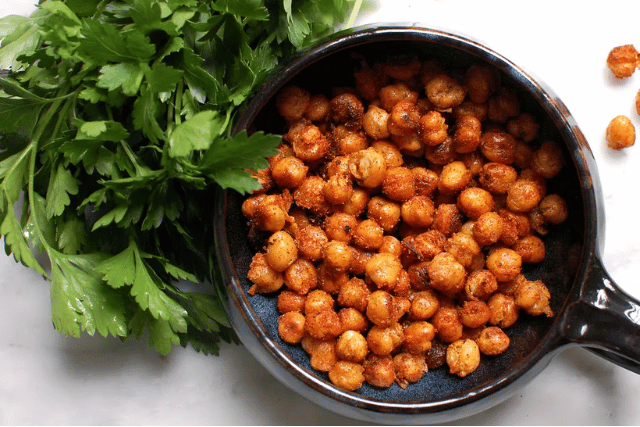
Roasted chickpeas

Take a can of rinsed and drained chickpeas, toss with oil, and bake for 20 minutes at 400F. When out of the oven, sprinkle with your favourite seasonings such as paprika, cajun, garlic powder, red pepper flakes, chilli powder, etc.

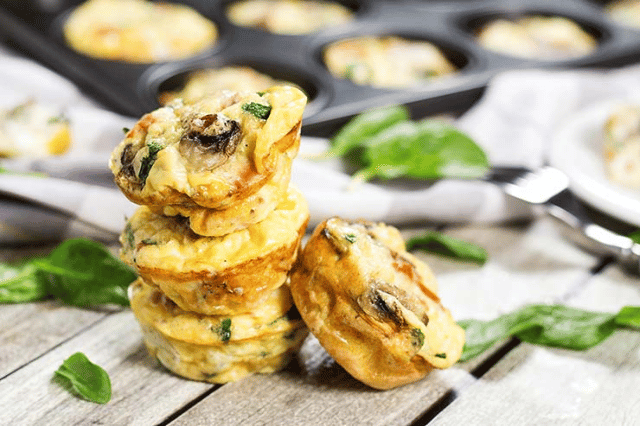
Muffin-tin omelettes

Easy, mini-baked omelets are perfect to make ahead of the week. You can use some of your favorite omelet ingredients but you can switch it up and add whatever you like or have on hand.

IF DINNER IS 1 HOUR AWAY 

You want to tread carefully in this time-frame, since many snacks can spoil their appetite for dinner. Serve veggies.

This was the strategy I settled on with my eldest son, and it worked wonders! Our house rule was “only veggies in the hour before dinner.” I’d offer both the veggies I was prepping for dinner and any veggie in the fridge.

The beauty of this rule: Your children will come to the dinner table with a serving or more of veggies already in their bellies. Or if they chose to opt out of the pre-dinner veggie snack, they’re still hungry for dinner.

IF IT DOESN’T WORK 

Consider moving dinner earlier or later. Ditch the rules you have about what time you must eat dinner or waiting for husband to come home for dinner. After your children going to day care or preschool, your family schedule need to be changed. You can have a small after school snack, earlier dinner at 5pm or 6 pm, and small bedtime snack (8-9 pm); or having a large after school snack and later dinner, both are healthy options. Try out a few options and see what works best for your family schedule.

If your children just can’t get by without a big, filling snack after school, pushing dinner later might be the solution.

BOTTOM LINE

When your children get older, schedules shift and appetites grow, and your snack and dinner strategy will likely change too. Do what works for your family now.

Are you running out of creative and healthy snack ideas? Here are some tasty and easy options to try with your children and family. For more delicious, family friendly recipes, check out my Facebook Page and follow me on Instagram

How to Feed Your Children When They Are Sick

How To Feed Your Children When They’re Sick

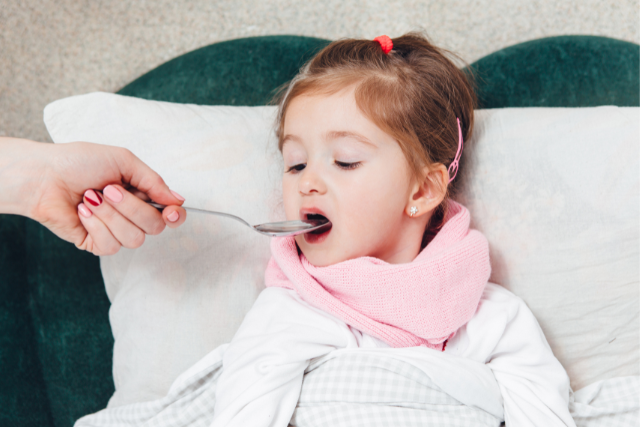
HIt seems like everyone is sick recently. COVID-19 is still circulating like crazy, but children are also getting hit with Respiratory Syncytial Virus (RSV), strep throat, stomach bugs, HFMD, the flu and other seasonal viruses. As disruptive as illness can be for work, school, and your family’s plans, it can also impact how you and your child eat. How can we feed our children who are sick so they’ll get better faster?

LOWER YOUR EXPECTATIONS

In most cases, when children are sick, it is very normal to see them have very little appetite, no interest in eating, and may even refuse food they usually eat. Even as adults, when we’re not feeling well, we tend to prefer bland, plain foods that are easy to eat as well our favourite comfort meals. We don’t usually fancy a huge variety of exciting foods when we’re not feeling well.

However, it doesn’t mean that you have to ONLY offer bland or favourite snacks to your children. The best thing to do during sick days is to keep your normal feeding routine as much as possible and rely on your child’s internal body signals. Because it’s important to help them keep their energy up and prevent pickiness after illness, and we know it’s usually only for a short period of time and it’s not going to undo any of the work that you’ve done in encouraging them to enjoy a variety of foods.

Responding to their appetite

You can continue to serve other foods alongside to keep up the variety that they are actually familiar with, but don’t be surprised if they’re not touched, or even expect them to try new foods, or foods that they’re less keen on at this time. Their appetites are likely to be all over the place, it can be hard to predict. Therefore, offering foods at set schedule whether they ask for it or not, and trust their body instincts to do the rest in terms of whether food is accepted or how much is accepted.

If they ask for food outside of mealtimes or seem hungry, that’s perfectly fine to give it to them, especially if you’re finding that there have been a few days where not much at all has been eaten. So let them follow their appetite and give them the chance to eat if they show interest. REMEMBER, it’s ok for the routine to slip as it is only for a short period of time. However, once they start to feel a little better, it’s helpful to start to build in some more structure to get things back on track.

FEED YOUR CHILDREN WHEN THEY’RE SICK WITH

i) a cold and respiratory illness

When your child has a cold or respiratory illness, it may affect their appetite and drive to eat. Between coughing, fatigue, a runny nose and sore throat, they might not want to eat or drink like they usually do. They might be tired or uncomfortable, or maybe they’re unable to smell or taste food appropriately.

The biggest concern during illness is keep the body well-hydrated to prevent dehydration. While a child might not eat as much as usual, as long as they’re drinking adequately they should be okay in the short-term.
Babies:

For babies under 12 months, getting enough milk to stay hydrated is most important during illness. Babies will likely prefer sticking to breastmilk or formula, and that’s OK. If your baby has really bad congestion, the use of a bulb suction or Nasal Spray to clear up the congestion might make eating and drinking easier. Focus on regular breastfeeds or bottle feeds and watch for 5-6+ wet diapers per day. If your baby is eating solids (6+ months), offer solid meals like usual but don’t be surprised if your baby isn’t interested. Stay consistent and continue to include your baby in family meals, as long as they’re not upset when they sit in their high chair.

Toddlers ++: 

Continue to offer the regular food/meals you normally would at regular times but trust their hunger and fullness cues. Focus on lots of veggies, fruits, protein foods, whole grains and fats. Do not force or pressure them to eat. Nutrition is important during illness, but their appetite and food preferences almost definitely change. You may find your child gravitating toward certain foods or surviving on familiar beige foods like bread and crackers – this is OK. You might want to just feed them whatever sounds good for a while until they feel better. As best you can, try to offer some variety in the food groups you serve, too. They might surprise you when they are suddenly interested in something again.

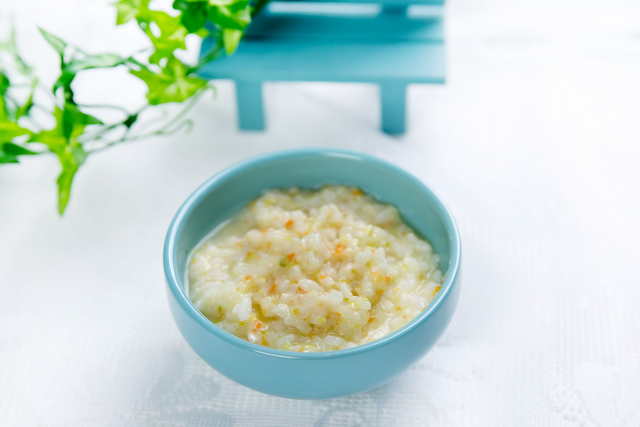
Sometimes it helps to integrate warm foods into their diet, like clear soup, porridge, mee sua soup or oatmeal. The steam from these foods can help loosen mucus and provide relief from nasal congestion.
The pain of a sore throat can make swallowing food and liquids uncomfortable, which may make your toddler eat less even if they feel hungry. Acidic foods can irritate an already inflamed sore throat.

Avoid acidic foods until your toddler’s sore throat has healed:

  • orange and orange juice
  • pineapple juice
  • tomato soup

Offering extra-cold and smooth foods may help soothe a sore throat:

  • smoothies blended with frozen fruits
  • frozen yogurt barks,
  • popsicles
  • frozen fruits

Since many cough suppressant medications are not approved for use in young children, it’s hard to know what to do with the coughing child, especially for those night time coughing. Some evidences (here, here, here, here, here) suggest that a spoonful of 100% pure honey can work as a good cough remedy for children over the age of one.

(ii) hand, foot and mouth disease

Hand, foot and mouth disease can be particularly difficult for children and mealtimes. Their mouths can get SO sore, which obviously makes it uncomfortable for them to eat. It’s especially tough as they may actually WANT to eat, they just can’t because it makes the pain so much worse.

Foods for children with hand, foot and mouth disease:

  • SOFT foods such as yogurt, porridge, cereal or oatmeal are likely to go down well as they are easy to eat and shouldn’t cause too much pain to sore mouths
  • Scrambled eggs, muffins or pancakes
  • Soft toast fingers with toppings like avocado, cream cheese, butter or nut butter
  • AVOID acidic foods such as tomato, citrus fruits or fruit juice

(iii) stomach flu (diarrhea/vomiting)

Stomach bugs or acute gastroenteritis will almost certainly affect the amount and types of food your children eats.

Babies:

Just like with respiratory illnesses, hydration is most important when babies are sick with GI bugs. Dehydration is especially dangerous with stomach bugs because babies can quickly lose fluids from vomiting and diarrhea. Continue to offer regular breastfeeds and bottle feeds and watch for 5-6+ wet diapers per day. If your baby is continually vomiting or has profuse diarrhea and you’re worried about their hydration status, speak with your doctor right away. Make sure your baby can tolerate breast milk or formula before offering bland foods like banana or crackers, then offer a regular diet if bland foods are tolerated.

Toddlers++:

Some simple guidelines to remember when our children are vomiting or have diarrhea:

  • Start with small amounts of liquids to prevent dehydration.
  • If those are tolerated, move onto a bland foods like toast, soup/broth, porridge, crackers, oatmeal, eggs (steam) or certain fruits (applesauce, banana, avocado, berries).
  • Once bland foods are tolerated, move onto a regular, varied diet including complex carbohydrates, lean meats, dairy, fruits and vegetables. Just avoid super heavy and greasy foods like fried or fried chicken, pizzas. The BRAT (banana, rice, applesauce, toast) diet is no longer recommended by the American Academy of Pediatrics. The reason is this diet is low in calories, protein, fat, fiber and other nutrients, also it makes diarrhea last longer. Current research show that children who eat a balanced diet recover quicker from stomach flu.
  • Juice is generally not recommended during stomach flu because it contains a lot of fructose and sorbitol, which can actually worsen diarrhea. If juice is all your children will drink, make sure to dilute it.

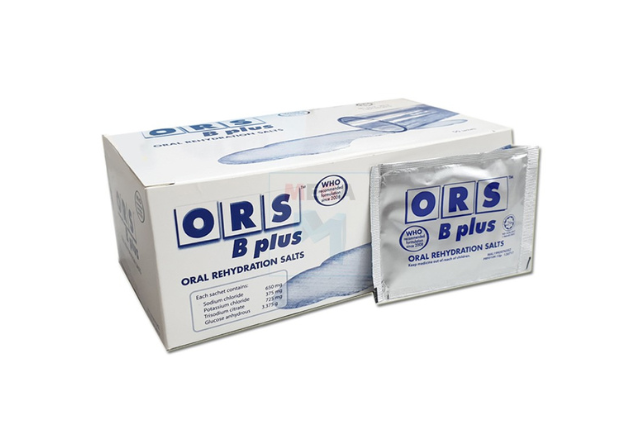
Sometimes water isn’t sufficient to rehydrate children when they’re losing fluid quickly from profuse vomiting or diarrhea. Oral Rehydration Therapy (ORT), means to drink solutions that are made with an appropriate amount of salt, sugar and fluid to help your child’s body absorb lost electrolytes appropriately. Sugar is essential in Oral Rehydration Solutions (ORS) because it helps to get the electrolytes through the bloodstream quicker and to rehydrate your children faster.

Some families make their own inexpensive ORT at home using the World Health Organization recipe. It is just as effective as expensive rehydration drinks and doesn’t contain any harmful ingredients and no dyes.

  • 1/2 tsp salt
  • 6 tsp sugar
  • 1L water

HYDRATION IS REALLY IMPORTANT WHEN CHILDREN ARE SICK!!!

During periods of illness, the number one concern is DEHYDRATION.

Babies:

Under 12 months, babies should still be consuming at least 20-24 ounces of breast milk or formula.

Toddlers ++:

Toddlers and older children need to drink lots of water to stay hydrated and get better. Estimated fluid needs per the American Academy of Pediatrics are as follows:

  • 1-3 years: 4 cups (32 ounces or ~1 L)
  • 4-8 years: 5 cups (40 ounces or ~1.2 L)
  • 9-13 years: 7-8 cups (56-64 ounces or ~1.7-1.9 L)

Fever, diarrhea, vomiting, or just refusing liquids for a prolonged period of time can put your toddler at serious risk for dehydration.
How to prevent dehydration

The best way to prevent dehydration and replace fluids lost through vomit, diarrhea, or sweat is to keep a cup full and encourage your child to sip from it all day long. Using a favorite cup, or straw cup to spark a toddler’s interest in drinking more.

Water is the best choice, of course, but if you’re finding it a struggle to get your child to drink it, here are some other drink ideas:

  • Water or infused water
  • Honey lemon water (except children under the age of 1 can’t have honey due to the risk of botulism)
  • Breastmilk
  • Fresh cow’s milk/plain kefir
  • Plant-based milk (ex: soy, almond, oat)
  • Popsicles or freezies
  • Smoothies (If your child can tolerate some heavier textures, then a smoothie is a great way to boost nutrition along with fluids)
  • Bone broth (homemade bone broth has the benefit of protein and additional vitamins and minerals)
  • Coconut water (diluted 1:1 ratio with water) (offered occasionally, it can be a good substitute if your child likes the flavor, but it’s much lower in potassium than ORT and may not rehydrate as effectively).
  • Fruit juice (diluted 1:1 ratio with water) (offered occasionally, DON’T offer if experiencing diarrhea. The risk of dehydration FAR outweighs the risk of added sugars in a juice box)
  • Non-caffeinated tea in small amounts (¼ cup offered occasionally) like Chrysanthemum tea, barley tea, Luohanguo tea 罗汉果

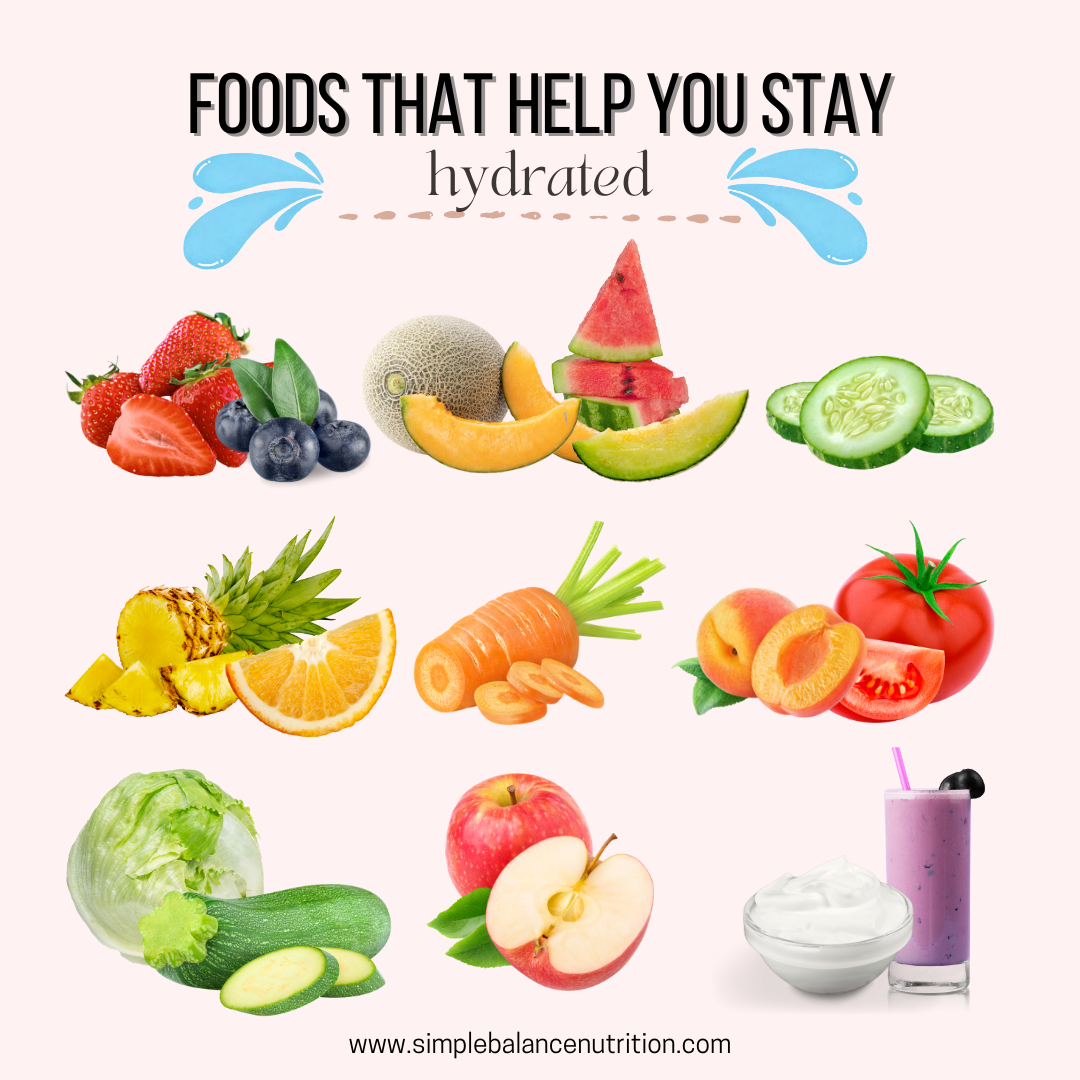
In addition to offering more beverages, if they can still eat, make sure to offer lots of Hydrating Foods (foods with high water content) throughout the day.

Instead of worrying about how much they are actually drinking, watch your child. Make sure they’re urinating regularly and don’t show signs of dehydration.
WHAT ARE THE SIGNS OF DEHYDRATION

Dehydration can be dangerous for a child and severe cases may require hospitalization. If you suspect your child might be showing signs of dehydration, it’s best to call your doctor right away so they can guide you on what’s best to do. According to the American Academy of Pediatrics, the following are signs of dehydration:
  • Less activity than usual
  • Less than six wet diapers a day
  • Less saliva or cracked lips
  • Fewer tears when crying
  • Sunken soft spot on the head
  • Very fussy or overly sleepy
  • Sunken eyes
  • Cool, discolored hands and feet
  • Wrinkled skin
  • Only 1 or 2 wet diapers in 24 hours
  • Dry tongue and mouth
  • No tears when crying

GAIN BACK APPETITE AFTER ILLNESS

Appetite after Illness

Ever notice that it takes a few days to even weeks for your children’s appetite to return after they have been sick? Try not to panic that they’ll never eat a variety again. During illness, this is not a good time to force them to eat anything or to buy them French fries, just to get them to eat.

Another thing to remember is after an illness, your child’s taste buds may be dampened. Viruses can inhibit taste and smell function, and sometimes congestion prevents them from smelling (and thus tasting) appropriately. You may experience this as an adult, too. Adding highly flavorful food to their regular meals can help “wake up” their tastebuds and get them back to eating like normal again!

One strategy I love to use is to offer a highly flavorful, crunchy, sour or salty food once or twice a day to help “wake up” their taste buds. I found that children who have been sick sometimes seek out these flavors so they can taste again. Try foods like:

  • Freeze-dried fruit (mango, strawberries, raspberries)
  • Cucumber or tomato paired with a strongly flavored dip like hummus or guacamole
  • Olives (remember to remove pits and quarter lengthwise for kiddos under 4 years old)
  • Ground meat seasoned with cumin and garlic
  • Cooking with flavorful spices like cinnamon, ginger and paprika

You can also try lemon, lime or spicy food (if your children usually enjoys and tolerates it).

Don’t be surprised if your child’s appetite takes a while to return to normal when they have been sick. If they seem to be losing weight or not improving over time, consult a dietitian.

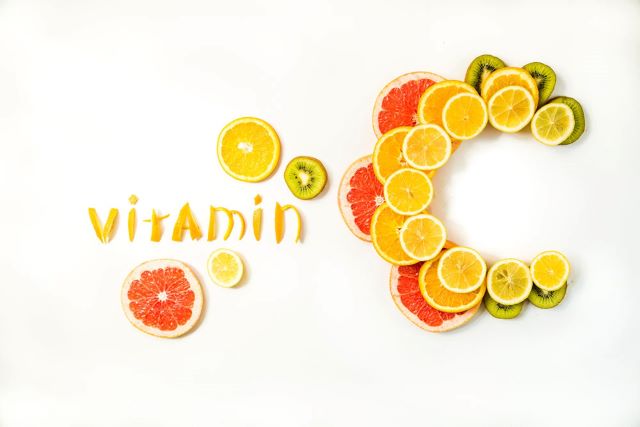
DOES VITAMIN C HELP WITH ILLNESS?

There may be NO STRONG evidence to suggest vitamin C will cure a cold. While some studies have suggested that vitamin C may shorten the duration of illness, other research does not support this theory. Plus, giving your children high vitamin C doses can cause diarrhea and stomach upset.

According to the NIH, here are vitamin C needs based on age (daily):

  • 7-12 months: 50 mg (Adequate Intake)
  • 1-3 year-olds: 15 mg
  • 4-8 year-olds: 25 mg
  • 9-13 year-olds: 45 mg

In general, unless your child has an extremely limited diet or malabsorption issues, they likely don’t need a vitamin C supplement.

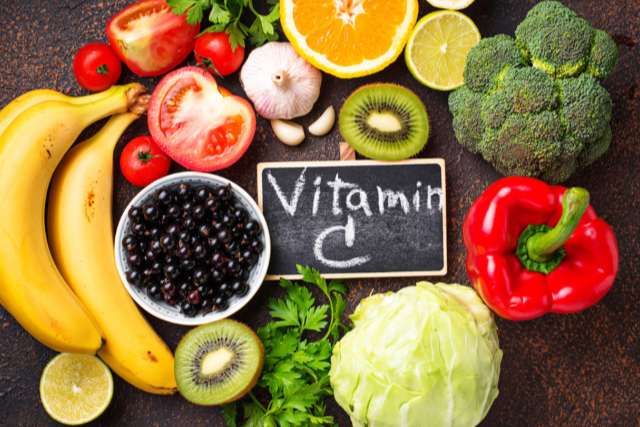
FOODS HIGH IN VITAMIN C

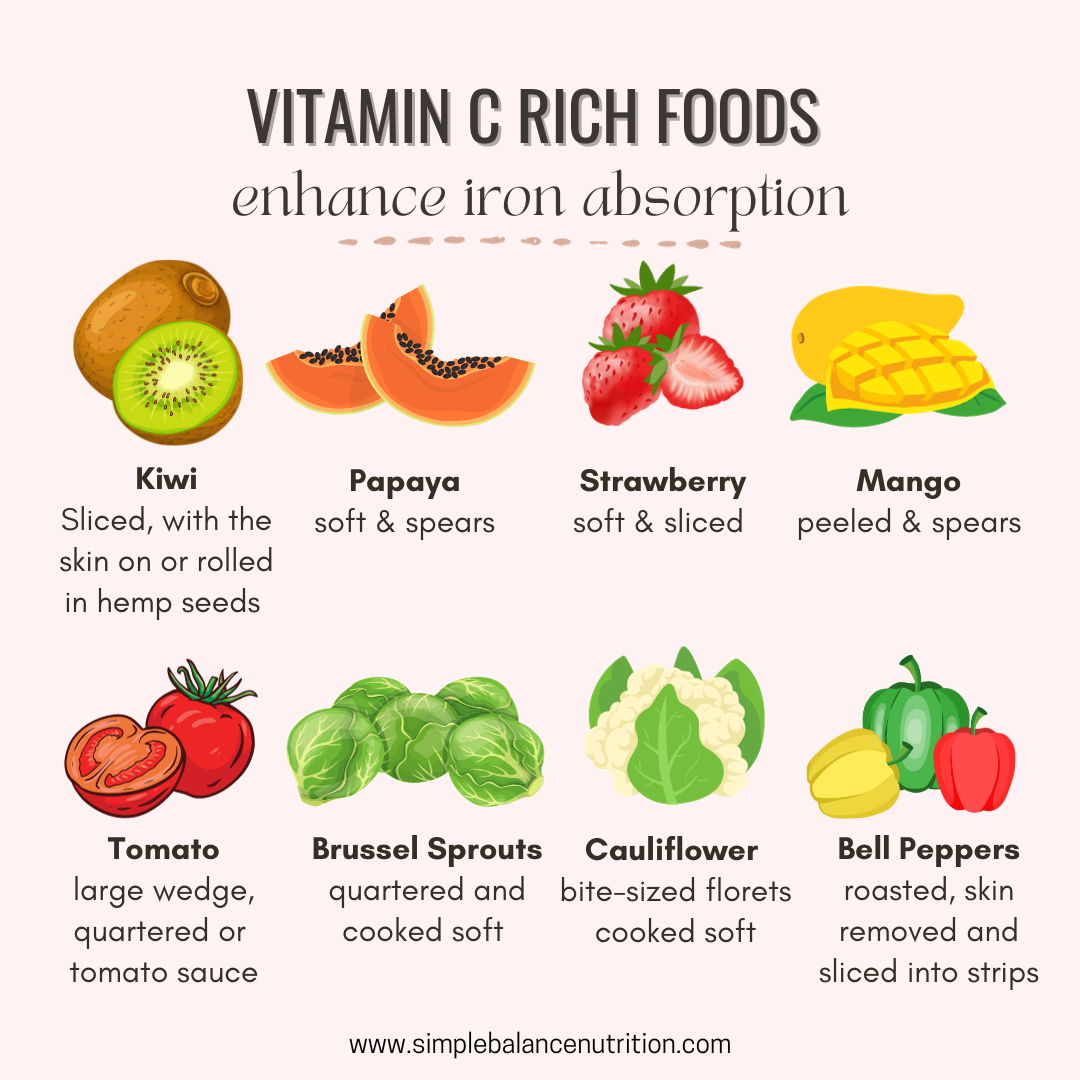
Since vitamin C can’t cure a cold, but it can support the immune system. Oranges are not the only way to get your daily dose of vitamin C! Many fruits and veggies – yes, even bell pepper – can fulfill a great percentage of your child’s daily needs. Below are some kid-favorite foods that are high in vitamin C:

  • Potato (medium, cooked) – 15 mg
  • Tomato (medium, raw) – 16 mg
  • Mango (1 cup)  – 45 mg
  • Broccoli (1/2 cup) – 61 mg
  • Orange (medium) – 70 mg
  • Kiwi (medium)– 75 mg
  • Strawberry (1cup) – 95 mg
  • Red bell pepper (1 whole, raw) – 312 mg

Breast milk and formula are great sources of vitamin C, too! In fact, babies’ vitamin C needs are met by their milk alone.

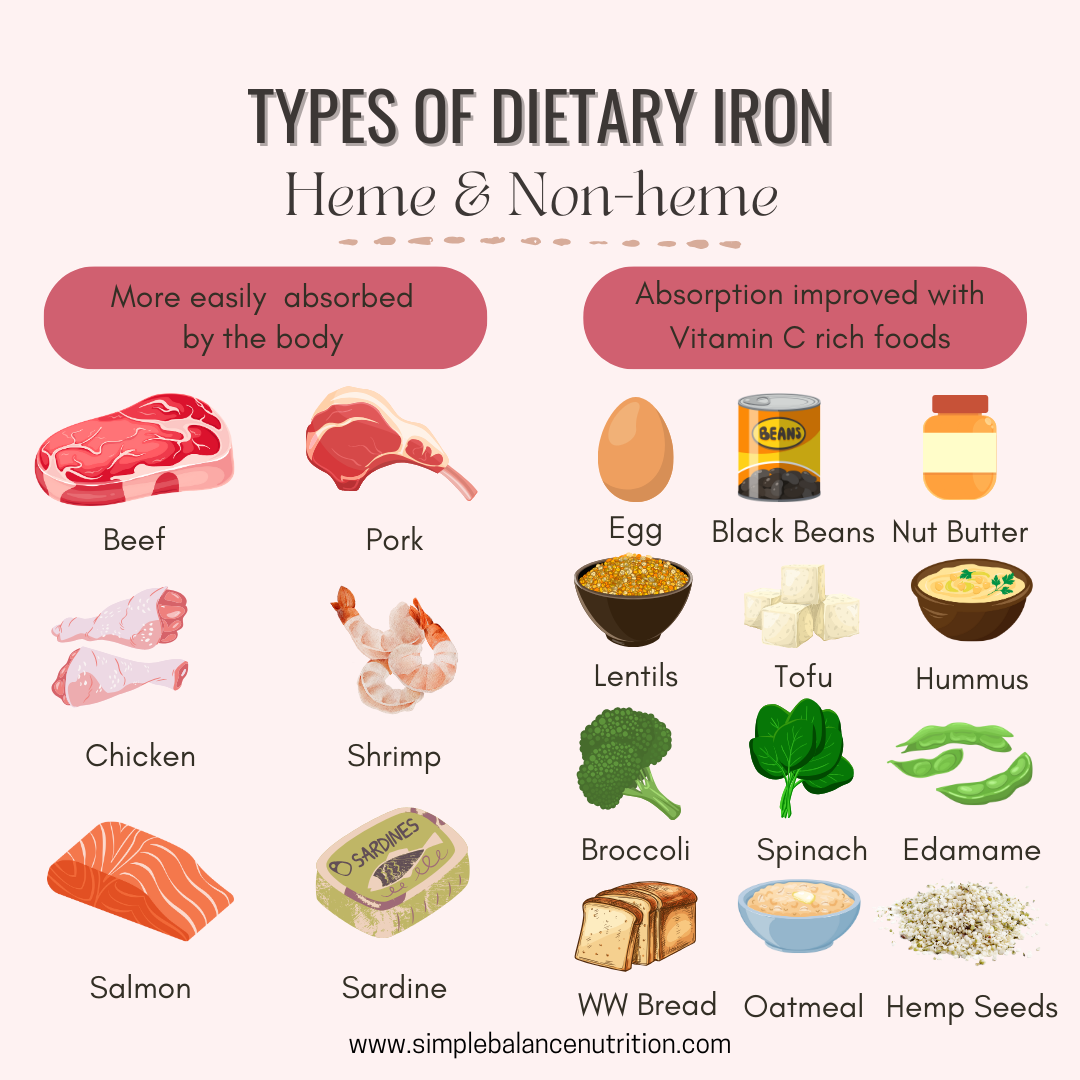
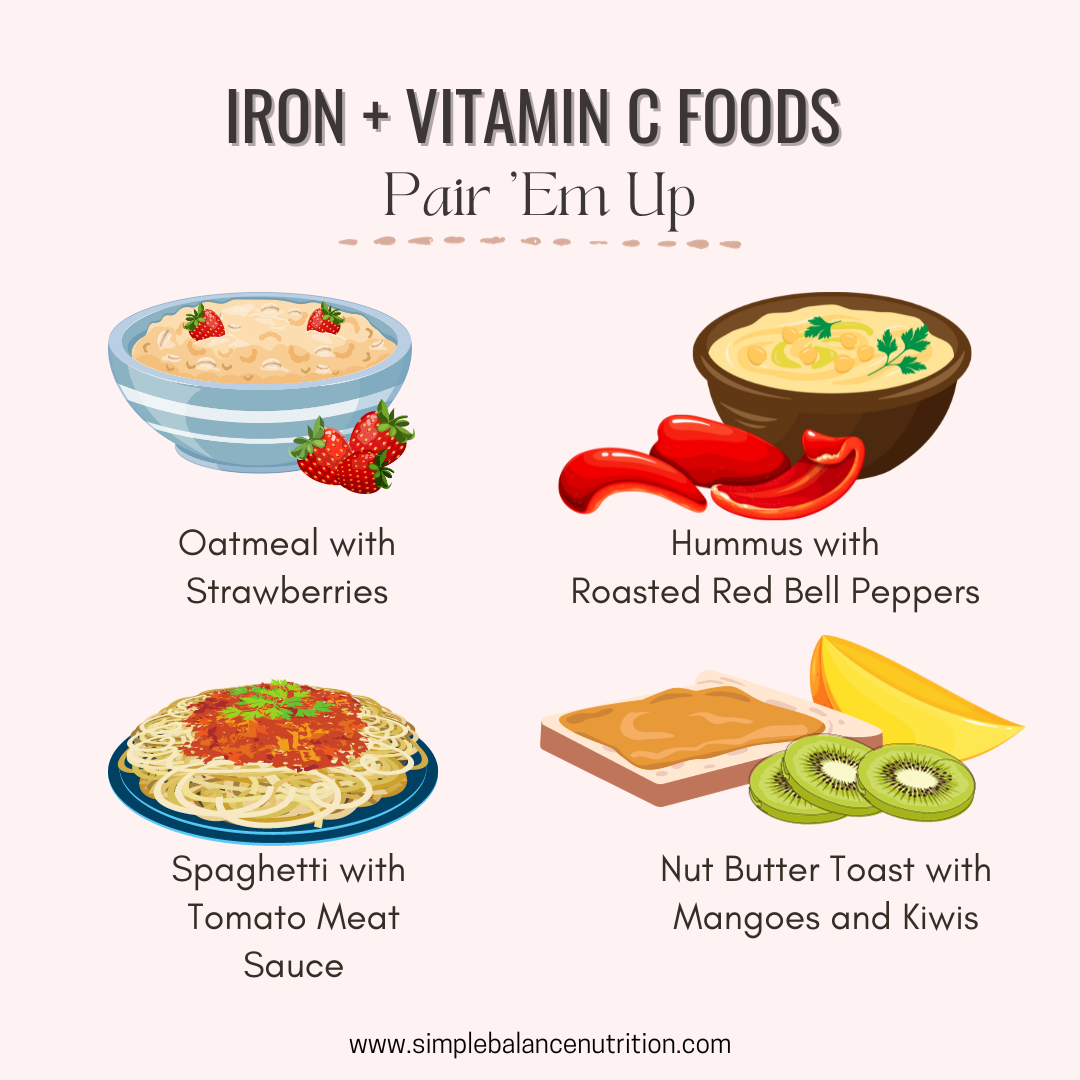
Interestingly, vitamin C also helps our bodies absorb iron, so pairing a high vitamin C food with high iron foods like meats, poultry, fish, lentils, beans and nut butters can help your child’s body absorb iron, a critical nutrient in childhood.

SHOULD MY SICK CHILD AVOID MILK AND DAIRY?

There have been many studies that have looked at the relationship between drinking milk and how it affects mucus production but there is NO scientific evidence to suggest that there is any relationship. However, if you notice your child’s symptoms seem to worsen after a cup of milk or yogurt, you can go ahead and remove it from their diet until they are healthy again.

If your toddler is having a stomach flu, serving dairy can be iffy. It is because sensitive stomach may have a hard time digesting dairy. Again, if you notice any changes or are worried dairy could potentially worsen their symptoms, it’s best to skip it for couple days.

HOW TO GET YOUR CHILDREN TO TAKE MEDICINE?

There’s nothing worse than a sick child who would feel much better if they just took their medicine. If your children refuses prescribed meds, here is an amazing blog post from physician Steve Silvestro, MD on various ways to make taking meds a little easier on everyone.

BOTTOM LINE

Caring for sick children is hard! Be sure to reach out for help and call on your support network for meals or runs to the pharmacy when needed! I hope this article helped to answer your question. For more support feeding children, be sure to check out my 3 months TRANSFORM program.

Note: This information does not replace medical advice. If you have any concerns about your little one’s symptoms, appetite or growth, please do speak to a pediatrician and follow their advice.

How to Encourage Picky Eater

How To Encourage Picky Eaters

As parents, once of our most basic jobs is to feed our children. It sounds simple enough. However, when your child is especially picky about what they eat, it can become a logistical and emotional nightmare.

When a child has a very limited food repertoire, mealtimes can become stressful. Many parents try to cajole, persuade, beg, bribe, or threaten their children into eating different foods. These actions are rarely met with success, and even if they work in the moment, they do nothing to encourage their child to develop a positive relationship with food.

So how can you make the dinner table less threatening for children who struggle with picky eating, and less stressful for you as parents? Here are some tips to help you achieve that.

1. BE CAREFUL OF HOW YOU LABEL YOUR CHILD

We all live up to the names we are given, good or bad. If you tell everyone that your child is a “picky eater”, he will believe that. Instead, try to avoid discussing the topic in his presence. If that is not possible, be mindful of the words you use. You could say something along the lines of “James is still learning to like eggplant. He may want to try them today. Let’s ask him and see.” If James overhears this conversation, it tells him that food preferences change over time, and he is in control of when to try new foods. This is more encouraging and less stressful than hearing himself referred to as a “picky eater”.

2. TALK TO YOUR CHILD ABOUT HOW TASTE-BUD CHANGE

Let them know it is okay that they only eat a few foods right now, and that it might change in the future. Food preferences are always evolving. If your child understands that, they are more likely to try in the future something they do not want to try today.

3. ENCOURAGE YOUR CHILD TO EXPLORE FOOD WITHOUT THE GOAL OF EATING IT 

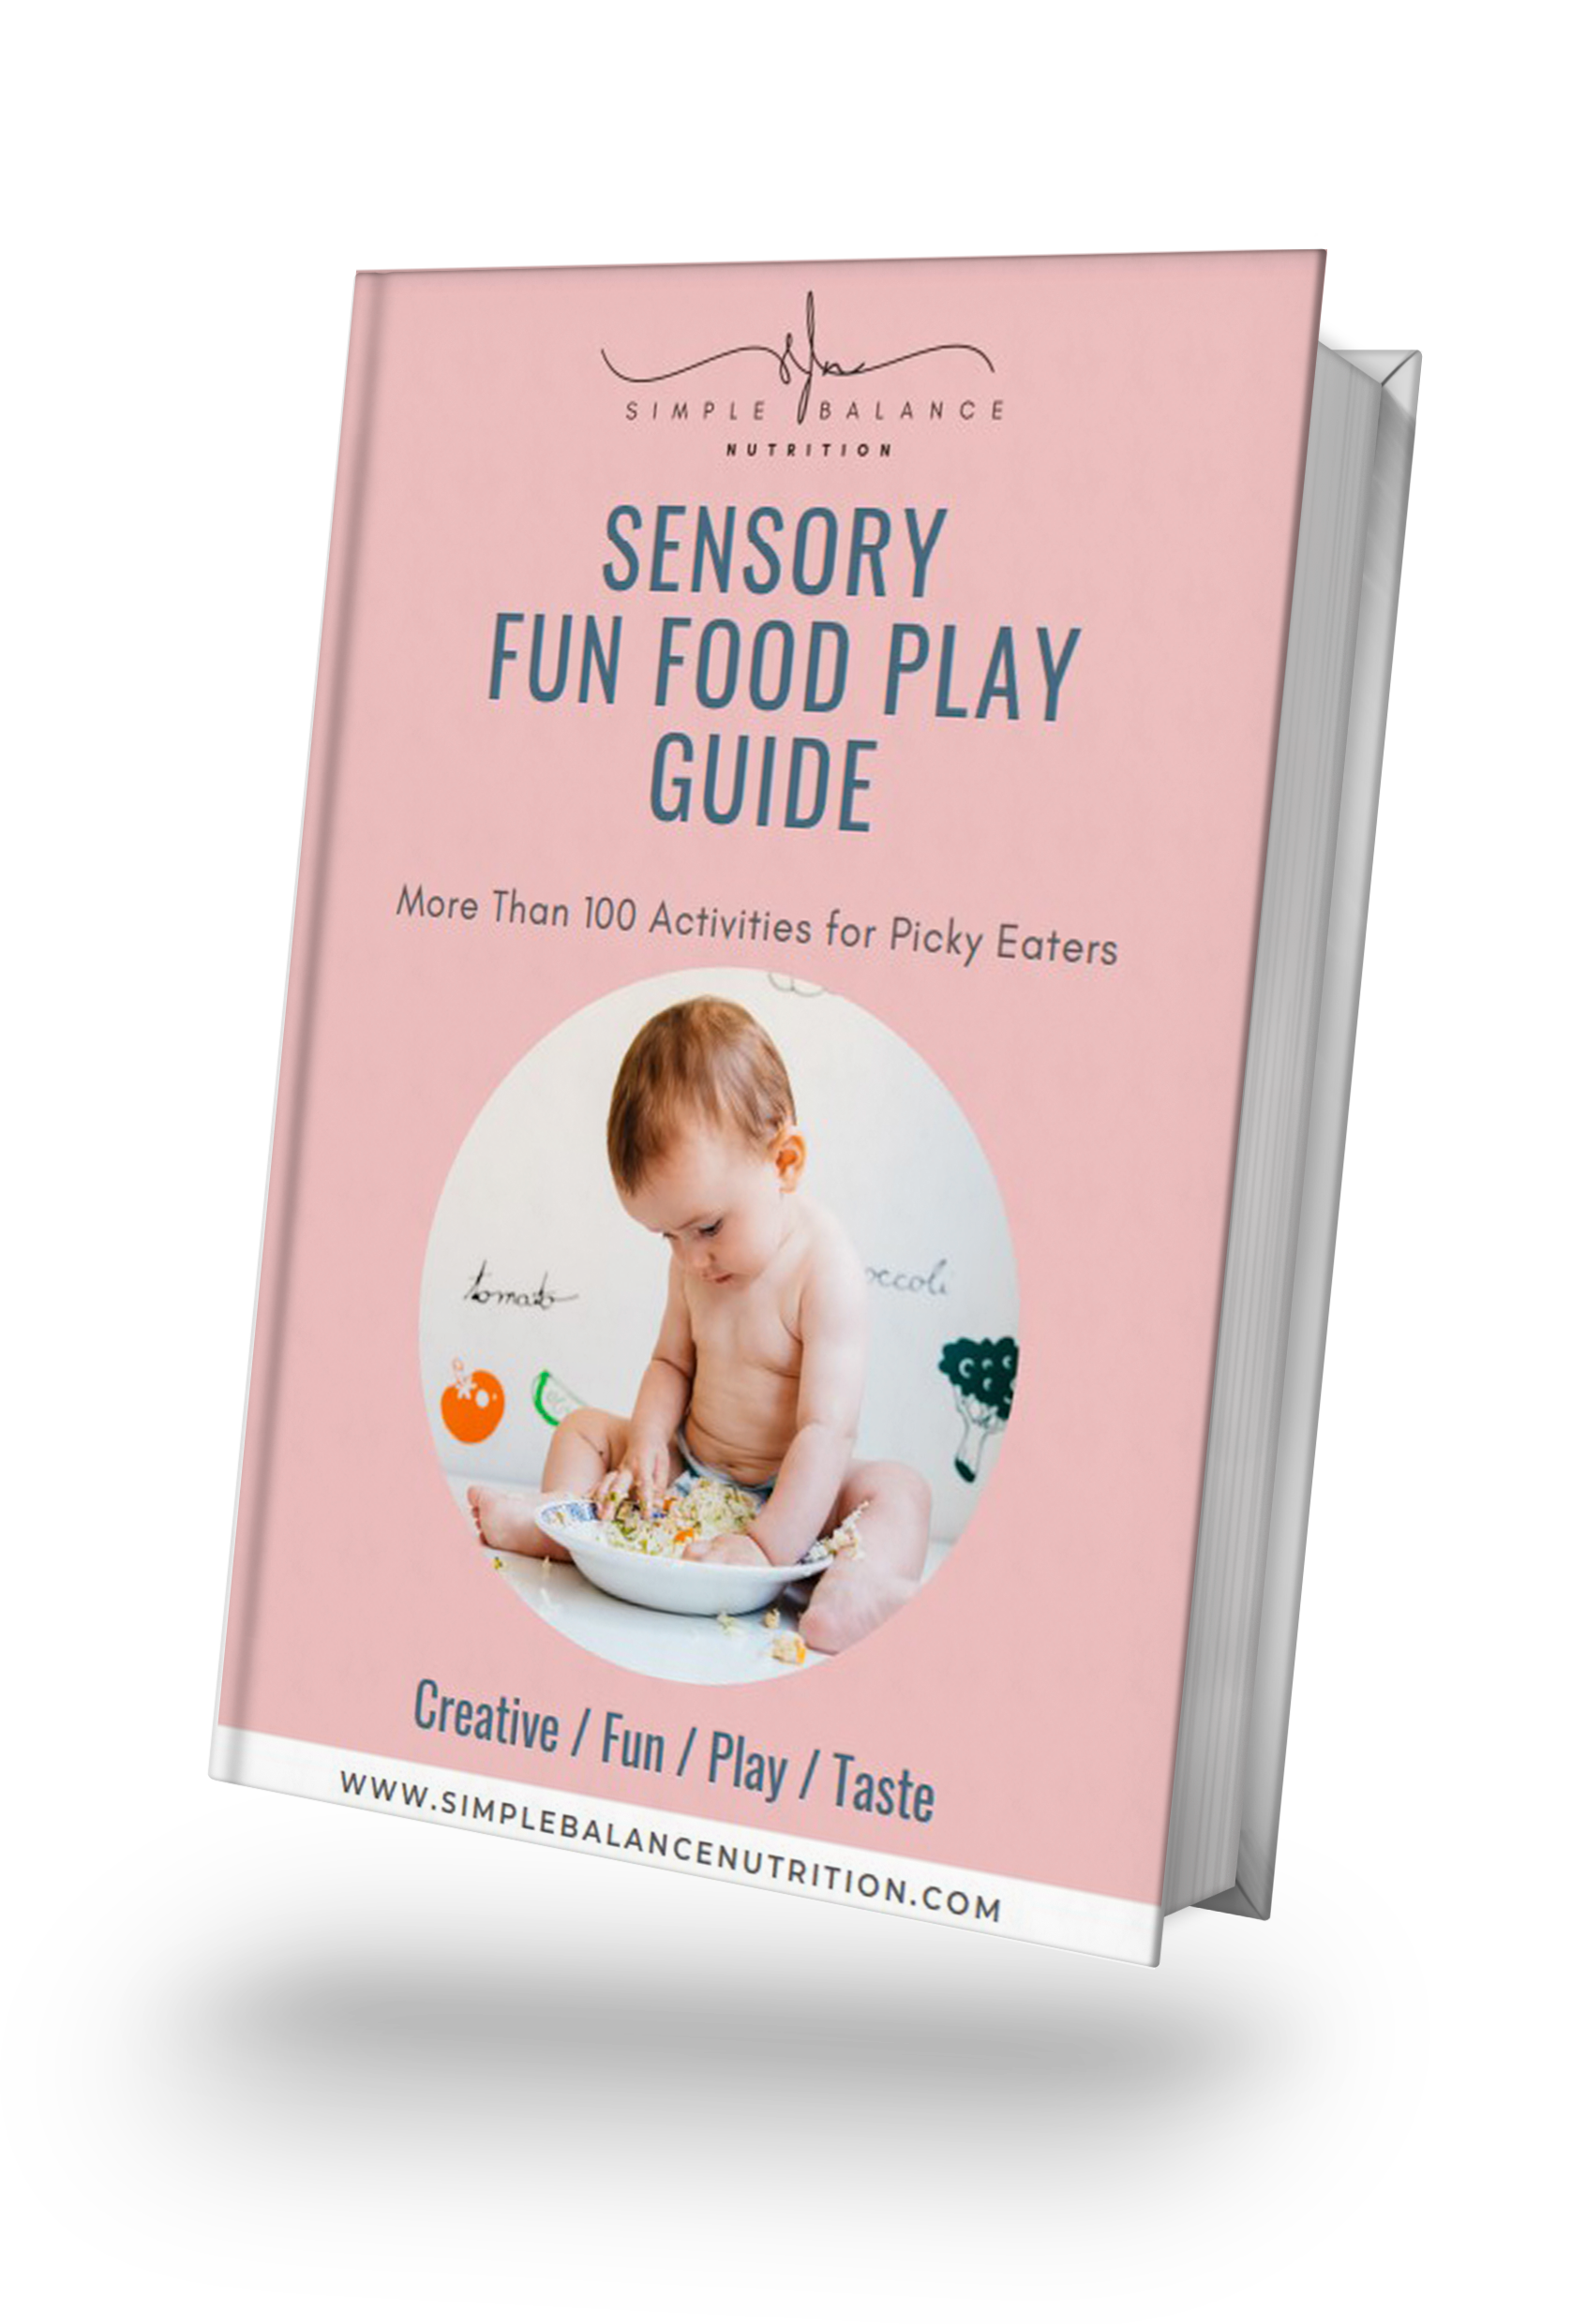
Talk about how food looks, smells, feels, what temperature it is, and how it sounds. Encourage them to explore it, with no expectation that they will eat it. It allows them to familiarize themselves with different foods without the stress of having to try them. Try Sensory Fun Food Play Activities here.

4. TAKE IT IN STAGES 

Instead of focusing on getting your child to eat new foods right away, take it in stages.

  • Stage 1 might be tolerating it sitting on their plate. With some children, even stage 1 can be challenge.
  • Stage 2 might be sniffing it.
  • Stage 3 touching. Then licking, and eventually tasting.

Know that it might take weeks or even months to get through all the stages with one food, and that is ok. Just take a deep breath and try to be patient.

5. LET THEM SPIT FOOD OUT 

This might sound controversial. Who wants a child to spit out their food? But if a picky eater knows that they can remove food from their mouth if they don’t like it, they are more likely to give it a try. Teach your child how to politely remove food from their mouth using a napkin, and let them know that it is acceptable to do that if they try a food they don’t like.

6. CHANGE THEIR SCRIPT 

How many times have you heard your child say, “I don’t like it” before they have even tried something? Just the act of a child saying that to himself can reinforce the idea that he does not like the food. New time your child makes that declaration, encourage him to say “I don’t feel like trying it today” instead. It reinforces the idea that they may want to try it in the future, and allows them to feel in control of their choices.

7. ASSIGN ROLES APPROPRIATELY 

Ellyn Satter, Registered Dietitian Nutritionist and Family Therapist, developed the Division of Responsibility in Feeding approach to mealtimes. The crux of it is that roles should be divided up between the parent and the child in the following way:

  • The parent decides what, when, and where the child will eat.
  • The child decides how much they will eat, if any.

In practice, that meals that you as the parent decide when and where mealtimes will take place, and what food to put in front of your child. The next part is the hard part. You have to step back and let your child decide how much to eat, if any. It is not easy to do, but over time it has been shown to encourage children to be more accepting of new foods.

8. GET CHILDREN INVOLVED IN BUYING INGREDIENTS AND PREPARING MEALS 

At the grocery store, ask your child to pick out a new food they might like to try. You could also check out some children’s cookery books from the library, or go online and look at some recipes. Get them involved and excited about mealtimes. Over time, increasing their interest in food will translate into becoming more adventurous at mealtimes.

9. MAKE SURE THEY ARE HUNGRY AT MEALTIMES 

If your child is not hungry at mealtimes, it is going to be even harder to encourage them to eat a variety of foods. Try not to let your child snack in the hour leading up to mealtime. If there is less than one hour to go and your child simply can’t wait, offer them part of their lunch or dinner, or some cut fruit or vegetables.

10. ALWAYS PUT SOME FAMILIAR FOODS ON THEIR PLATE

Remember the goal is to make mealtimes stress-free for your child. You want them to come to the table looking forward to the meal. If they are anxious, they are less likely to be adventurous. By making sure there are always one or two foods on their plate that they like, you remove a lot of the stress for a child who is picky about what they eat.

11. MAKE FOODS APPEALING 

By this, I don’t mean that you have to start creating art with your child’s meal. However, you can make little changes that will enhance your child’s enjoyment.

For example, you could cut vegetables into sticks and give them a dipping sauce, use a cooking cutter to make fun shapes out of sandwiches or sliced cheese, or cut foods into cubes and skewer them onto wooden tooth picks to make kebabs. Children often respond well to giving foods interesting names, like monster juice for green smoothies, or baby trees for broccoli. Also try to make meals colourful and visually appealing, and only put small portions on your child’s plate. Being faced with a huge pile of bland-looking food won’t do much to tease out your child’s adventurous side. I’ve more than 100 activities or ways to make foods more fun.

12. EAT FAMILY STYLE MEALS 

Family style meals involve putting the food in serving bowls on the dinner table and allowing people to serve themselves. Giving your child control over what he chooses to put on his plate can help relieve anxiety and encourage him to be more adventurous about what he chooses to eat. Hotpot or Hakka Lei Cha (客家擂茶) are a great way to do this. Salad bars are another. Just lay it all out and let everyone dig in.

13. MODEL GOOD EATING HABITS 

Children love to copy their parents. If your child sees you eating a diverse range of foods, they are more likely to do the same. This is especially true if you allow the family style meals tip, because they can pick from the same bowls that you picked from.

14. ENCOURAGE YOUR CHILD TO EAT UNTIL HIS BELLY FEELS FULL 

Explain to them what it feels like to have a full belly, and tell them that is the goal at mealtimes. Let them know they do not have to finish all the food on their plate if they feel full before that. If they consistently leave lots of food on their plate, try serving them a little less food.

15. OFFER NEW FOODS OFTEN 

You have probably heard it many times before, but children often need exposure to a new food many times before they will try it. Follow the old adage, “If at first you don’t succeed, try again”.

16. LET THEM KNOW THEY WILL NEVER BE FORCED TO EAT SOMETHING THEY DON’T WANT TO EAT 

With this in mind, children will be less fearful of the dinner table. A relaxed child will be more open-minded, which is what we want to achieve.

17. AVOID MEALTIME BATTLES 

Entering into mealtime battles with your child never ends well. Try to keep mealtimes stress free for your child. You want them to enjoy coming to the dinner table, not dreading it because they might be forced to eat something they don’t want.

18. KEEP MEALTIMES RELAXED 

Try to focus on something other than their eating. If your child tries a new food, offer some encouraging words, but don’t make a big deal out of it. Just keep it business as usual. Avoid cajoling, persuading, begging, bargaining, or threatening your child to eat. DOWNLOAD Mealtime Conversation Starters HERE.

19. IF VEGETABLES ARE A CONCERN, HIDE SOME AND SHOW SOME 

Sometimes, parents of picky eaters are worried about their child’s nutrition intake. If this is you, and your child turns his nose up at vegetables, try hiding some and showing some. You can hide veggies in smoothies, pancakes, or blended sauces. That way you know your child is getting some fresh produce in their diet. Once they like the taste, you can tell them what went into it to help desensitize them to those foods.

Hiding vegetables does not teach your child to like them.

20. TALK TO YOUR CHILDREN ABOUT WHAT FOOD DOES FOR YOU 

Help your children understand the importance of food, that it gives your energy, helps your brain work properly, and makes your muscles strong. While this is unlikely to bring about any short-term changes in their food intake, over time it will help them see just how important it is to make healthy food choices.

21. EXPECT SOME WASTE

The process of encouraging your child to eat a greater number of foods is often long and fraught with frustration for everyone concerned. Part of that frustration is usually directed at the food waste that inevitably accompanies the process. Try to remember that some waste is unavoidable. When it makes you stressed, remind yourself that you are doing a very important job here. You are teaching your child lifelong habits that will impact their physical and mental health.

Food waste is an unfortunate side effect of that, and will hopefully be short lived.

22. IF IN DOUBT, SEEK PROFESSIONAL HELP 

If you re at all concerned that what your child is experiencing is more serious than common picky eating, consult their pediatrician. They may benefit from seeing an occupational therapist. And if your are worried that your child is not getting enough of the nutrients they need, a paediatric Dietitian can help advise you. BOOK 1-1 Nutrition Consultation NOW.

BOTTOM LINE 

All of these tips are designed to help you create a relaxed eating environment in which your child is comfortable and confident. You want your child to have a positive relationship with food. That being said, it is likely to be a long and rocky journey for you as parents. But the effort you put in now will set your child up for a lifetime of healthy eating habits. And in those darker moments when you feel as tough you are doing it all wrong, remember this. Just by reading this post and taking steps to help your child, you are doing an amazing job. Keep going. You can do this. It will all be worth it in the long run.

If you’re still struggling with a picky eater and want to learn more about ending pressure your child to eat then join PEACEFUL MEALTIMES online course for a complete step-by-step process for preventing or reversing picky eating. This is the best of feeding therapy, all rolled into one affordable course with lifetime access and ongoing support.

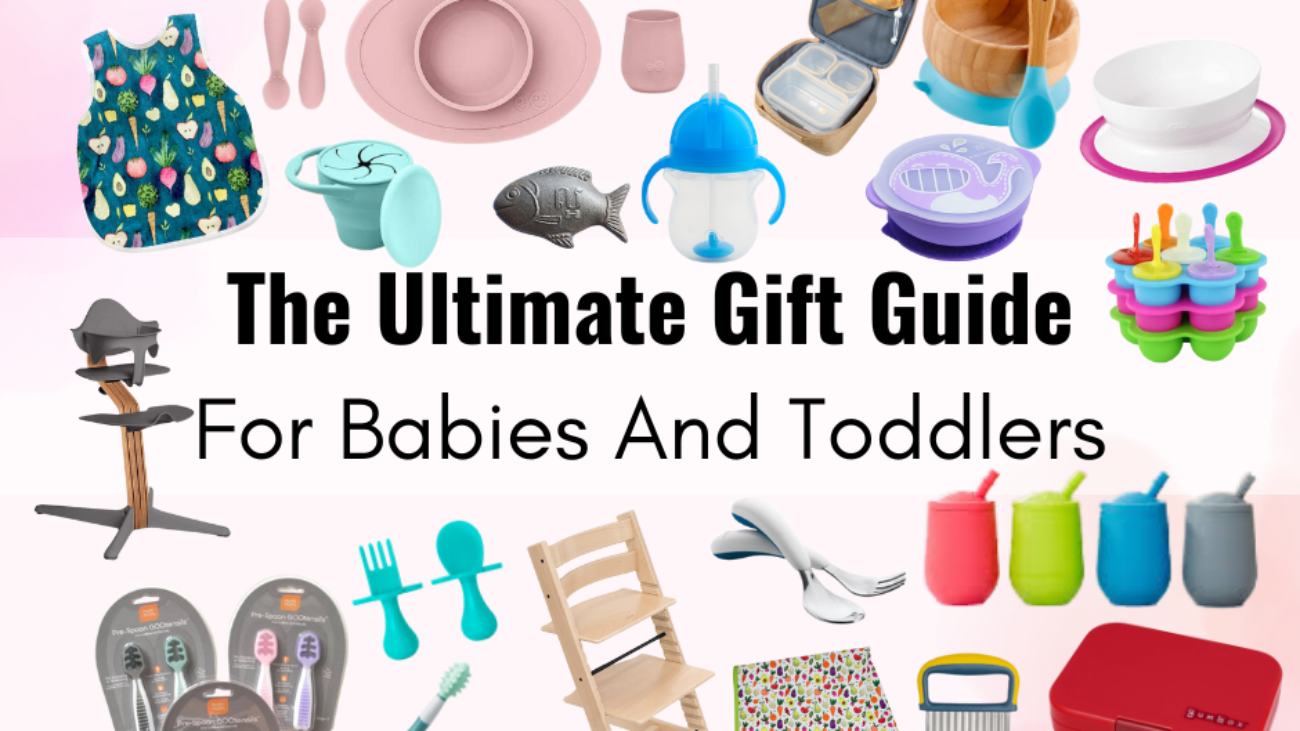
The Ultimate Gift Guide For Babies And Toddlers

The Ultimate Gift Guide For Babies And Toddlers

If you are searching for fun, practical and educational food and eating-related gifts for children and parents, I hope you will enjoy this guide of my favorite feeding tools, books, and gadgets. I used most of them myself and those that I did not are definitely on my wish list.

BABY FEEDING GIFT ESSENTIALS 

A GOOD QUALITY HIGH CHAIR

If you’re getting ready to start solids, or even if you’ve already started and looking for a comfortable, ergonomic and easy to clean high chair for your baby, here is my top 3 recommendations:

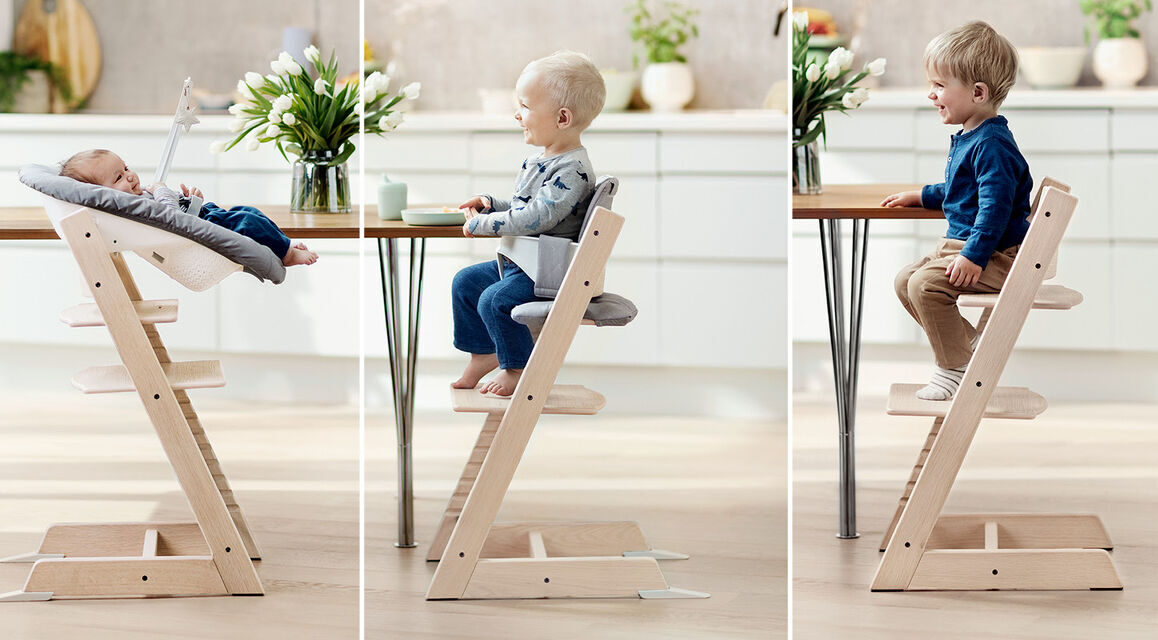
1. STOKKE TRIPP TRAPP HIGH CHAIR

The Stokke Tripp Trapp is a high quality wooden chair with an adjustable footrest. It is made to grow with your baby so they can continue to use it into toddlerhood and beyond. Be sure to purchase the Tray and Baby Set for feeding infants 6 -18 months.


2. NOMI HIGH CHAIR

The Nomi High Chair is a modern upgrade to the Tripp Trapp. It is light and easy to move or hang on the table for clean-up. The adjustable footrest and seat do not require tools.

You can get 10% off Nomi High Chair with the code YETING: click here to shop.


3. IKEA ANTILOP HIGH CHAIR

Another budget friendly high chair. For most babies, the seat is very big and can have a large gap between the baby’s chest and the tray, which means baby will have to lean over to reach for foods. I suggest buying the ANTILOP support cushion that’s sold separately to help fix this issue. This high chair doesn’t have a footrest, so what I suggest is buying a footrest to solve this problem too!


EZPZ FIRST FOODS SET

This set consists of 1 EZPZ Tiny Bowl, 1 Tiny Cup and a 2-pack of the Tiny Spoons. This set contains everything you need to get a safe start to solid foods.

Singapore:You can get 10% off with the code YETING: click here to shop.

Malaysia:You can get 10% off with the code YETING: click here to shop.


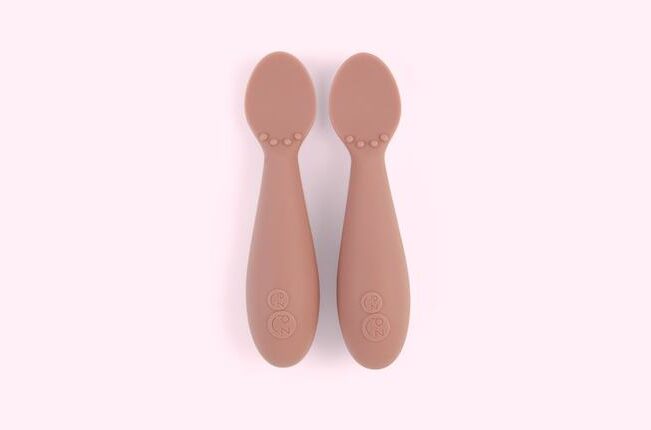
EZPZ TINY SPOON TWIN-PACK

Longer-handled spoons are useful when baby is being fed by a parent or caregiver, but for self-feeding babies, shorter handles, wider handles or handles with guards are better. EZPZ Tiny Spoon is designed to help baby learn how to feed independently. Adult-size spoons are too large for a baby’s mouth, so these tiny spoons have narrow spoon bowls that will help with portion control and prevent overfeeding and gagging. It actually works for both purees and the baby-led weaning feeding methods, therefore you’ll need to invest in at least two or three baby spoons for feeding.

Singapore:You can get 10% off with the code YETING: click here to shop.

Malaysia:You can get 10% off with the code YETING: click here to shop.


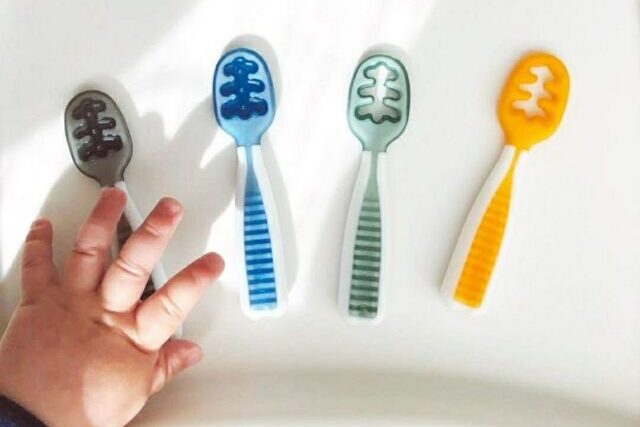
NUM NUM PRE-SPOON GOOtensils

When babies are just learning to handle a spoon, the food tends to slide right off. These spoons are great for “grabbing” the puree during self-feeding (or baby led weaning).

Singapore:You can get 10% off with the code YETING: click here to shop.

Malaysia:You can get 10% off with the code YETING: click here to shop.


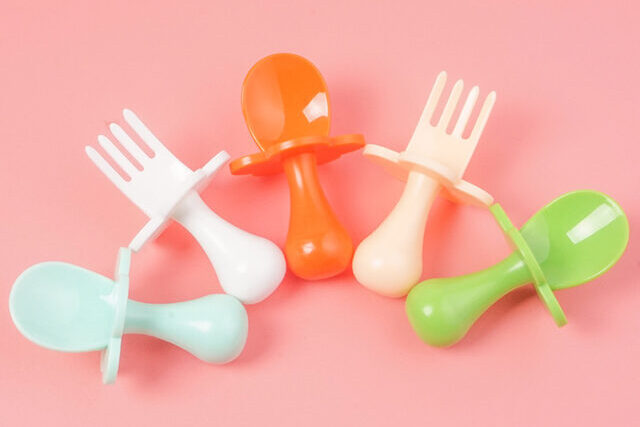
GRABEASE BABY FORK & SPOON SET

These utensils feature short easy to grab handles that make it impossible for your little one to stick too far into their mouth. Additionally, the ergonomically shaped handles are easier for tiny hands to grab. When first starting I like to help them practicing poking and then showing them how they can bring the food to their mouth. This is a great first set, but don’t expect your baby to be proficient until closer to 12+ months.


SUCTION PLATES & BOWLS

When introducing solid foods to your baby, messy mealtimes are common. Suction bowls and plates help minimize the mess, so be sure to select baby bowls and plates with great suction.

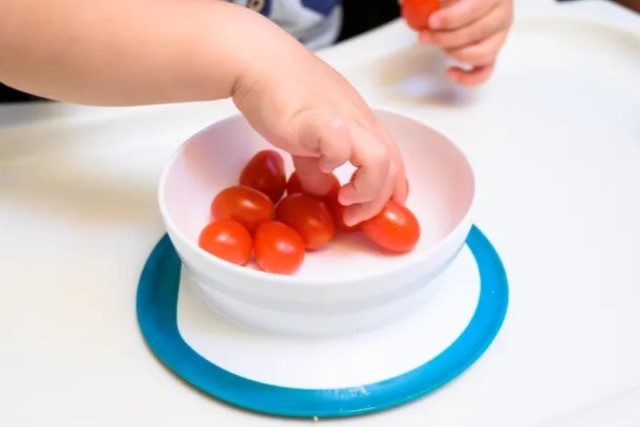
1. OXO TOT STICK & STAY SUCTION BOWL

This bowl is made of BPA-free plastic so they are unbreakable. This bowl features a secure suction base that sticks firmly to surfaces, so can prevent accidental tipping to help prevent spills. The curved walls are designed to promote self-feeding skill such as scooping.


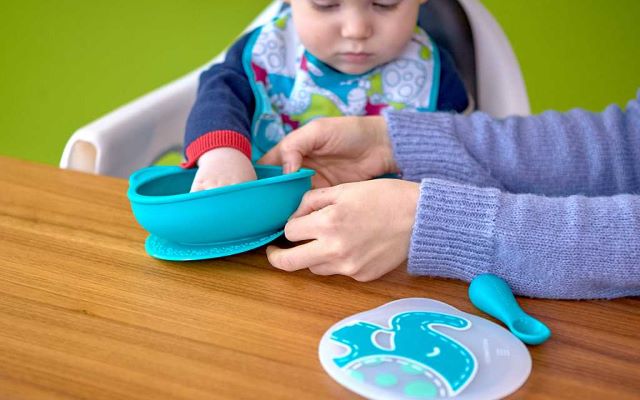
2. MARCUS & MARCUS SUCTION BOWL WITH LID

I also purchased some silicone bowls with lids because I’m constantly putting a bowl of half eaten yogurt or rice in the fridge for later.


3. AVANCHY BAMBOO SUCTION BABY BOWL + SPOON

If you’re looking for a bamboo option, which is a safe choice too, this is a great option. It comes with one of my favorite baby spoons and has a silicone suction base, which detaches for easy cleaning.


CUP

You might be surprised to learn that babies can start using an open cup as early as 6 months. All three of these cups are excellent options or teaching babies to drink from an open and/or straw cup during infancy.

1. EZPZ TINY OPEN CUP

EZPZ Tiny Cup is only 2 oz, perfect for little hands and the angle of the cup helps to control the flow as babies learn to use open cups. Additionally, the weighted base makes it harder to tip over. This tiny cup is made of food grade silicone, so great for teething. This cup doesn’t seal, so it’s not the best for an on-the-go life.

Singapore:You can get 10% off with the code YETING: click here to shop.

Malaysia:You can get 10% off with the code YETINGclick here to shop.


2. EZPZ MINI CUP + STRAW TRAINING SYSTEM

This cup is super versatile as you can also use it as an open cup. It’s 4oz so it would be perfect size for toddlers learning to drink from straws as most straw cups are much larger than this.

Singapore:You can get 10% off with the code YETING: click here to shop.

Malaysia:You can get 10% off with the code YETING: click here to shop.


3. Weighted Straw Cup

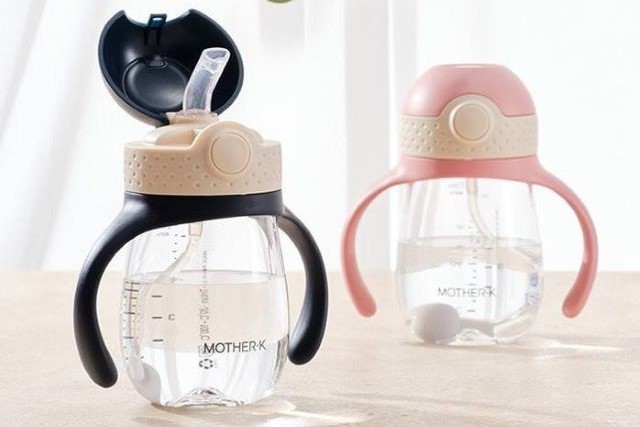
This straw cup is perfect for younger babies learning how to drink out of straw cup. They don’t spill and I love that they have handles. The weight at the bottom can keep the straw pointing down into the liquid which means your baby can drink at almost any angle.

Grosmimi PPSU Weighted Straw Cup & Munchkin Click-Lock Weighted Straw Cup are both of my favourite.


BAPRON BABY

A bib is an ESSENTIAL accessory for any baby or toddler, whether you are doing baby led weaning or not.

I have tried so many different styles and my favorites are definitely the ones that are easiest to clean.

  • Bapron bib is made from a waterproof fabric that is super soft, made from an eco-friendly type of polyester. You can rinse the Bapron bibs in the sink right after meals, dry them on the drainboard and they’re ready to go for the next meal.
  • Sleeveless so they don’t weigh your baby down or restrict their range of motion.
  • If your baby doesn’t tolerate a bib, tie-on ones are harder to yank off than velcro ones. Bapron baby bibs tie in the back under your baby’s shoulder blades – not all up in their neck which can be a negative sensory experience.

Singapore:You can get 10% off with the code YETING: click here to shop.

Malaysia:You can get 10% off with the code YETING: click here to shop.


SPLASH MAT

Eating solids is a dirty business, both spoon-feeding or baby led weaning. A waterproof  mat to go under your baby’s highchair makes for easy cleaning. The Bapron Splash Mats are made from the same amazing fabric as their bibs. You can rinse them under water and dry in between feeding.

These mats are also perfect for indoor/outdoor picnic, crafts and sensory play, if you’re out and about and they fold down so small you can easily transport them in your diaper bag.

Singapore:You can get 10% off with the code YETING: click here to shop.


TOOTH BRUSH

The Nuk™ Brush is a toothbrush-like teether with a nubby textured silicone “brush” at the end. Perfect shape and size for little mouthes. Initially, this brush was designed for teething infants, it has made its way into therapeutic settings as an invaluable tool for oral massage, oral stimulation and sensory exploration. So it is usually used in speech therapy and feeding therapy to help with oral motor skills and to de-sensitize the gag reflex.
The Nuk™ Brush can be perfect tool if you have a child who is struggling with certain food textures or gagging and spitting the food up.


BOOKS

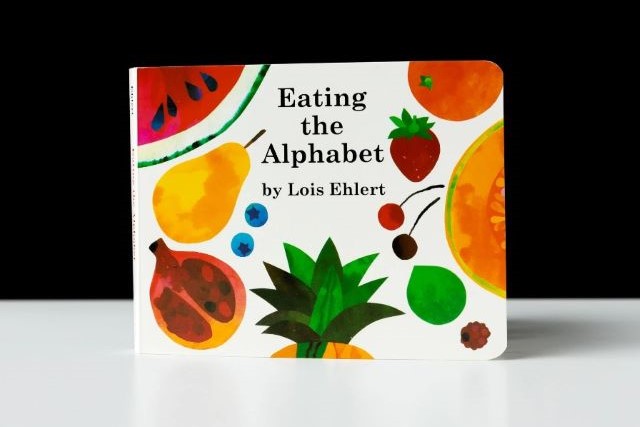
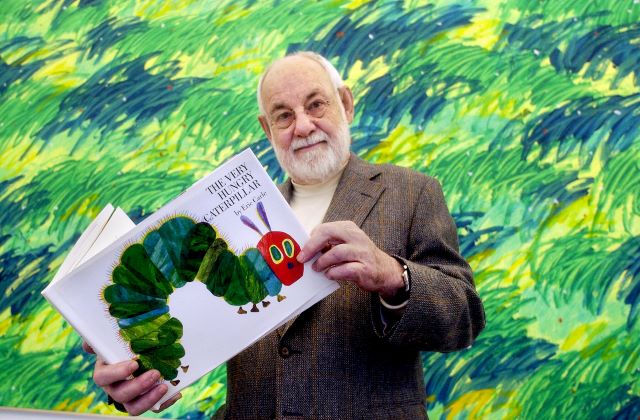
Children deserve to learn about good nutrition and develop positive attitudes about eating. These 3 books that teach nutrition are perfect to get you started!

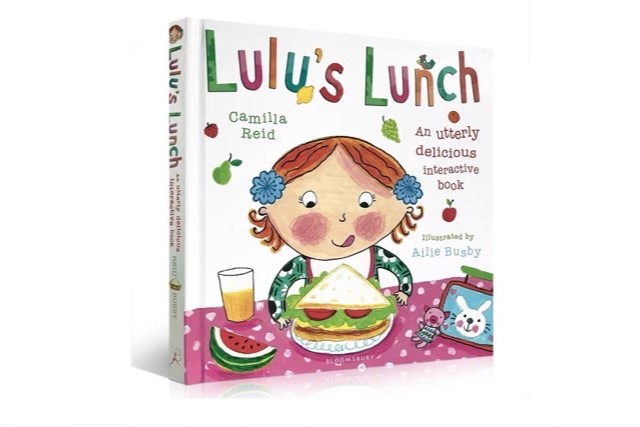
1. LULU’S LUNCH BY CAMILA REID & AILIE BUSBY


2. EATING THE ALPHABET BY LOIS EHLERT


3. THE VERY HUNGRY CATERPILLAR BY ERIC CARLE

TODDLER FEEDING GIFT ESSENTIALS

1. EZPZ MINI FEEDING SET

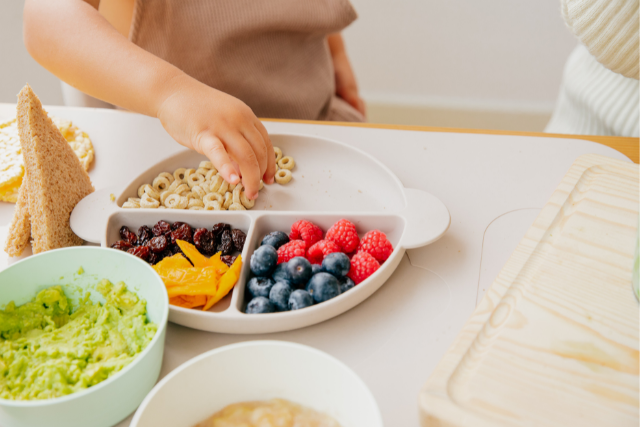
If your baby is ready to move to the table (without a tray), a suction plate can be helpful. They are also great to bring to restaurants or in-laws for your baby to eat off of. Also, if your baby or toddler does not like his food to touch, this divided plate is a perfect choice. The built-in separators help keep the servings small and make it easier for parents to offer a variety of foods like puree and finger foods each meal. This set consists of 1 EZPZ Mini Mat, 1 Mini Spoon and 1 Mini Fork.

Singapore:You can get 10% off with the code YETING: click here to shop.

Malaysia:You can get 10% off with the code YETINGclick here to shop.


2. UTENSIL SET

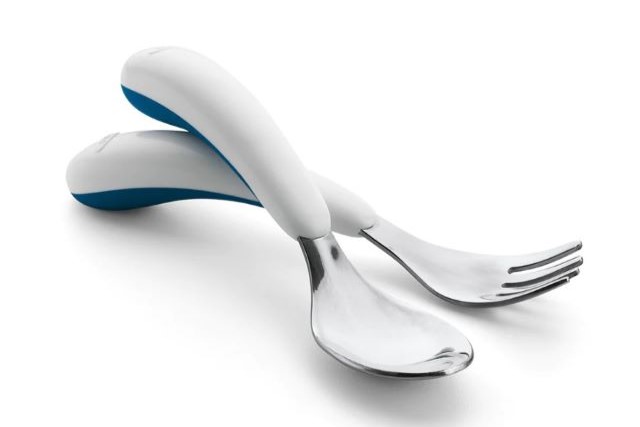
This OXO TOT Fork & Spoon Set is easy for young eaters to learn self-feeding. A flat spot on the handles prevents the fork and spoon from rolling off the table or high chair tray, and the soft grips are shaped to keep them from sliding into bowls or plates. The depth of the spoon is ideal for scooping up food. The stainless steel body is extremely durable.


3. LEARNING CHOPSTICKS

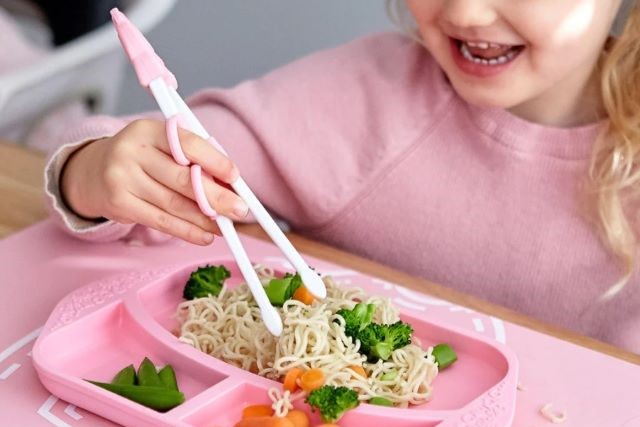
Marcus & Marcus Learning Chopsticks is one design that fits both right-handed and left-handed toddlers. They are so easy to use and toddlers can learn using the chopsticks in a day! The rings support them to hold onto the chopsticks and they can be adjusted to a comfortable angle for perfect fitting on each individual hand.


4. SNACK CUP

This is perfect for on-the-go snack and great for keeping snacks from spilling, such as cereal.

Malaysia:You can get 10% off with the code YETINGclick here to shop.


5. LUNCH BOX

Choosing a lunch box can be overwhelming as there are many different varieties, styles and sizes of lunch boxes to choose from, not to mention different materials. We all want to pick a non-toxic lunch box that won’t harm our children, while also making sure it’s easy to clean!

To narrow down your list, here are the things that I believe we should look out for:

  1. BPA-Free – The lunch box should be safe to store food inside.
  2. Stay Fresh – A box that will seal and keep an unwrapped item fresh.
  3. Easy to Clean – I prefer one lid for the lunch box, easy to clean and store when drying.
  4. Sections – Separate spaces to place different foods.
  5. Size – It’s not too big to fit into the child’s school bag, or take up most of the space.
  6. Perfect Portions – Sections that are big enough for the amount of food the child will eat.
  7. Reusable – Save the environment and your pocket, don’t use plastic zip lock bags.
  8. Dishwasher safe – For those days I don’t have time to hand wash.
  9. Easy to store – not too bulky to store when not in use.
  10. Machine Washable – lunch bags can easily be washed in the washing machine.

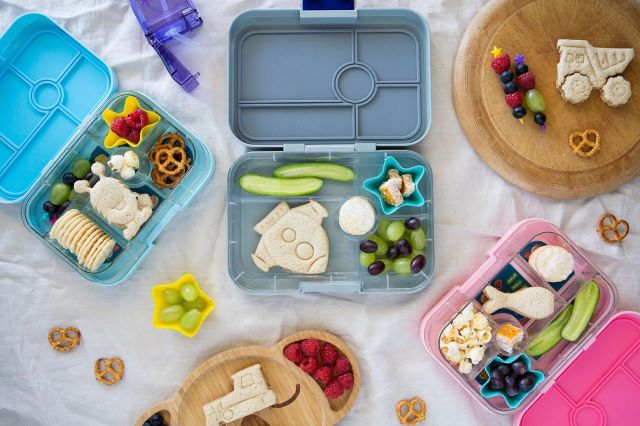
I personally prefer lunch boxes that seal tight and keep an unwrapped food fresh, eliminating the use of plastic wrap or sandwich bag which saves money and the environment. Also, most children prefer to graze on a variety of foods as opposed to just a sandwich and piece of fruit and so the bento style boxes and accessories are very clever at making the food fun and exciting.

My son has been using YumBox since he was threeIt is designed for easy to open, and 100% leak proof – perfect for on-the-go or school lunch or snack!

Another favourite lunch box is from local Malasyia’s brand Wild Mums Enterprise.

Malaysia: Check out Wild Mums Enterprise for Mumu M3: 3-Compartments Detachable Lunch Box and Mumu M3: 3-Compartments Lunch Box.

6. SENSORY FUN FOOD PLAY GUIDE

If you think your child can benefit from Sensory Food Play to help with their eating, check out Sensory Fun Food Play E-book. It has over 100 activities I created with a focus on picky eaters. Join me for lots of fun sensory food play.


7. BOOKS FOR PICKY EATERS 

Looking for a great book to help your picky eater? One of the ways you can help your picky eater as a parent is to talk about food at times other than mealtime when things are a bit more mellow and no one is furstrated or hangry. Check out some of my favorite books for picky eaters that help teach confidence, get them excited about trying new foods.

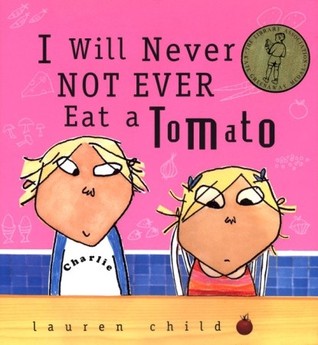
1. I WILL NEVER NOT EVER EAT A TOMATO BY LAUREN CHILD


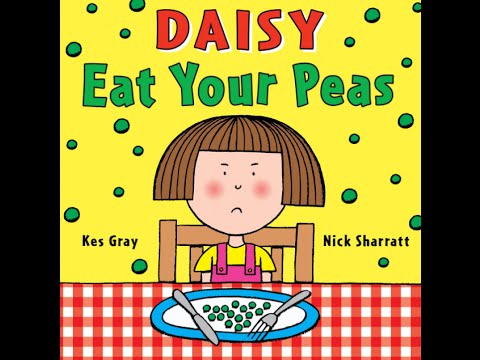
2. DAISY EAT YOUR PEAS BY KES GRAY


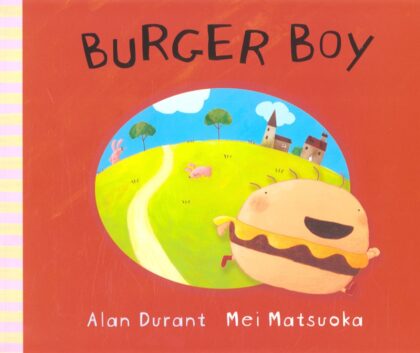
3. BURGER BOY BY ALAN DURANT

MY FAVORITE GIFT FOR NEW PARENTS 

1. PEACEFUL MEALTIMES ONLINE COURSE

Feeding is one of those milestones that gives parents a lot of stress. That’s why I offer my online course as gifts! I designed this online course to help parents go from feeling overwhelmed and nervous about picky eating and meeting nutrient needs, to feeling confident, calm, and knowledgeable about their children eating independently. BUY THE COURSE AS GIFT NOW.


2. FIRST AID & CPR COURSE

Although choking is a very rare risk it is also a very real risk. Knowing basic CPR skills can save your baby’s life and I suggest that everyone (partner, husband, mother-in-law, babysitter…) who helps or is going to help feed your baby should know CPR.

My go-to 2 days First Aid & CPR Training course from @YS First Aid is on now open for register!

If you want to focus on Infant/Child CPR, Choking and Injury Prevention Course, you can check out  @Little Beh’s 急救课.

YS First Aid: ysfirstaid6@gmail.com, 019-689-3413

Little Beh’s 急救课: jbmacademyplt@gmail.com, 016-206-8643


3. CERAMIC COOKWARE

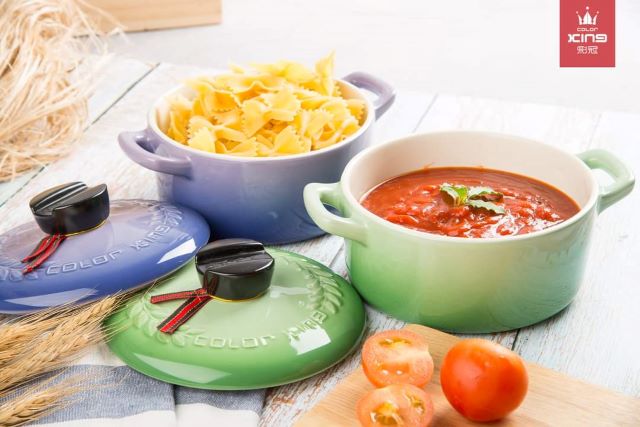
Color King 100% Ceramic Cookware (Non-Toxic , No PTFE, No PFOA) is one of the best investments you can make. It will drastically improve your cooking experience and make your meals taste better. It performs well in a range of temperatures from -20°C to 400°C. It works great on gas and electric stoves as well as with ovens. Also, it has excellent heat retention that can preserve the flavor and nutrients of your dishes.

Check out their Facebook Page or contact their customer service representatives for any questions you have at 018-277-7802. 


4. CRINKLE CUTTER

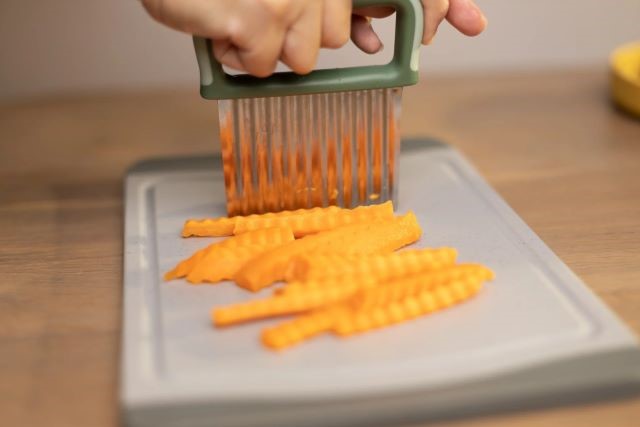
This is another tool that I am getting lots of questions about. Some people call it a crinkle cutter because it makes fun grooves on the food.

If you are doing baby led weaning, it doubled as a finger food cutter, because the grooves it makes on food make it easier for small hands to grab and hold it, especially if it is slippery. Some examples of finger foods I created using this crinkle cutter: mango, avocado, kiwi, pineapple, very ripe pear, steamed carrots and apples sticks and slices.

Singapore: You can get 10% off  YAY Crinkies with the code YETING: click here to shop.


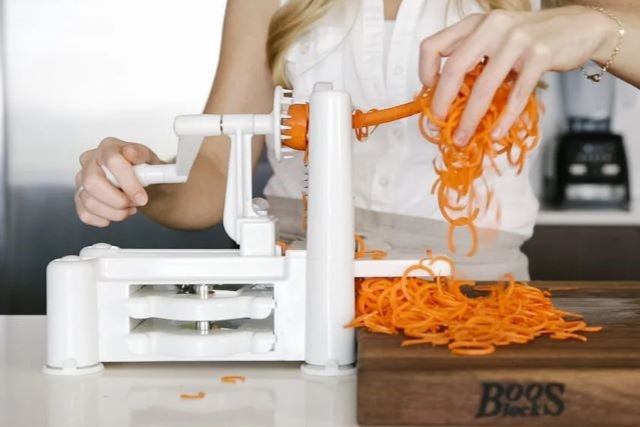
5. SPIRALIZER

My son love helping me spiralize fruit and veggies into fun shapes and it saves a lot of time spent chopping and slicing. We spiralize raw fruit just for fun and to use in salads and roast spiraled root veggies like sweet potato and beets. Raw spiraled zucchini, carrots, and jicama work great in salads.

Malaysia: Check out the Spiralizer here


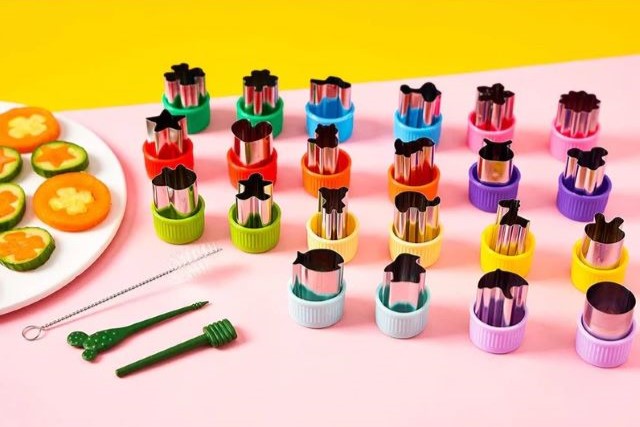
6. MINI COOKIE & VEGETABLE CUTTER

These little tools are my hard-working kitchen helpers. From cookies to veggies and from fruit to sandwiches, they cut everything into super cute shapes that my children love. This newer option comes with silicone holders which makes them even more child-friendly.


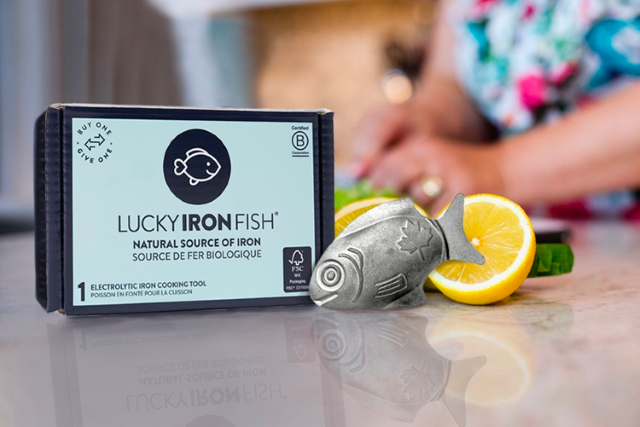
7. LUCKY IRON FISH

The Lucky Iron Fish is a simple and effective cooking tool that is designed to add natural iron to any liquid-based meals. It’s easy: simply drop Lucky Iron Fish into boiling water or liquid-based meals for 10 minutes to release a portion of your daily recommended iron. Great for postpartum moms who are struggling with iron deficiency anemia.


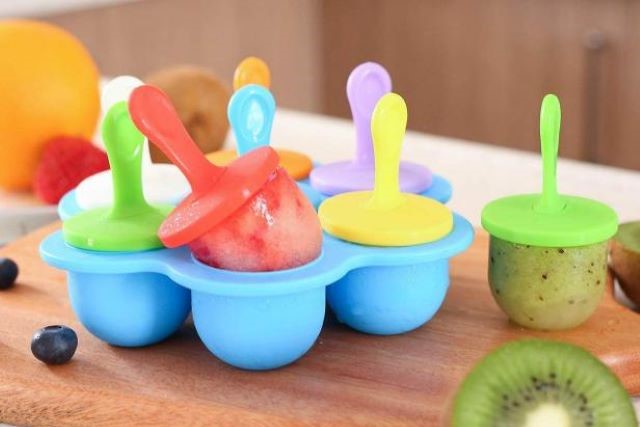
8. POPSICLE MOLD

This popsicle mold puts a fun and creative way to eat a nutritious snack. You can freeze pretty much anything in them, from breastmilk to smoothies. I always use the molds to freeze the leftovers smoothie. No waste and a yummy snack always on hand.


9. BOOKS FOR NEW PARENTS

Are you looking for books and resources on nutrition, feeding children, picky eating and baby led weaning?  I wanted to share my favourite child health and nutrition books with you.

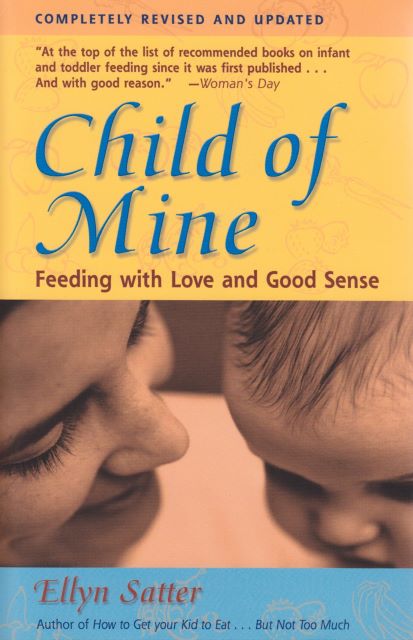
1. Child of Mine by Ellyn Satter

The Gold Standard reference for building trust in feeding children and establishing positive feeding, using the Division of Responsibility. A must-read for all new parents.


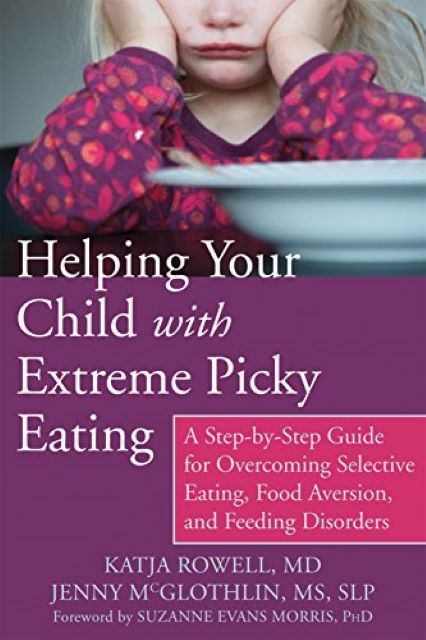
2. Helping Your Child with Extreme Picky Eating: A Step-by-Step Guide for Overcoming Selective Eating, Food Aversion and Feeding Disorders by Katja Rowell and Jenny McGlothlin

Family doctor specializing in childhood feeding, Katja Rowell, joins forces with speech pathologist, Jenny McGlothlin, to help support children with food aversion and end meal-time anxiety (for your child and you) once and for all.


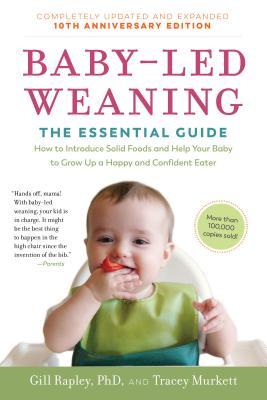
3. Baby-Led Weaning: The Essential Guide―How to Introduce Solid Foods and Help Your Baby to Grow Up a Happy and Confident Eater by Gill Rapley Ph.D. and Tracey Murkett

Still not sure if BLW is for you? Let Gill Rapley, the generally acknowledged pioneer of baby-led weaning, walk you through this approach.

If you want to understand the history and theory behind baby-led weaning, this could be the one for you. The book goes into the essentials and basic principles of why the method works. It also explains in detail the benefits your little one can get by following baby-led weaning.

The book uses an easy and clear tone. Its claims are backed with science-based facts. The topics are clearly divided, so you can skip forward or just choose a topic you like.

The updated edition includes the latest research on allergy prevention and safety. This thick, big book can be a good reference or a go-to book for your BLW questions.


10. COOKBOOKS FOR BUSY PARENTS 

Whether you have a new eater, picky eater or extremely picky eater, there are steps you can take to make trying new food fun, enjoyable and pressure-free. I have some cookbooks to keep you excited about planning your baby’s weaning meals.

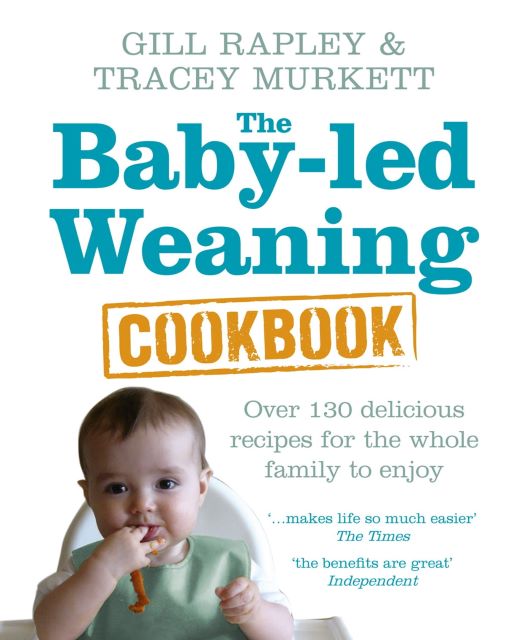
1. The Baby-Led Weaning Cookbook: Delicious Recipes that’ll Help Your Baby Learn to Eat Solid Foods―and That the Whole Family Will Enjoy by Gill Rapley PhD, Tracey Murkett

Gill Rapley’s Baby-Led Weaning Cookbook is more than just a cookbook. Before getting to the recipes, you will also be given a comprehensive guide on baby-led weaning.

It’s like a summary of Rapley’s Essential Guide to remind you what to consider while preparing meals. The book details the importance of baby nutrition and safety.

Recipes are made not just for the baby but also for the rest of the family. The book provides a huge range of recipe ideas. It offers simple meals and healthy and nutritious store-cupboard meals to new recipes.

With more than 130 recipes, there’s always something for everyone. Even your family’s picky eaters can find something they might enjoy. This big book has plenty of meal plans from baby snacks, healthy sweets, and filling meals for the family.

There are stories and messages from parents who practice baby-led weaning to keep readers inspired. There are also easy-to-follow tips on minimizing the mess during the baby’s feeding time.


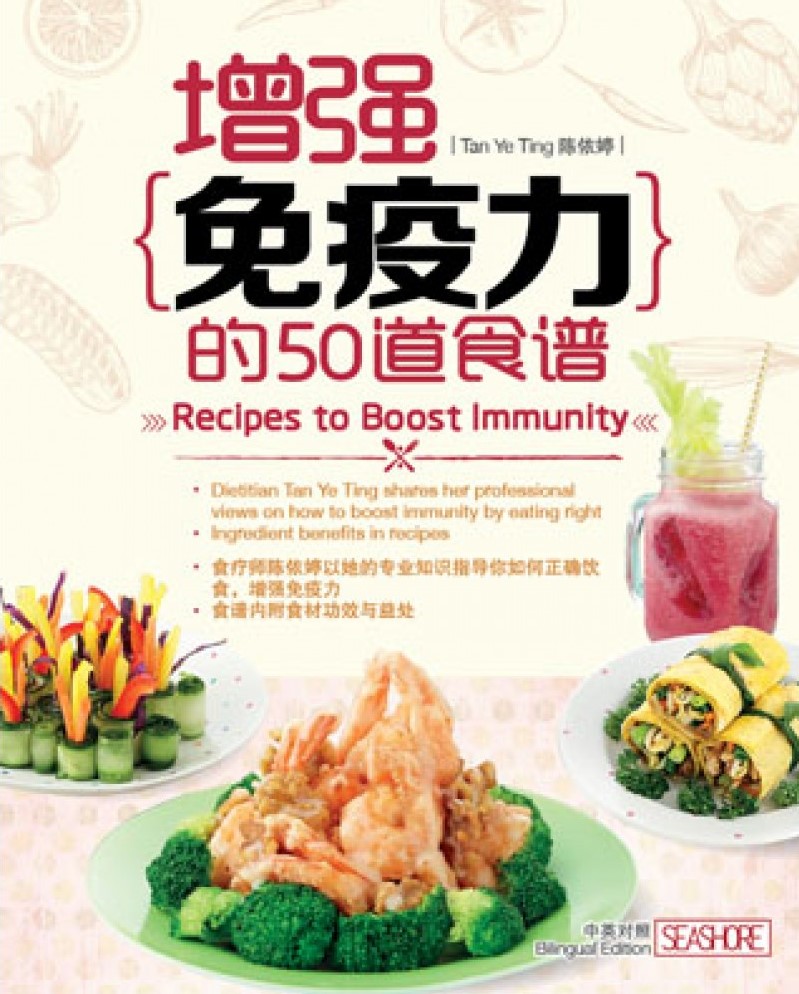
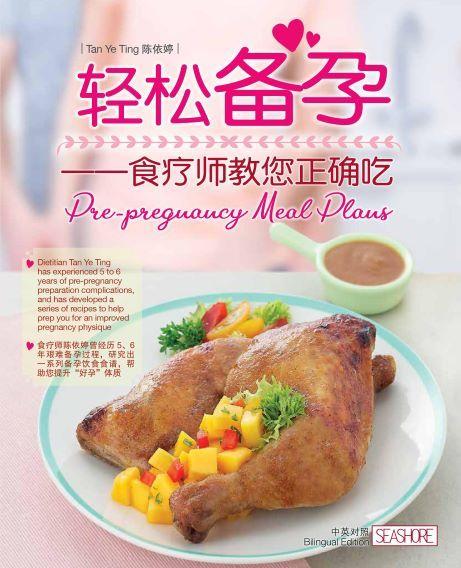
2. Recipes to Boost Immunity / Pre-Pregnancy Meal Plans

Two cookbooks with over 100 recipes which are family-friendly to ensure nutritious meals for all.


HAPPY SHOPPING!

That’s all for my 2023 gift guide! All of these products are great for baby led weaning and into toddlerhood. Truly an ultimate guide for Holiday or Birthday shopping for your baby, toddler, and any new parents in your life.

Disclaimer: Please note that all opinions are my own and I was not paid to promote any of these products. The post contains affiliate links that allow me to receive a small commission to help run this blog. Thank you for your support and understanding!

Nutrition Boosters Chia, Flax, and Hemp Seeds

Nutrition Boosters: Chia, Flax, and Hemp Seeds

Looking for an easy way to add a nutrition boost? Chia, flax and hemp seeds are all in healthy fats and super versatile. Read more about their nutrition benefits, tips of buying and storing, and ways to enjoy.

WHAT ARE SUPER SEEDS?

Frequently called super seeds or super foods – chia, flax, and hemp seeds are super tiny yet packed with nutrition.
CHIA SEEDS

Small, round, and white or black in color, similar looking to poppy seeds, with a neutral flavour. They were a staple food for the Aztecs and Mayans as they were prized as an energy booster, which is actually how they got their name as “chia” is the Mayan word for “strength.”

HEMP SEEDS

It can be called hemp hearts, which have a mild nutty flavour. These seeds come from the Cannabis sativa plant. Before you start worrying about THC (the active ingredient in marijuana) and getting high, hemp seeds contain only trace amounts of THC (0.3%) and is very unlikely to cause any psychoactive side effects or even show up in a drug test. In fact, hulled hemp seeds have GRAS (Generally Recognized as Safe) status by the FDA.

FLAX SEEDS

Flax seeds are thought to be one of the world’s oldest crops. These nutrient-dense seeds and their oil have been used for medicinal purposes for thousands of years. Nutty and grassy flavor, these brown or golden seeds can be purchased whole or pre-ground.

NUTRITION & HEALTH BENEFITS

Despite their small size, these super seeds are loaded with nutrients and linked to numerous health benefits.

CHIA SEEDS

Chia seeds are a great source of fiber, 2 tbsp contain 8 grams of mostly soluble fiber. Chia seeds are high in calcium, magnesium, phosphorus, and ALA. All of these nutrients have been linked to improved bone mineral density.

HEMP SEEDS

Hemp seeds contain all the essential amino acids, making them a complete protein source. However, hulled hemp seeds (hemp hearts) contain very little fiber because the fiber-rich shell has been removed. Hemp seeds are also a great source of vitamin E and minerals, such as phosphorus, potassium, sodium, magnesium, sulfur, calcium, iron and zinc. Hemp seeds contain 3X more omega-6 fatty acids than omega-3 fatty acids, which may benefit skin disease and provide relief from eczema and improve dry or itchy skin.

FLAX SEEDS

Flax seeds are one of the best sources of an antioxidant called lignans, which may protect against cancer. Flax seeds are an excellent source of alpha-linolenic acid (ALA), a type of omega-3 fatty acid that our body doesn’t produce. Flaxseed is particularly high in thiamine, a B vitamin that plays a key role in energy metabolism as well as cell function. It’s also a great source of copper, which is involved in brain development, immune health, and iron metabolism.
Overall, thanks to their high fiber content, healthy fats, and antioxidant content, all three seeds have been associated with a reduced risk of chronic diseases, including heart disease, certain types of cancer, and type 2 diabetes.

HOW AND WHERE TO BUY THEM

All three super seeds can be found in health food stores or at larger supermarkets. Of course, you can also buy these seeds online.

For flax seeds, you have the option to buy them whole or pre-ground. Ground flax seed is much easier to digest than whole flax seed. Due to the outer shell of a flaxseed contains insoluble fiber, which does not dissolve in water, so whole flax seeds may pass through your intestine undigested. Therefore, crushing, milling or grinding the whole flax seeds before consuming can increase the absorption of the nutrients.

You can still buy whole flax seed, grind it in a coffee grinder, and store the ground flax seed in an airtight container for easy use.

For hemp seeds, look for “hemp hearts” or “hulled hemp seeds”, which are just the soft inner seeds with the inedible outer shell removed. Also be aware of where the seeds are from as different countries have varying levels of hemp regulation.
HOW TO STORE THEM

Thanks to their high fat content, these super seeds will last longer when stored in the fridge or freezer, but that doesn’t mean you have to store them that way. The most important thing is to store these seeds in airtight containers. 

  • CHIA SEEDS: last 2 years in the pantry and 4 years or more in the fridge.
  • HEMP SEEDS: 3-4 months in the pantry, 1-2 years in the fridge, and at least 4 years in the freezer.
  • WHOLE FLAX SEEDS: 6-12 months in the pantry and 1 year in the fridge.
  • GROUND FLAX SEEDS: 1 week in the pantry and 1-2 months in the fridge and 6 months in the freezer. If your ground flax seed tastes at all bitter, then throw it away – bitterness is a sign of rancidity!

USING SEEDS IN YOUR DIET

Flax and hemp hearts both have a mild, nutty flavor, while chia seeds have more of an earthiness to them. All three can be easily added to many different foods, such as smoothies, yogurt, overnight oats, salads or baked goods.

Moderation is important. You don’t need to eat a lot of seeds to reap their health benefits. All seeds are high in fat, which makes them high in calories. A serving size of 1 to 2 tablespoons each day is a great addition to a healthy diet and lifestyle.

Here are some ways to incorporate these nutrient-rich seeds into your meals and snacks.

CHIA SEEDS

You don’t need to grind or cook the chia seeds. What makes chia seeds unique is that they form a gel-like texture when submerged in a liquid. As a result, you can use them to thicken sauces and as an vegan egg substitute, such as adding to puddings, smoothies, jams, or baked goods.

For 1 medium egg = 1 tbsp chia seeds + 3 tbsp water

You can also sprinkle dry chia seeds on top of cereals, salads, granola, and yogurt.

HEMP SEEDS

In addition to sprinkling over foods, hemp hearts can be used to make hemp milk and also make for a protein-rich coating for “slippery” foods like avocado, banana, mango.

To really bring out their nutty flavor, you can roast hemp hearts prior to using (they also make for a great nut substitute!).

FLAX SEEDS

As I mentioned earlier, ground flax seed is much easier to digest than whole flax seed, so you want to grind them before eating/using in cooking. You can also buy pre-ground flax seeds, which are often labeled as flaxseed meal.

Ground flax seeds can be added to baked goods, yogurt, oatmeal, pancakes, and smoothies. Like chia seeds, they can be used as an egg substitute in baking recipes – a great trick if your family is vegan or your child has an egg allergy!

For 1 medium egg = 1 tbsp ground flax seeds + 3 tbsp water

BOTTOM LINE

Hemp, flax and chia seeds each have a unique nutrition profile, so there’s no reason to stick to eating only one. They’re an excellent source of plant-based protein, fiber, omega-3 fatty acids, antioxidants, and a number of minerals. If you’re looking for a nutrition boost, mix them up, include one to two tablespoons of one or more types of seeds in your diet each day.

How does your family enjoy eating these superseeds? Share in the comments!

Nutritional Yeast Benefits and How to Use

Nutritional Yeast – Benefits and How to Use

Nutritional yeast, also called “nooch,” is a popular vegan food product with a savory, nutty or cheesy flavor. When I first heard the term “nutritional yeast”, I thought it was a product used to bake bread that had some vitamins added to it.

Every now and then I use nutritional yeast in a recipe I get asked questions about it so I figured I need a full blogpost explain what nutritional yeast is, reviews its health benefits, and suggests creative ways to use it.

WHAT IS NUTRITIONAL YEAST?

Nutritional yeast is sold as thin flakes, granules, or powder. You can find it in the spice or condiment section at most grocery stores or in bulk bins of health food stores. It has a pale yellow color and may come packaged in a bag, shaker, or plastic container. It’s low in calories and sodium, dairy-free, soy-free, gluten-free, sugar-free, fat-free and vegan so  it fits into a lot of restrictive diets.

HOW IS IT PRODUCED? 

To produce nutritional yeast, Saccharomyces. cerevisiae (a type of yeast) cells are grown for several days on a sugar-rich medium, such as molasses. Once the yeast is mature, it is heated up to deactivate the yeast (which inhibits its leavening properties), then it is washed, dried, crumbled and packaged into small flakes.

TYPES OF NUTRITIONAL YEAST

There are two types of nutritional yeast: unfortified and fortified:

  • Unfortified: This type doesn’t have any added vitamins or minerals. It only contains the nutrients that are naturally found in the yeast itself.
  • Fortified: This type has vitamins added during the manufacturing process to boost nutrient content. Any additional vitamins are included in the ingredient list. Fortified nutritional yeast is the most common type and offers the most benefits. However, it is important to note that different brands have different concentrations and types of nutrients, so read labels closely and adjust the serving size accordingly.

BAKER’S YEAST vs NUTRITIONAL YEAST vs BREWER’S YEAST

Brewer’s, baker’s and nutritional yeasts are technically made from the same species of yeast (Saccharomyces cerevisiae), they are indeed different products.

  • Brewer’s yeast: Brewer’s yeast can be purchased alive and is used to brew beer. Darker in color. The dead yeast cells leftover from the brewing process can be consumed as a nutritional supplement but have a very bitter taste. Brewer’s yeast is rich in a complex of vitamins, including vitamin B, chromium, selenium, and protein.
  • Baker’s yeast: Baker’s yeast is purchased alive and used to leaven bread. The yeast is killed during cooking but adds an earthy, yeasty flavor to bread.
  • Nutritional yeast: This yeast is grown specifically to be used as a food product. The yeast cells are killed during manufacturing and not alive in the final product. It is used in cooking and has a cheesy, nutty or savory flavor.

WHAT ARE THE BENEFITS OF NUTRITIONAL YEAST?

Nutritional yeast gets its name from the nutrients it contains, including protein and a wide array of vitamins, minerals, and antioxidants.

  • PROTEIN: It’s a great source of plant-based protein, with all 9 of the essential amino acids (complete protein). 2 Tbsp = 8 grams of protein.
  • VITAMIN B12 (COBALAMIN): Most nutritional yeasts are fortified with B12. It’s essential for the production of of red blood cells and nerve health. It’s largely found in animal products so if you follow a vegan or plant-based diet, you may not be getting enough.
  • OTHER B VITAMINS: You’ll also find vitamin B1 (thiamine), B2 (riboflavin), B3 (niacin), B6 (pyridoxine) and B9 (folate). They help to convert food into fuel to keep us energized and while many of them work together they each play their own role in our health as well, from healthy skin and hairs, to working as antioxidants, to their role in mood, sleep and brain health
  • MINERALS: Fortified nutritional yeast also includes zinc, selenium, manganese and molybdenum, which are involved in gene regulation, metabolism, growth, and immunity
  • ANTIOXIDANTS: Glutathione and Selenomethionine can help protect your cells from damage caused by free radicals and heavy metals and help your body eliminate environmental toxins.
  • BETA-GLUCAN (a type of fibre): It may help to lower cholesterol levels, which may benefit heart health. It may also boost the immune system.

WHAT DOES NUTRITIONAL YEAST TASTE LIKE?

It has a nutty, cheesy, salty, umami flavor and is often used to add a cheesy flavor to dairy-free or vegan dishes. Also, it helps to thicken dressings, sauces and soups.

IS NUTRITIONAL YEAST HEALTHY FOR BABIES?

Nutritional yeast is not a common choking hazard and not considered a common allergen. Therefore, it can be a healthy addition to a baby’s diet, especially in families that prefer vegan and vegetarian cooking.

If your baby has a MTHFR genetic mutation, it may be best to avoid nutritional yeast that has been fortified with folic acid, the synthetic form of vitamin B9. The MTHFR mutation causes impaired folic acid metabolism.

HOW DO YOU USE NUTRITIONAL YEAST?

Aside from its many health benefits, nutritional yeast is affordable, easy to use and can be sprinkled on just about anything to produce a delicious nutty, cheesy flavor

It’s versatile and here are some fun ways to use it:

  • Add to soups, stews, chili or sauces
  • Sprinkle on top of pasta dishes, casseroles, baked potatoes, mixed green salad, and roasted vegetables
  • Toss it with homemade fries before baking
  • Toss it into a tofu scramble or scramble eggs
  • Mix it into mashed potatoes or mashed cauliflower
  • Spread toast with olive oil and then sprinkle on top
  • Sprinkle over popcorn or kale chips (no popcorn for children under 4)
  • Combine with soaked cashews, lemon, garlic, salt, pepper, and water to make vegan cashew cheese sauce

Serving sizes for nutritional yeast depend on the recipe, but you typically use 2–4 teaspoons (5–10 grams).

BOTTOM LINE

Nutritional yeast is a really great versatile food. It’s such a great addition to a variety of healthful dishes and can be added to a variety of snacks and meals while providing a delicious umami flavor! Nutritional yeast is very high in Vitamin B12, a nutrient that of often difficult to find in most adult diets as well as a child’s diet. But remember, not all nutritional yeast is fortified with vitamin B12, so it is important to check the label for ingredients.

Does your family use nutritional yeast? What are some of your children’s favorite ways to eat it?

How to Read Nutrition Label If You Are Diabetic

How to Read Nutrition Label If You Are Diabetic

Are you having difficulties choosing the right foods at the grocery? Do you feel lost when you look at the nutrition fact table? Do you understand the list of ingredients? Finding the right nutritious food and understanding food labels is not as easy task especially with the high number of food products on the market. It’s even harder for people with diabetes because food choices can have an impact on blood sugar level. In this articleI will show all you need to know about grocery shopping in you have diabetes.

UNDERSTANDING SUGAR CLAIMS

Claims are used to attract consumers on a particular nutrition aspect of the food product.

Here is a list of the most common sugar claims and their meaning:

  • Free of sugar or sugar free: The food contains less than 0.5g of sugars per portion. For example: chewing gum.
  • No sugar added: The food contains no added sugars. However, sugar substitutes (aspartame, sucralose, sugar alcohols, acesulfame-k) could have been added.
  • Reduced in sugars: The food is processed, formulated, reformulated or otherwise modified so that it contains at least 25% less sugars than the reference amount of a similar reference food. This label is bit tricky because even if it is reduced it doesn’t necessarily mean that the sugar content is low and that this product is a good choice.
  • Fat-free: While it’s not a sugar claim, it’s important to know that some fat-free foods are often higher in sugar than the regular version.

Beware this claim does not mean that there are no sugars in this product! This is why it is very important to look at the food label to check the content of carbohydrate and sugars. For example, if you are buying an applesauce with no sugar added, you are still getting the natural sugar from the apples but no extra sugar has been added.

CHECKING THE INGREDIENT LIST 

The ingredient list shows all the ingredients in a packaged food product. They are usually listed in descending order by weight, beginning with the ingredient that weights the most and ending with the ingredient that weights the least. Therefore, if you see the word sugar or sugar derivatives in the first FIVE ingredients, it would be wise to check the sugar content on the nutrition fact label. The list of ingredients can also be a good place to look for heart-healthy ingredients such as healthy fats; or whole grains.

It’s important to know that there are different names of sugar. Look for words that end in -OSE. These include: sucrose, maltose, dextrose, fructose, glucose, galactose, lactose, high fructose corn syrup.

Unfortunately, it doesn’t end here. The following are all sugar: cane juice, dehydrated cane juice, maltodextrin, corn syrup, caramel, brown sugar, malt syrup, agave syrup, fruit juice concentrate, maple syrup, honey and molasses.

USING THE NUTRITION FACT TABLE

A lot of people tend to focus on the number of calories in a product. While it is important. It’s not only the calories that count. Here are some quick tips when reading the nutrition fact table:

START BY CHECKING THE PORTION OF REFERENCE 

All values in the Nutrition Facts table represent a specific amount of food. Be sure to compare this amount with the amount that you are actually consuming.

For example: If a 240 ml milk brings you about 11g of carbohydrates, evaluate if your intake corresponds to that same quantity or more and this by checking the amount you usually drink.

CHECK THE % DAILY VALUE 

Fiber 

They are found in the right column on the label and can help you make informed food choice. A useful tip is to look at the % daily value of fiber in the chosen product. Fibers play a role in regulating blood sugar levels. Therefore, the more fiber you have in a product the better. As easy way to verify that is to look at the percentage. If a particular food product has 5% or less fiber per portion, it means that the fiber content in this product is low. On the other hand, a percentage equal or superior to 15% means that this product is high in fiber.

Saturated, Trans fats and sodium 

Since people with diabetes are at risk of having cardiovascular diseases, it would benefit to check also the percentage value of the saturated and Trans fats (bad fats) and sodium. In this content, aiming for  5% or less is ideal.

Finally, if you feel hesitant between similar products, use the % daily value to compare and pick the best option. However, make sure they both have the same portion of reference.

LOOK FOR THE FIBER CONTENT AND SUBTRACT IT FROM THE TOTAL OF CARBOHYDRATES 

Diabetes is all about blood sugar control and one way to do that is to know approximately the amount of sugar a product is giving you per portion. This is especially true for those with type 1 diabetes and who have uncontrolled type 2 diabetes. Fiber is highly encouraged int he diet because it’s not digested and therefore it will not affect blood sugar levels. In fact, some types of fibers such as soluble fiber found in oat bran, legumes (beans, peas, and lentils), and fruits high in pectin can actually help control blood sugar levels.

Here is an example of a nutrition label and how we can deduct fiber from the total carbohydrate amount:

As we can read from the label, this product has 10 grams of carbohydrates in one cup. From these 10 grams, 5 grams are dietary fiber. Therefore, the total amount of carbohydrate to be considered is 5g.

BOTTOM LINE

Understanding nutrition labels will make your grocery shopping experience way easier as you will be making more informed food choices. Here is a list of some grocery shopping tips:

  • Don’t go on an empty stomach and check your blood sugar levels before you go.
  • Focus on fresh fruits and vegetables of all colours. Frozen versions are also good but avoid buying sweetened frozen fruits.
  • Try to choose more complex carbohydrates such whole grain products. Aim for 2 grams of more of fiber per portion.
  • If you want to buy biscuits/crackers look for those that have less than 20 grams of carbohydrates per portion and less than 5 g of fat.
  • Explore non-animal sources of proteins such as beans and lentils least once a week. They not only contain protein but they are excellent sources of fibers.
  • Go more for lean proteins, fish high in omega-3 and egg whites.
  • Aim for unflavoured dairy products. Flavored versions tend to be higher in sugar.
  • Pick low sodium or no salt-added products.

If you’re looking for one-on-one nutrition counselling for yourself, feel free to check out my service.  

the-prolonged-breast-milk-jaundice-journey-two-months-photo

The Prolonged Breast Milk Jaundice Journey (Two Months)

经常在社交媒体的群组里看到父母们为了刚出世就全身泛黄的小宝宝在发文求救,寻求最快退黄疸方式。身为父母的我们,每当听到小宝宝扎针抽血时的哭喊声,一定会心如刀割,心急如焚。所以才会到处寻找各种偏方,希望宝宝少受一点扎针之苦。

7年前的第一胎,曾经历长达两个月的母乳性黄疸。所以这一胎,我已提前为肚子里的两个宝宝即将会经历黄疸治疗做好一切的心理准备。

我的双胞胎宝宝终于在5月15日来到了我们的身边。

相信有follow我的 IG 的小伙伴们一定知道,我在过去的两个月里到低经历了什么。我们在COVID-19疫情最严峻的时期频密的往返 KK (Klinik Keshitan),带宝宝们各种验血验尿,两次进院照灯,最终被refer到了巴生中央医院 (HTAR) 的儿科专科。

新生儿黄疸 (Neonatal Jaundice, NNJ),正常吗?

新生儿的红血球(Hemoglobin)比成人多,它们的寿命也不长。当新生儿出生后,开始哭泣呼吸,肺循环须提供充分的氧气,这时体内过多的红血球因而被破坏。红血球被分解后,产生未结合胆红素(Unconjugated Bilirubin)。所以这意味着,这时新生儿体内会产生很多的胆红素。一般,胆红素不会引起黄疸,因为肝脏会代谢它并将其排出到肠道中。可是,因为新生儿肝功能尚未成熟,未结合胆红素无法有效经由肝脏代谢排出体外,因此沉积在皮肤表面而导致皮肤甚至巩膜(sclera)变成黄色。所以,黄疸是新生儿时期正常的生理现象。

新生儿黄疸分为生理性及病理性。

生理性黄疸 (Physiological Jaundice)

一般来说,足月宝宝的生理性黄疸通常是在出生后2~3天才出现的,第4天至5天达高峰期,一星期后就会慢慢消退,消退的时间一般不会超过2周。早产儿因为代谢能力差,黄疸消退的时间可能拖比较久,可延长至3周之久。 生理性黄疸通常不需要特殊治疗,除非黄疸出现过早或升高的速度太快、胆红素指数偏高。一般,父母只需在家观察,继续母乳喂养,1-2周后黄疸就会慢慢消退,不会对宝宝造成任何伤害。这就是为什么有些宝宝在满月前黄疸指数就已恢复安全水平,无需天天跑KK验血。

病理性黄疸 (Pathological Jaundice)

如果孩子出生后24小时内出现黄疸,或者黄疸发展迅速、甚至有贫血、体温异常、呕吐、大小便颜色异常(大便颜色是浅灰白,浅黄色,浅绿色;小便颜色是Teh-O色)、不爱喝奶、嗜睡,消退后又复发或者持续时间长,这种多属病理性黄疸,应立即就诊。 因为我曾有GBS positive 的病史,虽然在剖腹产手术前已施打了抗生素,为了安全起见,在出生后,当天晚上弟弟就安排入NICU观察,姐姐则安排在SCN (Special Care Nursery) 观察。第二天一早,弟弟已被transfer回SCN。吃了早餐,我就到SCN探望两个宝宝。  和医生沟通后,宝宝们都很健康,为了排除细菌感染或败血症(sepsis),需要等待验血报告,另外我特意交代医生一定要观察宝宝们是否有黄疸。 不出我所料,午饭后,我回到SCN 时,宝宝们已经在进行照光治疗(Phototherapy),所以暂时不能出院。

Audrey
Avery

接着,验血报告显示没有细菌感染,但是宝宝们有黄疸,需要继续照光治疗。在医院呆了4天3夜,医生让我们出院回家,并交代说一定要到住家附近的KK预约回诊,并接受黄疸检查。

Heel Prick Test

在回KK复诊期间,宝宝会被安排做Heel Prick Test。KK 的医生一直会重复的问宝宝的大便和小便的颜色和次数?喝母乳or配方奶?多久喝奶一次?一次喝多少?父母们在家必须把这些给记录好。同时也会检查宝宝的体重, 确保宝宝的体重没有下降

(here)。 

延长性黄疸 (Prolonged Jaundice) 

足月宝宝出生后14天或早产儿出生后21天,黃疸仍旧持续,皮肤和眼白部分比较黄。延长性黄疸通常无害,大多数是因为母乳性黄疸 (Breast Milk Jaundice),但有些也可能起源于其他病理问题(溶血性黄疸或感染性黄疸)。 两次的入院照光治疗是day 7 和 day 14。需要入院的胆红素水平是257 umol/L以上,而宝宝们的指数也超过了这个level。宝宝们的胆红素水平在照灯治疗后都有显著的下降。可是过后的几天回到KK验血,胆红素水平又往上飙。就这样我们风雨无阻的往返KK验血。 因为持续性黄疸,宝宝们的日龄也已超过了21天,这时KK的医生安排宝宝们采集血液样本和尿液样本来排除其他延迟性黄疸的可能原因,例如泌尿道感染 (UTI),败血症(Sepsis) ,甲状腺功能低下 ,肝功能衰竭。 引起黄疸的另一个比较严重的原因是肝脏问题:胆道闭锁 (Biliary Atresia) 胆道闭锁 (Biliary Atresia) 是肝脏通向肠道的胆管受到损伤,阻滞了胆汁流出肝脏。若及早发现,可在在60天以内做手术以恢复胆汁引流,以減少死亡或换肝的机率。 这就是为什么 KK 的护士会死缠烂打,穷追不舍,天天打电话来问宝宝的黄疸指数是多少,确定宝宝的黄疸指数下到安全水平才会罢手!

因为延长性黄疸, 所以宝宝们也被refer到了巴生中央医院的儿科专科。来到中央医院也免不了抽血验尿。抽血比在KK 用的Heel Prick Test更加准确。两个宝宝小小的手被无数的针孔扎过,站在门外听到宝宝哭,我只能和老公互相安慰。在排除了以上提到的潜在风险后,两个宝宝体重增加正常,纯母乳喂养,排便次数多,排便量大,尿液清澈,总体情况良好。医生最后告诉我,应该是母乳性黄疸

母乳性黄疸 (Breast Milk Jaundice) 

一般喝母乳的新生儿,黄疸会持续比较久,这是因为母乳中含有一种女性荷尔蒙,会抑制新生儿肝脏酵素的活性,使其无法代谢处理胆红素,导致持续性的黄疸。 另一方面可能因为新生儿一开始喝母乳,奶量还不是很多,当摄取奶量不足时,可能出现轻微脱水,便便排出延迟,增加肠、肝循环,血液中未结合胆红素增加而出现黄疸。 在这个时候,很多妈妈听到 “母乳性黄疸” 会想要马上停止母乳喂养。

NO! NO! NO!!

事实上,解决母乳性黄疸的方法就是母乳本身!黄疸会随着时间慢慢消退,母乳性黄疸的宝宝应继续母乳喂养。

偏方有用吗?

如今网络媒体资讯发达,在各个群组里,我还是会时不时看到一些完全没有科学根据的 “退黄偏方”。上一胎,因为是新手妈妈,人在国外坐月子,当时宝宝黄,心急如焚的家人到处问人,而以下这几种方式是最多人建议的:

  • 喂宝宝喝羊奶?
  • 喂宝宝喝青葡萄汁?
  • 用黑狗啤酒给宝宝洗澡?
  • 用特制药材包给宝宝洗澡?
  • 坐月子期间不要吃黄色的食物?不要给宝宝穿黄色的衣服?

当然,“退黄偏方” 不只这几种方法而已,只要你在社交媒体的群组里发一个求救贴,底下一定会有很多“我试过了xxx” ”这个对我宝宝有效,黄很快退了” “给宝宝喝XX” 等等的留言。 如果你把前面的文字已读明白了也了解了什么是新生儿黄疸,今天不管你在网上看到,还是听谁谁谁推介超级有效退黄偏方,你都不会随便尝试,因为你知道只有母乳才能解决母乳性黄疸,只是退黄的时间会比较久。

坐月饮食需要戒姜戒中药吗?

在宝宝出生前,我已经和来帮我做月子的老妈说好月子餐要清淡一些,可用姜烹煮,但无需大量使用姜。另外因为需要哺乳+亲喂,暂时也不吃/喝有酒精的食物。在整个做月子期间,不管我是有吃还是没吃姜,酒, 中药,红枣水,宝宝们的胆红素水平还是持续上升,完全不受我的饮食影响。

到目前为止,没有证据表明生姜和黄疸之间存在直接关联;熟食中的酒精本身也不会引起黄疸。红枣水含有丰富的铁和维生素,做月子期间/哺乳都需要大量的摄取水分,所以多补充水分并没有害处。

总而言之,我在整个月子期间吃的均衡适量多样化,红枣水,炒米茶,中药汤,我都有断断续续的喝。姜是适量的用在调味上,也没怎么吃。置于用来炖补的酒,在第一个月里我是完全没有碰,只用了米酒酵素来烹饪。

如果你想在坐月子期间暂时戒姜戒中药,好让宝宝的黄疸退的快一点(有些宝宝是生理性黄疸,两个星期黄疸就渐渐退了),你也是可以在之后才补上这些食材。

宝宝黄疸指数居高不下,要怎么办?入院照灯须知

不管是生理or 病理性黄疸,只要慢慢增加哺乳次数以及奶量,黄疸自然能改善。总之,多喝奶(每1-2小时),多排便,多小便,黄疸就会退的很快。如果胆红素超过照光标准(257 or 308 umol/L),医生就会建议入院进行照光治疗。照光治疗可以安全和有效的迅速降低黄疸,因为蓝光治疗能改变胆红素分子的形状和结构,使它们能随尿液和粪便排出体外。 在治疗期间,宝宝会脱光衣服,只穿上尿布和戴上眼罩,这种光不是紫外线,防护屏会过滤掉可能发出的紫外线,所以爸爸妈妈不需要担心宝宝晒伤。 假如黄疸指数真的非常高,可能需要进行换血(Exchange Transfusion)。因为黄疸指数太高,不及时治疗,胆红素有可能会进入脑细胞,干扰脑细胞的正常活动和功能,伤害到神经系统,造成永久性神经系统损害,脑性麻痹 (Cerebral Palsy) ,听力丧失,智力落后等,更严重的还可能危及生命。

“居家照光治疗服务”可行吗?

在宝宝们第二次入院前,由于疫情逐渐严重,想要减少出入医院的次数,我有尝试询问医生,我们能否租借仪器回家为黄疸宝宝照灯。医生的回答是 “NO”。他认为照光治疗必须在儿科医生和专业护士的观察和指导下进行,不是租借仪器回家照个一两天就当没事了,而且宝宝隔天还是必须回诊与抽血,追踪治疗。因此,他建议如果黄疸指数居高不下,入院治疗才是最快最安全的方式。

宝宝们入院照灯 

因为疫情关系,宝宝们入院照灯,妈妈是不能入院陪同宝宝过夜。一天只有两次探望时间。所以,两个宝宝入院后,我只好在家把母乳挤出来,然后等到探望时间或一大早送过去医院给护士们。 在这里要提醒大家,如果想要宝宝入政府医院进行照灯治疗,一定要带上平时到KK 产检的Pink Book。因为入院时,医生会问很多问题,关于你整个怀孕过程,宝宝在哪家医院出生,宝宝的各种体征,宝宝的喂奶状况等等。 出入医院那么多次,马来语不好的我,都用英语和政府医院的医护人员沟通,不管我问什么问题,他们都很耐心的回答我。

新生儿黄疸可以预防吗?

不能。新生儿黄疸是正常的生理现象,我们无法在怀孕过程预测哪些胎儿出生比较有可能出现黄疸。不管你在怀孕期间,还是坐月子期间,吃什么用过什么都不会把新生儿黄疸的几率降低。想要黄疸退的快,妈妈们在生产后一定要尽早哺乳,初乳有催便效果,胆红素即可迅速排出体外。

总结

新生儿黄疸有哪个新手爸妈不担心的呢?听信坊间流传的没有科学根据的偏方,盲目使用偏方很可能会给宝宝的肝脏带来更多的负担,延迟让宝宝接受应有的治疗,对宝宝的黄疸并不会有帮助。不管你是在政府还是私人诊所follow up, 是生理性黄疸还是病理性黄疸,一定要听从医生护士的建议,准时回诊。 女儿Audrey 在第41天的验血报告里,胆红素已降到56 umol/L;儿子Avery的胆红素在第51天已降到179umol/L。

新手爸妈们,你们是否和新生儿黄疸对抗过呢?请留言分享!