Smoothies for Babies A Dietitian’s Guide to Smart Choices

Smoothies for Babies: A Dietitian’s Guide to Smart Choices

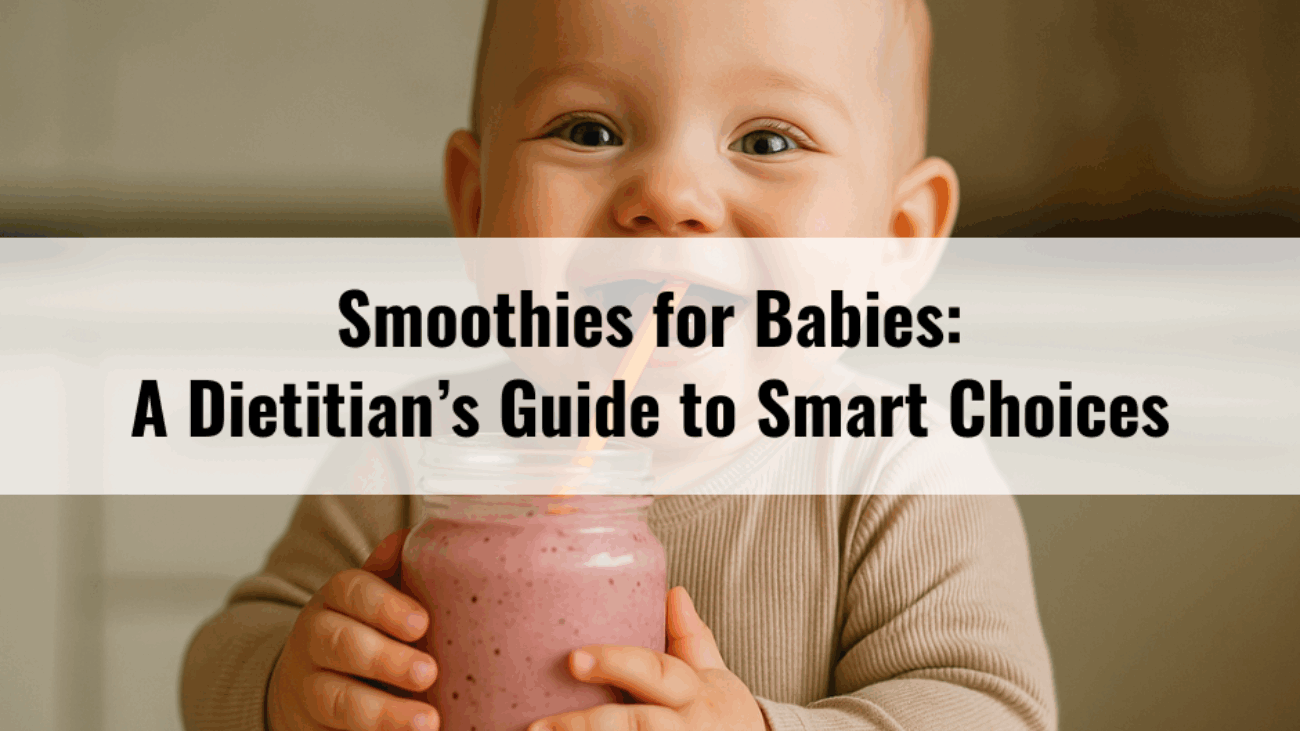
Smoothies can be a fun, nutritious, and practical way to offer a variety of nutrients to babies, especially on busy days or when appetite is low. As a dietitian, I appreciate how smoothies can incorporate fruits, vegetables, healthy fats, and protein into one easy-to-consume blend. They’re also a helpful option when introducing new flavors or allergens in a gentle, familiar form. That said, while smoothies have their place, they should complement, not replace whole foods during the complementary feeding stage. Babies need to explore different textures and practice chewing to support oral development and build long-term healthy eating habits. Whole foods remain the foundation, and smoothies are simply one of the many tools we can use to support a positive feeding experience.

Let me address some common myths and questions about smoothies.

1) ARE SMOOTHIES SUITABLE AS A STANDALONE SNACK OR COMPLETE MEAL?

It depends on what you include. A basic fruit and milk blend is more of a snack. For a smoothie to qualify as a meal, it needs a balance: protein (e.g., Greek yogurt, tofu), healthy fats (e.g., avocado, nut butter, ground flax seeds, chia seeds), and an iron rich food (e.g., fortified cereal, spinach). On busy days when convenience is key, such as breakfast on the go, a well-balanced smoothie can serve as a standalone option. On other occasions, it’s best paired with finger foods like toast or cheese cubes to support chewing skills and sensory exploration.

2) WHOLE FRUITS OR SMOOTHIES?

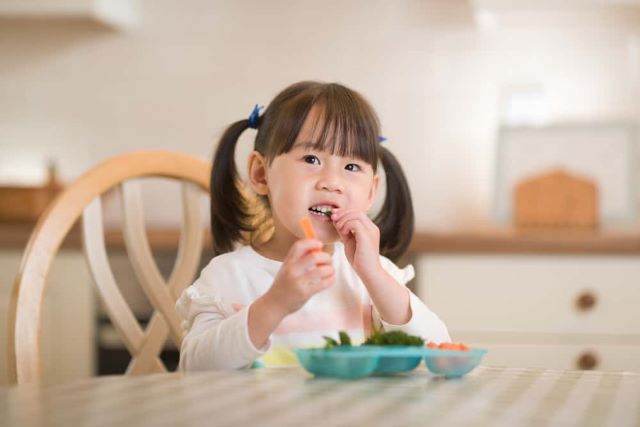
Offering whole fruits is important, especially for supporting oral-motor development, like biting, chewing, and learning to manage different textures. These are key skills that build the foundation for lifelong eating habits. However, smoothies can still play a supportive role, especially in the early months of starting solids. For babies who are just beginning to explore new tastes and textures, a smoothie can feel familiar, similar to purées, and offer a gentle introduction to a wider variety of nutrients. The key is balance: smoothies can complement whole foods, but they shouldn’t replace opportunities for your baby to touch, hold, bite, and chew real foods.

3) WHEN IS THE RIGHT AGE TO INTRODUCE SMOOTHIES?

Smoothies with a puréed texture can be introduced from around 6 months of age, once your baby is developmentally ready to start solids. However, it’s important to pay close attention to what goes into the smoothie. Many recipes contain a significant amount of milk or milk alternatives, which can displace iron-rich foods that are critical at this stage. For that reason, I generally recommend waiting until around 9 months before offering smoothies more regularly especially those made with milk as a main ingredient. Early in complementary feeding, our priority is to maximize iron intake and absorption to support your baby’s growth and brain development.

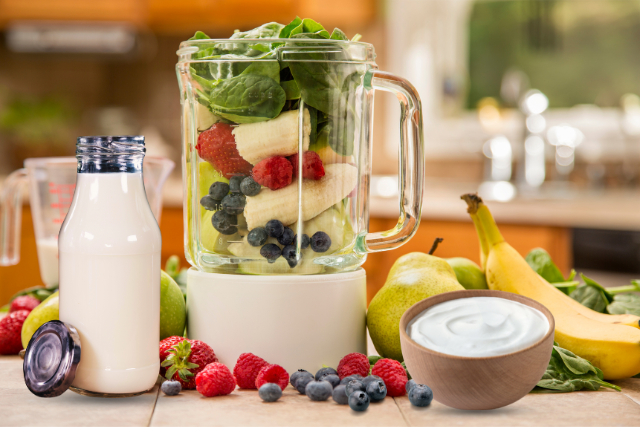
4) WHAT BLENDER WORKS BEST?

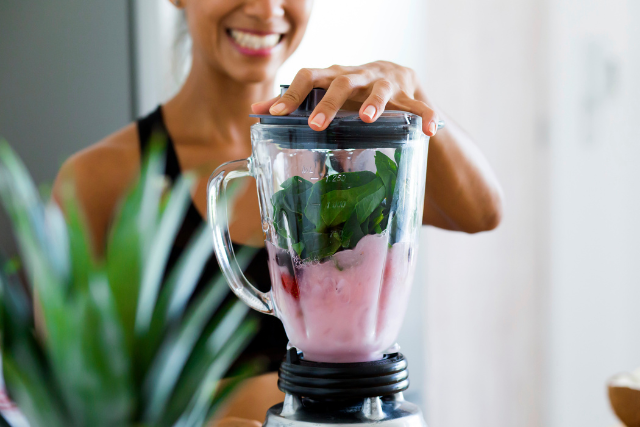
You don’t need an expensive, high-powered blender to make baby-friendly smoothies. Most standard or mid-range blenders can handle soft fruits and liquids well enough to create a smooth consistency that’s safe for babies. That said, if you plan to regularly blend tougher ingredients like frozen fruit, nuts, or leafy greens or make your own baby purées or thinker smoothie, a high-powered blender can be a worthwhile investment for smoother blends and long-term use in the kitchen.

5) SHOULD I ADD PROTEIN OR COLLAGEN POWDER?

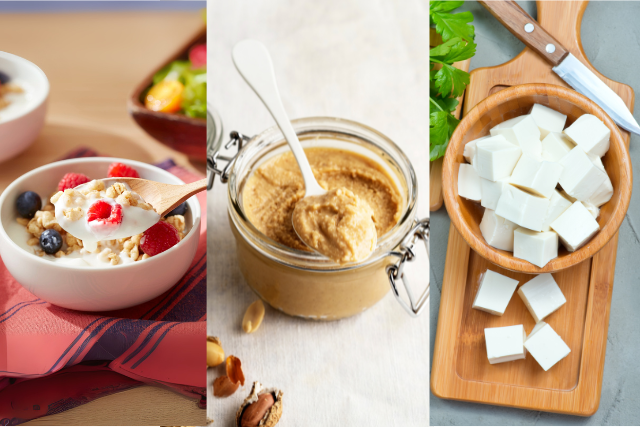
For babies under two, protein needs are typically met through a balanced diet with whole foods. Adding protein or collagen powders is not only unnecessary but may also introduce excess nutrients, added sugars, or unwanted ingredients like fillers and preservatives. Unless specifically recommended by your pediatrician or dietitian, it’s best to offer natural protein sources such as plain yogurt, tofu, nut butters, or cooked legumes. These whole foods provide protein along with other important nutrients without the risks that can come with supplements.

6) WHAT ABOUT SUGAR IN SMOOTHIES?  

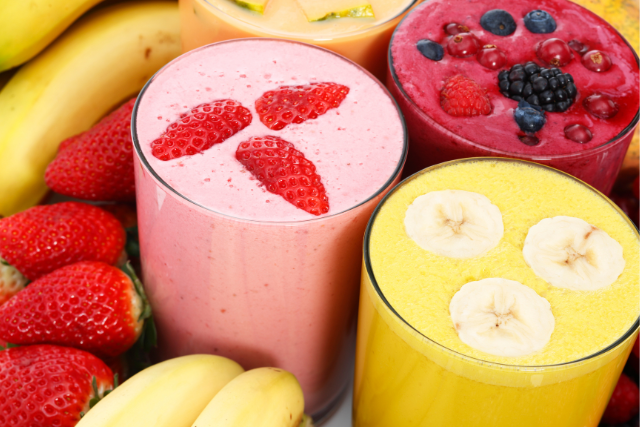
This is a common concern and an important one. While fruits do contain natural sugars, when they’re blended into a smoothie along with ingredients like yogurt, milk, healthy fats, and fiber (vegetables), the overall impact on blood sugar is much more balanced. Unlike fruit juice, which lacks fiber and protein, a well-composed smoothie retains the whole fruit and offers a combination of nutrients that help slow down sugar absorption. Think of it as “pre-chewed” food, nutritionally similar to what your baby would get from eating those ingredients individually. The key is using whole, minimally processed ingredients and avoiding added sugars or sweetened products.

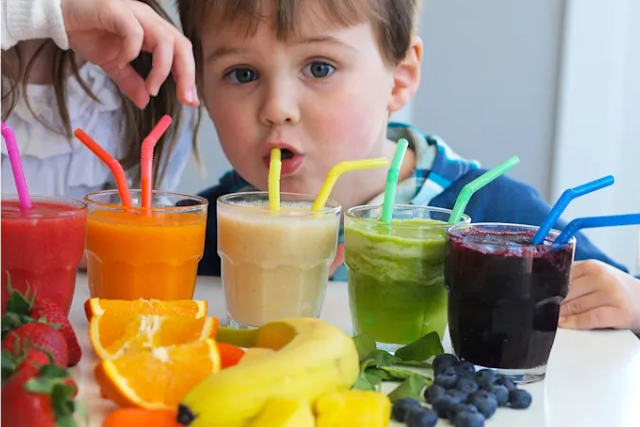
7) WHAT IF MY BABY STARTS PREFERRING SMOOTHIES OVER WATER OR MILK? 

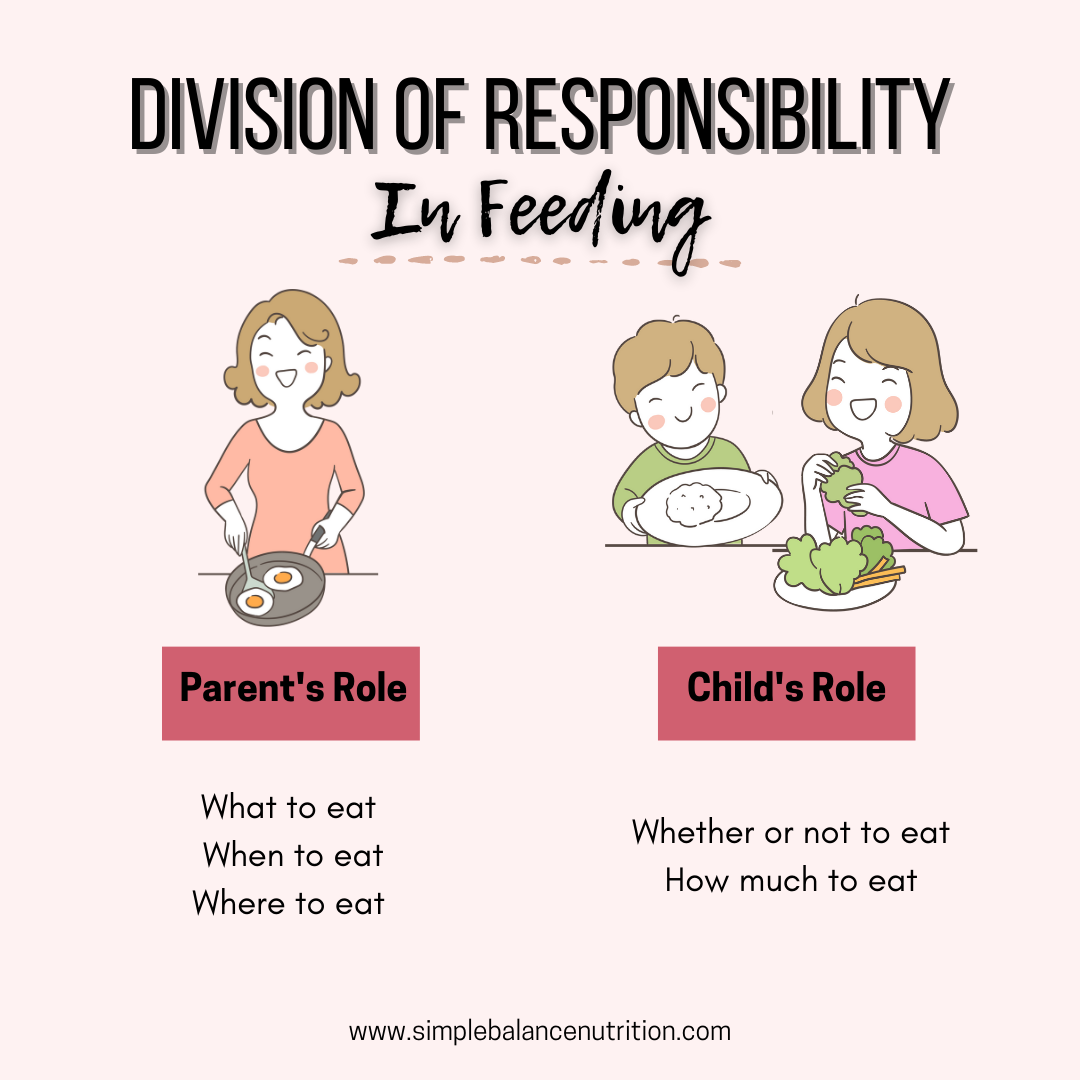
This is a valid concern, especially if smoothies become a frequent part of your baby’s diet. To help prevent over-reliance, I recommend using Ellyn Satter’s Division of Responsibility feeding model, a widely respected approach developed by a dietitian and social worker. In this model, caregivers decide what, when, and where food is offered, while the child decides if and how much they eat. This means you’re in control of when smoothies are offered and how often they appear on the menu.

To avoid smoothies becoming a preferred or overly fixated food, keep their presentation neutral. Serve them occasionally as part of a meal or snack, rather than labeling them as a treat or reward. When we overemphasize a particular food, especially in an excited or restrictive way, it can create a “forbidden fruit” effect, making that food more desirable than it needs to be. Keeping smoothies in regular rotation, without the hype, helps your child view them as just another food option among many.

8) WHAT MILK SHOULD I USE IN SMOOTHIES?

Whole cow’s milk or unsweetened fortified soy milk is ideal, as their nutrient profile closely matches infants’ needs. If allergies are a concern, work with a dietitian to find suitable alternatives. 

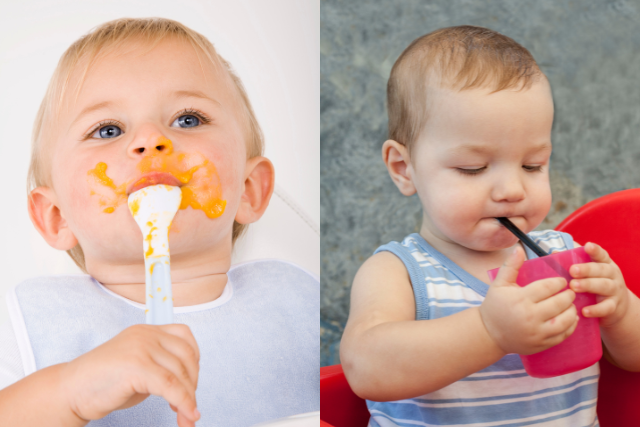
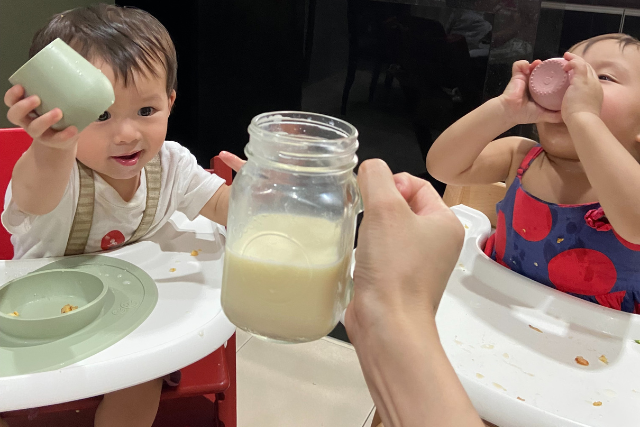
9) HOW TO OFFER SMOOTHIES? SPOON, STRAW, OR CUP, WHAT’S BEST? 

  • Spoon: For thicker, smoothie-bowl-style textures, encourage self-feeding by offering baby-friendly spoons. This supports fine motor skills and independence at mealtimes.

  • Straw/cup: For drinkable smoothies, the texture should be smooth enough to sip without much effort. Use a sturdy straw or open training cup to support oral motor development. Avoid thin straws, as they can be difficult for babies to use and are harder to clean properly.


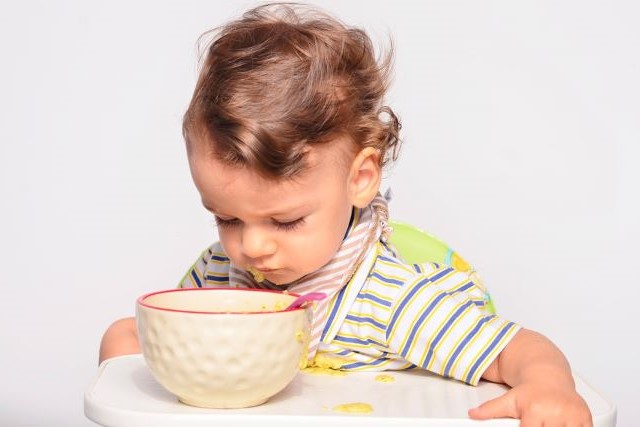
10) WILL SMOOTHIES SUPPRESS APPETITE? 

Not necessarily. Portion control matters more. A small smoothie may supplement hunger, while a larger one may serve as a meal replacement. Always leave room for future meals and respect the baby’s internal hunger cues.

11) IS THERE A RISK OF DEVELOPING A “SWEET TOOTH”? 

Only if sweet smoothies dominate your baby’s diet. Babies naturally prefer sweet flavors, but that doesn’t mean they’re destined to crave only sweet foods. By regularly offering a variety of tastes including savory, sour, bitter, and umami, you’ll help your baby develop a more balanced palate and reduce the likelihood of strong sweet-food preferences later on. Variety is key when it comes to shaping healthy, adventurous eaters.

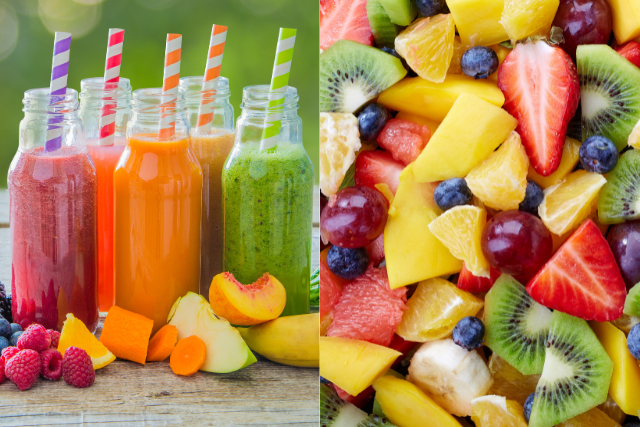
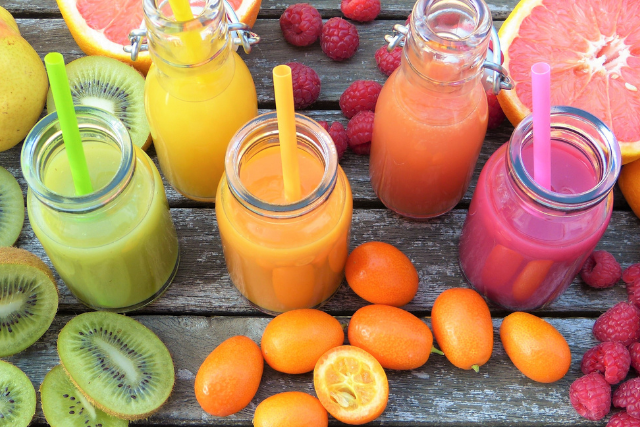
12) ARE SMOOTHIES THE SAME AS JUICE? 

No! they’re quite different. Unlike juice, which often contains only the extracted sugars from fruit and lacks fiber, smoothies are made from whole foods and retain their natural fibers and nutrients. When prepared thoughtfully with a mix of fruits, vegetables, protein, and healthy fats. Smoothies offer a much more balanced and nourishing option. Just be sure to avoid using fruit juice as the main base, as this can increase the sugar content without adding much nutritional value.

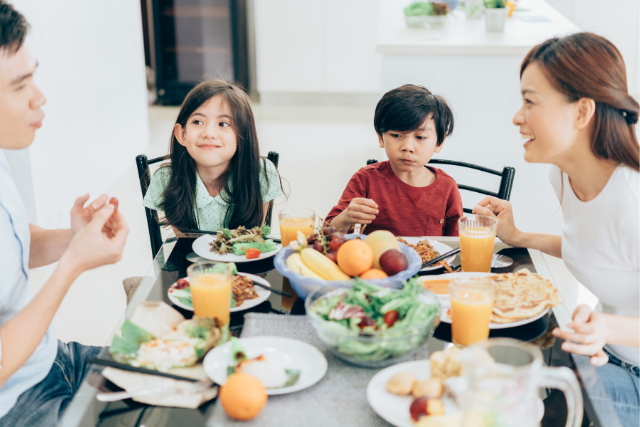
PRACTICAL TIPS FOR BUSY FAMILIES 

Introducing solids can feel overwhelming, especially for busy parents. Smoothies can offer a flexible, nutritious option when used thoughtfully alongside whole foods. Here are practical, evidence-informed tips to make smoothies work in your baby’s routine without compromising on safety or developmental goals.

1. Batch Smoothie Prep for Convenience

To save time, prepare a large batch of smoothie and portion it into silicone ice cube trays or small freezer-safe containers. Once frozen, transfer the cubes into a labelled zip-top bag for easy access. Defrost small portions overnight in the fridge or gently warm in a water bath (never microwave directly in plastic). This method helps reduce food waste and ensures you always have a nutritious option on hand.

2. Iron Integration is Key

Iron is a critical nutrient during the first year of life especially from 6 months onward. To ensure smoothies support your baby’s iron needs, consider blending in iron-rich additions like:

  • A spoonful of iron-fortified baby cereal

  • A handful of baby spinach (lightly steamed for better digestion)

  • A small amount of cooked red lentils. Pairing these with a vitamin C-rich fruit like mango or strawberry may help enhance iron absorption.

3. Support Allergen Tolerance Through Early Introduction

Smoothies can be a gentle and practical way to introduce common allergens. For example:

  • Add a spoonful of full-fat plain yogurt (dairy)

  • Blend in soft tofu or fortified soy milk (soy)

  • Include smooth peanut butter, almond butter, tahini, or sunflower seed butter. Start with small amounts and offer the same allergen on multiple occasions over time to support tolerance, following your pediatrician’s guidance, especially if there’s a family history of allergies.

4. Encourage a Variety of Flavours and Textures

To help your baby develop a well-rounded palate, rotate smoothie ingredients regularly. Introduce a mix of:

  • Fruits (banana, mango, berries, pear)

  • Vegetables (carrot, beetroot, spinach, zucchini)

  • Whole grains (oats, quinoa flakes)

  • Healthy fats (avocado, chia seeds, ground flaxseed).

Exposing your baby to diverse flavors including slightly bitter or earthy tastes can prevent food neophobia later and make mealtimes more enjoyable.

5. Keep Safety Front and Center

Smoothies should always be offered under supervision, just like any other food. Follow these safety tips:

  • Ensure a drinkable consistency for younger babies to prevent choking

  • Avoid large chunks of hard or frozen foods unless fully blended

  • For BLW-style eating, you can also serve smoothies as a thick dip or smoothie bowl with soft dippers (e.g., steamed veggie sticks or toast fingers)

  • Use open cups or straw cups designed for babies to promote oral motor skills
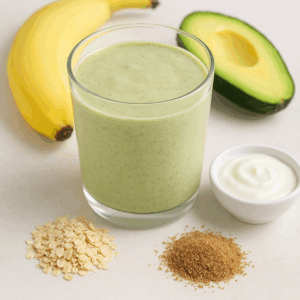
 

Balanced Smoothie

Ye Ting Tan
5 from 1 vote
Servings 1

Equipment

  • 1 Blender

Ingredients
  

  • 1/2 ripe banana (frozen)
  • 1/4 avocado
  • 1/4 cup plain whole-milk yogurt (or fortified soy)
  • 1 tbsp iron-fortified oat cereal (or a small handful of spinach)
  • 1/4 tsp ground flaxseed
  • 1 tsp unsweetened nut/seed butter (optional)

Instructions
 

  • Blend until smooth, adjust consistency with breastmilk, formula, or water. Serve in bowl or cup depending on preference.

Want more tips on how to build a balanced and nourishing smoothie?
Read this post for practical ideas and ingredient combinations that support your family’s health whether you’re starting solids, navigating picky eating, or just looking for easy, nutritious options.


BOTTOM LINE

Smoothies can be a nutritious, flexible addition to a baby’s diet, especially for busy families navigating the early stages of solids. When made with whole food ingredients and offered in age-appropriate ways, they support exposure to a variety of flavors and nutrients. However, they should not replace opportunities for babies to explore textures and develop chewing skills through whole foods. As a dietitian, I encourage caregivers to use smoothies as a complement to balanced meals, introducing them gradually, varying ingredients, and trusting their baby’s ability to self-regulate intake. With the right approach, smoothies can be part of a healthy, positive feeding journey.

If mealtimes with your little one often feel like a battle, you’re not alone. My online class Peaceful Mealtimes is designed to give you practical tools, proven strategies, and confidence to help your child eat better without the stress and power struggles. Join today and bring calm back to your family table.

Update: August 22, 2025

Helping Picky Eaters Thrive Tips for Creating Stress-Free Mealtimes

Helping Picky Eaters Thrive: Tips for Creating Stress-Free Mealtimes

Feeding a picky eater can be challenging, often turning mealtimes into battles filled with stress, tears, and frustration. When a child refuses multiple meals or consistently rejects new foods, it’s natural for parents to feel concerned and even resort to rules like the “three-bite rule” or offering dessert only if dinner is eaten. However, these approaches often increase the stress of mealtimes, leading to more food refusals, tantrums, and anxiety. This guide will help you navigate feeding a picky eater in a way that fosters a positive relationship with food and reduces mealtime stress.


WHY DO CHILDREN BECOME PICKY EATERS?

Picky eating often begins as children transition from infancy to toddlerhood, as their growth slows and their willingness to try new foods declines. This can be a normal part of development, but other factors may contribute:

  1. Routine and Structure
    • Consistent mealtime routines help children build an appetite and associate specific times with eating.
    • Regular meals and snacks about 2.5 to 3 hours apart, with only water offered in between, support a balanced appetite.
  2. Temperament
    • Some children may naturally be more sensitive or cautious, and this can affect their willingness to try new foods. Consider your child’s temperament and how it might influence their eating behaviors.
  3. Medical or Sensory Issues
    • Conditions like acid reflux, constipation, or sensory processing challenges can make eating uncomfortable, contributing to picky eating.
    • Mechanical issues, such as difficulties with chewing or swallowing, can also play a role. If you suspect an underlying issue, consult a healthcare provider for tailored advice.


THE DIVISION OF RESPONSIBILITY

Registered dietitian Ellyn Satter introduced a model called the Division of Responsibility (DOR), a framework that creates boundaries while honoring a child’s natural appetite and preferences. DOR outlines distinct roles for both the parent and the child, allowing parents to guide mealtimes without pressuring children to eat. By respecting these roles, parents can ease the stress around meals and help children build lifelong healthy eating habits.

PARENT’S RESPONSIBILITIES IN FEEDING 

1. WHEN the child eats

  • By age one, children typically benefit from three meals and two or three snacks a day.
  • Snacks should be scheduled and not constant, as this allows children to build up a natural appetite before meals.

2. WHERE the child eats

  • Family meals at the table provide consistency and foster positive social interactions around food.
  • Studies show that children who have regular family meals tend to make healthier choices, perform better academically, and have a lower risk of engaging in risky behaviors.

3. WHAT the child is offered

  • Parents are responsible for choosing which foods to offer. Aim to provide a balanced meal with diverse food groups. Avoid becoming a “short-order cook” by preparing special meals solely to meet your child’s preferences.

CHILD’S RESPONSIBILITIES IN FEEDING 

1. HOW MUCH to Eat

  • Allow children to decide how much food to eat, respecting that their appetites can fluctuate day-to-day.
  • Avoid pushing children to “clean their plate” to help them develop a healthy relationship with their hunger and fullness cues.

2. IF They Choose to Eat

  • Especially with toddlers and young children, it’s normal for them to occasionally refuse a meal entirely. Trust that they are listening to their body’s signals, and avoid turning this into a power struggle.


TIPS FOR REDUCING MEALTIME STRESS

To create a positive and low-pressure mealtime environment, consider these strategies:

1. Respect Your Child’s Appetite

  • If your child isn’t hungry, avoid force feeding. Forcing a child to eat can lead to negative associations with mealtime and weaken their sensitivity to hunger cues and fullness cues.

2. Remove Pressure

  • Avoid incentives or ultimatums like “two more bites for dessert” or “if you finish, you get screen time.” Even well-intentioned praise for eating can increase pressure. Instead, keep mealtimes relaxed and focus on enjoying the experience as a family.

3. Limit Distractions

  • Minimize iPads, TVs, and toys during meals. Creating a calm environment allows children to focus on their food and listen to their body’s signals of hunger and fullness.

4. Get Kids Involved in Food Prep

  • Let children help with age-appropriate tasks like rinsing vegetables, stirring batter, or setting the table. Involving them in meal preparation encourages a positive attitude toward food and can increase their willingness to try new things.

5. Sneak in Nutrients Thoughtfully

  • While “sneaking” vegetables or other refused foods into favorite dishes should not replace exposure to whole vegetables, it can be a helpful strategy for nutrient intake (short term only). Smoothies, sauces, and casseroles are great options for adding hidden veggies or proteins.


BOTTOM LINE

Picky eating can be frustrating, but it’s helpful to approach mealtime with patience and flexibility. By implementing a balanced approach to your child’s feeding responsibilities, involving them in the kitchen, and setting consistent routines, you’re laying a strong foundation for positive eating habits. Picky eating can be a phase, and with patience, your child will likely develop a healthier relationship with food over time.

I completely understand how challenging it can be to make these changes, and I appreciate the daily struggle of living with a child who has a limited diet. It can be overwhelming and exhausting, and many parents tend to unfairly blame themselves. You’re not alone! If you need more personalized help, I’m here for that too. I’ve successfully worked with many families to create custom action plans to get a child—or the whole family—back on track with healthy eating.

Looking for support in implementing the Division of Responsibility in Feeding in your household? Check out my Peaceful Mealtimes online course here.

Update: August 20, 2025

Tips To Help Children Be Mindful About Sweets

Tips To Help Children Be Mindful About Sweets

When it comes to desserts and treats for children, finding the right balance is crucial. Restricting sweets can backfire. Research indicates that the more attention we give to desserts or treats, the more fixated a child becomes. This fixation can lead to sneaking and increased consumption, potentially causing children to internalize guilt as they perceive sweets as a forbidden food. However, it’s essential to provide useful tips to help children be mindful of sweets, as giving in to these requests may reinforce the behaviour and lead to further demands.

In this post, I will outline a healthy approach to handling desserts or treats with children.


WHAT IS SWEETS? TREATS? DESSERTS? 

“Sweets” generally refers to foods high in added sugar, calories and/or saturated fats, often consumed as desserts or treats. This category includes items like candy, cookies, cakes, pastries, ice cream, chocolate, chips, and other confectionery products. While they’re enjoyable to eat, it’s important to remember the tips to help children be mindful about sweets. Sweets shouldn’t be served to children under two years old, and their consumption should be moderated in older children. Nonetheless, sweets are a part of life, and it’s essential for parents to teach their children how to enjoy sweets mindfully.

“Treats” and “desserts” can overlap with sweets but may also include healthier options. Treats are indulgent foods often enjoyed occasionally, while desserts are sweet dishes typically served at the end of a meal. Here are some healthy dessert or treat ideas:

  1. Smoothie
  2. Energy bites
  3. Apples and peanut butter
  4. Frozen yogurt bark
  5. Granola bars

These options provide sweetness and satisfaction while also offering nutritional benefits.


TIPS TO HELP CHILDREN BE MINDFUL ABOUT SWEETS  

FLEXIBLE SWEETS POLICY (FSP)

Here are some key points to consider when crafting a FLEXIBLE SWEETS POLICY (FSP) for your family:

1. SERVE DESSERT WITH MEAL NOT AFTER MEAL

“You shouldn’t offer dessert with dinner. They’ll just eat the dessert.”

I know you are worrying that your child will only eat the dessert. And yes, that is a possibility.

But, do you ever remember sitting at the dinner table telling your parents you are full, but you still had room for dessert? I do!

Ellyn Satter, a renowned dietitian and feeding specialist, suggests incorporating a small portion of dessert into dinner to normalize its consumption. Serving dessert with a meal takes away its special power and sends the message that this is just another food we are eating today.

The crucial aspect is to refrain from offering seconds of dessert and allowing children the freedom to consume the meal in any order they prefer. A lot of children will choose to eat the dessert first if it’s offered, but then they will go on to eat the other foods at the meal, too.

By serving dessert with a meal, you’re avoiding the notion of it being a reward only after finishing the meal. Each child should receive one serving of dessert, whether it’s two small cookies, a scoop of ice cream, or a small piece of cake. Surprisingly, in my own experience, serving dessert alongside the meal often results in they eat the dessert first , they will then finish most of their meal.

Instead of using a restriction statement like,

“You can’t have ice cream until you eat your carrots.”

Child learns ice cream are better than other foods and needs to be earned.

Try a neutral statement like,

“Let’s have a scoop of ice cream with dinner, which one do you want?”

Child learns that ALL FOODS can fit into a healthy lifestyle.

Some children might eat the dessert first, like what you are worrying, and some might not even touch anything else at that meal, or some might ask for more dessert. I just want you to know it’s completely normal for children and human beings in general, to enjoy some foods more than other.


2. CALL THE NAME

It’s important to note that a treat in one household might not be considered a treat in another. For example, in my home, we often have baked goods like cookies, muffins, energy balls readily available. We also enjoy freezing grapes, strawberries and bananas and occasionally dipping them in chocolate. In my mind, I considered all of these foods as “treats”, others may have different perspectives.

Regardless of how we define treats, I make a conscious effort not to label any food as a “treat” around my children. Instead, I refer to them by their names, such as “candy”, “Ice cream”, “cookie”, “chocolate covered strawberry.” For younger children, I use terms like “everyday foods” and “fun foods” or “not everyday foods.”

By avoiding categorizing foods as “good” or “bad,” I aim to foster a neutral perspective on food. Using terms like “treats” or “junk” can give theses foods a mystique or imply negatively, such as being forbidden or bad. Ultimately, they’re JUST FOOD.


3. FREQUENCY AND VARIETY

Dessert or treats can be a regular part of a healthy diet, and as a parent, you have the flexibility to decide how often they fits into your family’s routine. Some parents prefer to reserve dessert for weekends and special occasions, while others are comfortable with more frequent indulgence.

You can aim to incorporate dessert into your family’s meals on 3-4 nights per week without any plan in place. Avoid creating a pattern where children only receive dessert when they eat a good dinner.

Offering lots of “healthier” dessert options can help children feel like they have a choice. Consider options such as homemade oatmeal cookies, frozen yogurt barks, energy balls, or ice cream with nuts and fruits.

Using a positive approach, offer dessert as a choice alongside the main meal.

“Would you like fruits or vanilla yogurt with your dinner later?” 

On evenings when dessert isn’t on the menu, establish boundaries by simply stating,

“We’re not going to have any dessert tonight, but maybe tomorrow”

Emphasize a positive approach by saying “YES” to dessert rather than simply denying it.

“It’s not on the lunch menu right now, but we can save some to have with dinner.” 


PORTION CONTROL AND AUTONOMY SWEETS

Occasionally, it’s beneficial to offer unrestricted access to sweets during specific occasions or events where desserts or treats are plentiful, such as parties. For example, at a birthday party, you could place a plate of chips on the table and let your child take as many as they desire. By granting them free rein at the dessert table can be a way to empower them to make their own choices, learn self-regulation, and develop a healthy relationship with sweets.

These occasional opportunities for unlimited dessert consumption align with the tips to help children be mindful about sweets, as you’re teaching your child to listen to their body’s cues of hunger and fullness while also allowing them to enjoy treats in a balanced manner.


SETTING HEALTHY BOUNDARIES OF SWEETS

Implement strategies to neutralize the allure of sweets and promote a healthy attitude towards dessert consumption:

    1. Dessert should not come with conditions, such as finishing vegetables or cleaning the plate.
    2. Dessert should not be treated as a reward or bribe.
    3. Don’t soothe a crying child or anxious preschooler by using sweet food to calm the emotions.


WHAT WORKS FOR MY FAMILY

We’ve adopted a flexible once-a-day policy regarding sweets. On most days, we indulge in treats like dark chocolate, baked goods, or ice cream, though the frequency may vary – weekends tend to have more, while other days might have none at all.

During parties or event celebrations (CNY), my children are encouraged to freely enjoy sweets, provided they remain at the table while doing so. However, if dessert follows dinner about 2 hours later, we sometimes limit the amount, especially if it’s close to bedtime.

Now that my children are growing older (aged ten and three), they often regulate their sweet intake on their own, which has been a positive development. Every family is unique, so while my approach may suit us, others may find success with less frequent sweet offerings.

Your flexible sweets policy should be personalized and aligned with what feels right for your family. However, it’s essential to remain open to adjustments if you sense it’s not working or if your child becomes fixated on food.

Signs that your approach is effective include occasional requests or mild whining for sweets, which is normal. Overall, you should feel that your child is CONTENT  with the frequency of treats and doesn’t overly obsess over them. They may eat a lot of something they haven’t had in a while, but when they are done they stop thinking about it.

Conversely, signs that your approach may not be working include a child who CONSTANTLY asks for sweets and never seems satisfied after consuming them. They might resort to sneaking treats or exhibit excessive indulgence in sweets outside of the home. When these behaviors arise, it’s a clear indication that adjustments to the policy are necessary.


WHAT IF CHILDREN ASK FOR TREATS ALL DAY LONG? 

Establishing healthy boundaries is crucial when faced with persistent requests for treats or sweets throughout the day. Acknowledge that they want it and let them know they will get more at a later time. Better yet, get down to their level and talk calmly.

“I know you really want a chocolate. That’s not on the menu with lunch, but we can save one for dinner!”

“Did you enjoy your cupcake? Let’s leave some so we can have more tomorrow.”

If you don’t have any left, let them know you’ll put it on the grocery list for next time.

“I know you love cookies, let’s put them on the grocery list.”

As a parent, it’s essential to determine what feels comfortable for you and your family. Consider options such as allowing one treat per day or reserving treats for weekends while maintaining a no-dessert rule on weekdays. Having clear policies in place gives you a solid reason to say no when needed, even though your child may express disappointment.

Remember, children look to you to set boundaries and understand what’s appropriate. They rely on your guidance to navigate their choices, especially regarding treats. While it’s essential to stand firm in your decisions, flexibility is also key. If a day becomes particularly indulgent, such as during a school party followed by treats at home, adapt by offering healthier options like fruit for dessert in the following days. Being mindful of these situations helps maintain balance and reinforces healthy eating habits for your child.


BOTTOM LINE 

By following these tips to help children be mindful of sweets, families can create a healthy sweets policy that promotes moderation, autonomy, and a positive relationship with sweets. Remember, prioritizing nutrient-dense foods for the majority of meals provides children with essential nutrients while allowing room for occasional indulgence.

REMEMBER, children under two years of age do not require regular dessert in their diets. Introducing dessert at this age can displace essential nutrients. Therefore, it’s best to offer alternatives like yogurt and fruit. As children grow older, they will have ample opportunity to learn self-regulation around sweets.

Every family is different and some like to eat dessert every night, others on occasion. Tell me your family’s rule in the comments, I’d love to hear. 

Mealtime Boundaries for Picky Eaters Tips and Strategies

Mealtime Boundaries for Picky Eaters: Tips and Strategies

Mealtimes with young children can be challenging, especially if they’re picky eaters. Family dinners can easily turn into a power struggle, where parents struggling to get their children to eat certain foods, but facing even more resistance.

Parents often feel like their children are in control, while they desperately try to make them eat something healthy. They end up making special meals, using pleading phrases, coaxing, and even bribing, which only adds to the stress and leaves them feeling hopeless.

MEALTIMES FOR MANY PARENTS ARE ANYTHING BUT PLEASANT

When I encounter this dysfunctional and stressful feeding dynamic in my practice, it becomes evident that the roles of feeding within the household are completely reversed, and parents are unaware of it. Ultimately, children are in control of WHAT, WHEN and WHERE food is served, while parents exert great effort to control whether and how much their children eat.

THIS IS ACTUALLY THE OPPOSITE OF WHAT IT SHOULD BE!

To raise children who are healthy, happy, and self-assured when it comes to eating, parents need to establish clear boundaries and maintain their role as the ones in charge of WHAT, WHEN and WHERE food is served. Meanwhile, children should be allowed to fulfill their role as the ones who decide whether and how much they eat. This forms the foundation of the Division of Responsibility in Feeding (DOR), an approach advocated by Feeding and Childhood Nutrition Expert, Ellyn Satter.

By following the principles of DOR, you can create mealtimes that are more peaceful, reduce stress around eating, and raise children who are capable and confident eaters.

Does this sound familiar?

Your child refuses to eat, so you give in and stop asking him to come to the table for meals. 

He complains about what’s served, so you make him a peanut butter sandwich because you know he’ll eat it. 

He whines about feeling hungry before bed (Even though he didn’t eat at dinnertime an hour earlier) so you give him yogurt and a banana in hopes that he’ll go to bed peacefully and not wake up hungry.

If it does, you’re certainly not alone.

Here is my top strategy for creating more peaceful mealtimes and minimizing stress when it comes to feeding:

SET HEALTHY MEALTIME BOUNDARIES AND STICK TO THEM

By setting and consistently enforcing appropriate mealtime boundaries with your children, you can regain control over mealtimes and empower your children to take responsibility for the rest. It is ideal to establish these boundaries early, during infancy and early toddlerhood, but they can be implemented at any stage. Keep in mind that mealtime boundaries may vary among families, but here are some examples of ours:

1. Everyone MUST come to the table for meals, regardless if they plan to eat or not

A phrase you will frequently use is YOU DON’T HAVE TO EAT.” If your child says, “But I’m not hungry” or “I don’t want rice again!” calmly respond with, “You don’t have to eat, but it’s mealtime and you must come to the table.” In most cases, your child will happily eat a fair amount of his/her meal. To ensure proper mealtime etiquette, your children should remain at the table for at least 10-15 minutes and ask to be excused. If you have a slow eater, consider setting a timer for 30 minutes to prevent meals from dragging on indefinitely. This approach allows your child to pace themselves during the meal.

2. There are NO toys, screens, or other distractions at meal

The goal is to keep mealtime as a special moment for family to connect and have conversations, discouraging any form of mindless or distracted eating.

3. Being rude ISN’T OK

In my household, I have certain rules that we follow during mealtime. These include sitting properly at the table, refraining from throwing food or making rude comments, using age appropriate utensils, and practicing good table manners and politeness.

4. There are NO special meals

I provide a wide range of food options and always include at least one dish that I know my children enjoy. However, I only serve one meal, and I do not cater to individual requests as a short-order cook would.

5. The kitchen is CLOSED after mealtime

If I believe my children haven’t eaten enough, I gently remind them that it’s important to ensure their tummies are satisfied because the kitchen will be closed until a certain time, like X o’clock or the next morning. Any requests or demands for snacks outside of these designated times are kindly declined, along with a reminder that they had an opportunity to eat at the previous meal or snack but chose not to. By consistently applying this approach, children gradually learn how to regulate their appetite in a healthy manner.

6. There’s NO grazing

I politely decline random requests for snacks or milk, and instead, I establish specific snack times based on our meal schedule. I typically offer a snack between meals and occasionally before bedtime, although not frequently. This allows for eating opportunities every 2-3 hours or so. It’s important to note that children have smaller tummies and require regular meals, but it’s not necessary for them to constantly graze throughout the day. In fact, excessive grazing can often lead to mealtime struggles.

Grab your FREE Mealtimes Boundaries Rules [sg_popup id=”189969″ event=”click”]HERE[/sg_popup].

[sg_popup id=”189969″ event=”click”][/sg_popup]

BOTTOM LINE

These are my personal mealtime boundaries, which may also work well for your family. Remember that every family is unique, so it’s important to customize your own boundaries based on what works best for you and your family.

To assist you in establishing healthy mealtime boundaries, I have a printable kitchen resource available that outlines my family’s mealtime boundaries in a colorful and visually appealing format. It can serve as a starting point for you to create your own boundaries that align with your family’s needs and preferences.

If you’re facing challenges with a picky eater and would like to explore methods for reducing pressure on your child to eat, I recommend checking out my online course PEACEFUL MEALTIMES. This course provides comprehensive guidance on dealing with picky eaters and supports the development of a healthy relationship with food as your child grows. It covers everything you need to know to navigate mealtimes more peacefully and successfully.

Healthy After School Snacks That Won't Ruin Dinner

Healthy After School Snacks That Won’t Ruin Dinner

Children are back to school! Busy schedule and active day. For many children after school is the hungriest time of the day. Often times children get home ravenous and ready to eat down the fridge. Many parents and caregivers struggle to figure out the best options to feed ravenous hangry children so that it won’t spoil their appetite for dinner.

WHAT MAKES A GOOD AFTER SCHOOL SNACK?

Children are going through an enormous amount of growth and development and need nourishment. Consider offering some of the foods that are often trickier to get them to eat since this is a time they are most hungry. For example, if your child doesn’t love veggies at lunch be sure to offer some of these such as raw veggies with hummus or Greek yogurt, celery with nut butter, smoothie or veggies muffins.

WHY AFTER SCHOOL SNACKS ARE TRICKY?

Depending on what time your family eats dinner, a hearty after school snack can cause children to be too full at dinner time. And children who come to the table full won’t want to eat much (if any) dinner and they definitely won’t be as receptive to trying new foods or recipes. Your goal is to strike a balance between quelling hunger and making sure they still have an appetite at dinner.

IDEAS FOR AFTER SCHOOL SNACKS 

Every child is different and that includes their appetite. Yours may be going through a growth spurt that makes them perpetually hungry. Or your child may have a smaller appetite and tend to fill up faster.

You know your children best, and different families need different solutions. But here are some ideas to get you started, depending on how far out you are from sitting down to dinner.

I always try to include at least two foods in my children’s snacks – something rich in protein (milk, yogurt, cheese, beans, lentils, nuts, seeds, meat, etc.) and a fruit or vegetables or a whole grain food.

IF DINNER IS 3 (OR MORE) HOURS AWAY 

You want a snack with some staying power, including carbohydrates for energy, and protein and fat to keep them fuller longer.

  • Greek yogurt parfait
Greek Yogurt Parfait

Layer greek yogurt with fresh or frozen berries in a tall glass. Top with a sprinkle of granola.

  • Mashed avocado on toast
  • Nut butter with banana wrap
Nut butter with banana wrap

Spread 2 tbsp of nut butter (any kind of nut or seed butter) onto a whole grain wrap and top with a sliced banana. Wrap the tortilla up, cut the wrap into bite sized pieces.

  • Tortilla chips with hummus
  • Half of sandwich and a glass of milk
  • Overnight oats
Overnight oats

This version of oats requires no cooking and is prepared the night before. The basic recipe is equal parts milk, greek yogurt and rolled oats. Place the ingredients in a container in the fridge and the oats will soak up the liquids overnight. Toss in your favourite toppings such as fresh fruit, cinnamon, or nuts in the morning.

Hard-boiled egg

These can made up to a week ahead of time and stored in the fridge with the shells on.

  • Small bowl of granola (recipe 1 & 2)
  • Nut butter with waffle

IF DINNER IS 2 HOURS AWAY 

The idea is to suppress their hunger with foods that are tasty but quick and easy to digest, so they’re still hungry for dinner later. Serve something light but satisfying.

  • Trail mix
Trail mix

A very easy recipe includes: plain Cheerios, raisins, almonds, pecan, pumpkin seeds, the ingredients can be easily customized to your tastes.

  • Homemade popcorn + apple slices or berries
  • Whole grain crackers + banana
  • Apple slices with nut or seed butter
Apple slices with nut or seed butter

Pre-slice an apple with 2 tbsp of nut butter to dip.

  • Homemade smoothie popsicle
  • Small bowl of whole grain cereal
  • Edamame beans
Edamame beans

These can usually be found in the frozen aisle.

  • Cheese stick + pretzels
  • Small handful of nuts + cup of unsweetened applesauce)
  • Cheese cubes and fruits
Cheese cubes and fruits

Cube a palm-sized amount of cheese to go along with grapes, strawberries, kiwi or other fruits of your choice.

Roasted chickpeas

Take a can of rinsed and drained chickpeas, toss with oil, and bake for 20 minutes at 400F. When out of the oven, sprinkle with your favourite seasonings such as paprika, cajun, garlic powder, red pepper flakes, chilli powder, etc.

Muffin-tin omelettes

Easy, mini-baked omelets are perfect to make ahead of the week. You can use some of your favorite omelet ingredients but you can switch it up and add whatever you like or have on hand.

IF DINNER IS 1 HOUR AWAY 

You want to tread carefully in this time-frame, since many snacks can spoil their appetite for dinner. Serve veggies.

This was the strategy I settled on with my eldest son, and it worked wonders! Our house rule was “only veggies in the hour before dinner.” I’d offer both the veggies I was prepping for dinner and any veggie in the fridge.

The beauty of this rule: Your children will come to the dinner table with a serving or more of veggies already in their bellies. Or if they chose to opt out of the pre-dinner veggie snack, they’re still hungry for dinner.

IF IT DOESN’T WORK 

Consider moving dinner earlier or later. Ditch the rules you have about what time you must eat dinner or waiting for husband to come home for dinner. After your children going to day care or preschool, your family schedule need to be changed. You can have a small after school snack, earlier dinner at 5pm or 6 pm, and small bedtime snack (8-9 pm); or having a large after school snack and later dinner, both are healthy options. Try out a few options and see what works best for your family schedule.

If your children just can’t get by without a big, filling snack after school, pushing dinner later might be the solution.

BOTTOM LINE

When your children get older, schedules shift and appetites grow, and your snack and dinner strategy will likely change too. Do what works for your family now.

Are you running out of creative and healthy snack ideas? Here are some tasty and easy options to try with your children and family. For more delicious, family friendly recipes, check out my Facebook Page and follow me on Instagram

How to Encourage Picky Eater

How To Encourage Picky Eaters

As parents, once of our most basic jobs is to feed our children. It sounds simple enough. However, when your child is especially picky about what they eat, it can become a logistical and emotional nightmare.

When a child has a very limited food repertoire, mealtimes can become stressful. Many parents try to cajole, persuade, beg, bribe, or threaten their children into eating different foods. These actions are rarely met with success, and even if they work in the moment, they do nothing to encourage their child to develop a positive relationship with food.

So how can you make the dinner table less threatening for children who struggle with picky eating, and less stressful for you as parents? Here are some tips to help you achieve that.

1. BE CAREFUL OF HOW YOU LABEL YOUR CHILD

We all live up to the names we are given, good or bad. If you tell everyone that your child is a “picky eater”, he will believe that. Instead, try to avoid discussing the topic in his presence. If that is not possible, be mindful of the words you use. You could say something along the lines of “James is still learning to like eggplant. He may want to try them today. Let’s ask him and see.” If James overhears this conversation, it tells him that food preferences change over time, and he is in control of when to try new foods. This is more encouraging and less stressful than hearing himself referred to as a “picky eater”.

2. TALK TO YOUR CHILD ABOUT HOW TASTE-BUD CHANGE

Let them know it is okay that they only eat a few foods right now, and that it might change in the future. Food preferences are always evolving. If your child understands that, they are more likely to try in the future something they do not want to try today.

3. ENCOURAGE YOUR CHILD TO EXPLORE FOOD WITHOUT THE GOAL OF EATING IT 

Talk about how food looks, smells, feels, what temperature it is, and how it sounds. Encourage them to explore it, with no expectation that they will eat it. It allows them to familiarize themselves with different foods without the stress of having to try them. Try Sensory Fun Food Play Activities here.

4. TAKE IT IN STAGES 

Instead of focusing on getting your child to eat new foods right away, take it in stages.

  • Stage 1 might be tolerating it sitting on their plate. With some children, even stage 1 can be challenge.
  • Stage 2 might be sniffing it.
  • Stage 3 touching. Then licking, and eventually tasting.

Know that it might take weeks or even months to get through all the stages with one food, and that is ok. Just take a deep breath and try to be patient.

5. LET THEM SPIT FOOD OUT 

This might sound controversial. Who wants a child to spit out their food? But if a picky eater knows that they can remove food from their mouth if they don’t like it, they are more likely to give it a try. Teach your child how to politely remove food from their mouth using a napkin, and let them know that it is acceptable to do that if they try a food they don’t like.

6. CHANGE THEIR SCRIPT 

How many times have you heard your child say, “I don’t like it” before they have even tried something? Just the act of a child saying that to himself can reinforce the idea that he does not like the food. New time your child makes that declaration, encourage him to say “I don’t feel like trying it today” instead. It reinforces the idea that they may want to try it in the future, and allows them to feel in control of their choices.

7. ASSIGN ROLES APPROPRIATELY 

Ellyn Satter, Registered Dietitian Nutritionist and Family Therapist, developed the Division of Responsibility in Feeding approach to mealtimes. The crux of it is that roles should be divided up between the parent and the child in the following way:

  • The parent decides what, when, and where the child will eat.
  • The child decides how much they will eat, if any.

In practice, that meals that you as the parent decide when and where mealtimes will take place, and what food to put in front of your child. The next part is the hard part. You have to step back and let your child decide how much to eat, if any. It is not easy to do, but over time it has been shown to encourage children to be more accepting of new foods.

8. GET CHILDREN INVOLVED IN BUYING INGREDIENTS AND PREPARING MEALS 

At the grocery store, ask your child to pick out a new food they might like to try. You could also check out some children’s cookery books from the library, or go online and look at some recipes. Get them involved and excited about mealtimes. Over time, increasing their interest in food will translate into becoming more adventurous at mealtimes.

9. MAKE SURE THEY ARE HUNGRY AT MEALTIMES 

If your child is not hungry at mealtimes, it is going to be even harder to encourage them to eat a variety of foods. Try not to let your child snack in the hour leading up to mealtime. If there is less than one hour to go and your child simply can’t wait, offer them part of their lunch or dinner, or some cut fruit or vegetables.

10. ALWAYS PUT SOME FAMILIAR FOODS ON THEIR PLATE

Remember the goal is to make mealtimes stress-free for your child. You want them to come to the table looking forward to the meal. If they are anxious, they are less likely to be adventurous. By making sure there are always one or two foods on their plate that they like, you remove a lot of the stress for a child who is picky about what they eat.

11. MAKE FOODS APPEALING 

By this, I don’t mean that you have to start creating art with your child’s meal. However, you can make little changes that will enhance your child’s enjoyment.

For example, you could cut vegetables into sticks and give them a dipping sauce, use a cooking cutter to make fun shapes out of sandwiches or sliced cheese, or cut foods into cubes and skewer them onto wooden tooth picks to make kebabs. Children often respond well to giving foods interesting names, like monster juice for green smoothies, or baby trees for broccoli. Also try to make meals colourful and visually appealing, and only put small portions on your child’s plate. Being faced with a huge pile of bland-looking food won’t do much to tease out your child’s adventurous side. I’ve more than 100 activities or ways to make foods more fun.

12. EAT FAMILY STYLE MEALS 

Family style meals involve putting the food in serving bowls on the dinner table and allowing people to serve themselves. Giving your child control over what he chooses to put on his plate can help relieve anxiety and encourage him to be more adventurous about what he chooses to eat. Hotpot or Hakka Lei Cha (客家擂茶) are a great way to do this. Salad bars are another. Just lay it all out and let everyone dig in.

13. MODEL GOOD EATING HABITS 

Children love to copy their parents. If your child sees you eating a diverse range of foods, they are more likely to do the same. This is especially true if you allow the family style meals tip, because they can pick from the same bowls that you picked from.

14. ENCOURAGE YOUR CHILD TO EAT UNTIL HIS BELLY FEELS FULL 

Explain to them what it feels like to have a full belly, and tell them that is the goal at mealtimes. Let them know they do not have to finish all the food on their plate if they feel full before that. If they consistently leave lots of food on their plate, try serving them a little less food.

15. OFFER NEW FOODS OFTEN 

You have probably heard it many times before, but children often need exposure to a new food many times before they will try it. Follow the old adage, “If at first you don’t succeed, try again”.

16. LET THEM KNOW THEY WILL NEVER BE FORCED TO EAT SOMETHING THEY DON’T WANT TO EAT 

With this in mind, children will be less fearful of the dinner table. A relaxed child will be more open-minded, which is what we want to achieve.

17. AVOID MEALTIME BATTLES 

Entering into mealtime battles with your child never ends well. Try to keep mealtimes stress free for your child. You want them to enjoy coming to the dinner table, not dreading it because they might be forced to eat something they don’t want.

18. KEEP MEALTIMES RELAXED 

Try to focus on something other than their eating. If your child tries a new food, offer some encouraging words, but don’t make a big deal out of it. Just keep it business as usual. Avoid cajoling, persuading, begging, bargaining, or threatening your child to eat. DOWNLOAD Mealtime Conversation Starters HERE.

19. IF VEGETABLES ARE A CONCERN, HIDE SOME AND SHOW SOME 

Sometimes, parents of picky eaters are worried about their child’s nutrition intake. If this is you, and your child turns his nose up at vegetables, try hiding some and showing some. You can hide veggies in smoothies, pancakes, or blended sauces. That way you know your child is getting some fresh produce in their diet. Once they like the taste, you can tell them what went into it to help desensitize them to those foods.

Hiding vegetables does not teach your child to like them.

20. TALK TO YOUR CHILDREN ABOUT WHAT FOOD DOES FOR YOU 

Help your children understand the importance of food, that it gives your energy, helps your brain work properly, and makes your muscles strong. While this is unlikely to bring about any short-term changes in their food intake, over time it will help them see just how important it is to make healthy food choices.

21. EXPECT SOME WASTE

The process of encouraging your child to eat a greater number of foods is often long and fraught with frustration for everyone concerned. Part of that frustration is usually directed at the food waste that inevitably accompanies the process. Try to remember that some waste is unavoidable. When it makes you stressed, remind yourself that you are doing a very important job here. You are teaching your child lifelong habits that will impact their physical and mental health.

Food waste is an unfortunate side effect of that, and will hopefully be short lived.

22. IF IN DOUBT, SEEK PROFESSIONAL HELP 

If you re at all concerned that what your child is experiencing is more serious than common picky eating, consult their pediatrician. They may benefit from seeing an occupational therapist. And if your are worried that your child is not getting enough of the nutrients they need, a paediatric Dietitian can help advise you. BOOK 1-1 Nutrition Consultation NOW.

BOTTOM LINE 

All of these tips are designed to help you create a relaxed eating environment in which your child is comfortable and confident. You want your child to have a positive relationship with food. That being said, it is likely to be a long and rocky journey for you as parents. But the effort you put in now will set your child up for a lifetime of healthy eating habits. And in those darker moments when you feel as tough you are doing it all wrong, remember this. Just by reading this post and taking steps to help your child, you are doing an amazing job. Keep going. You can do this. It will all be worth it in the long run.

If you’re still struggling with a picky eater and want to learn more about ending pressure your child to eat then join PEACEFUL MEALTIMES online course for a complete step-by-step process for preventing or reversing picky eating. This is the best of feeding therapy, all rolled into one affordable course with lifetime access and ongoing support.

Nutritional Yeast Benefits and How to Use

Nutritional Yeast – Benefits and How to Use

Nutritional yeast, also called “nooch,” is a popular vegan food product with a savory, nutty or cheesy flavor. When I first heard the term “nutritional yeast”, I thought it was a product used to bake bread that had some vitamins added to it.

Every now and then I use nutritional yeast in a recipe I get asked questions about it so I figured I need a full blogpost explain what nutritional yeast is, reviews its health benefits, and suggests creative ways to use it.

WHAT IS NUTRITIONAL YEAST?

Nutritional yeast is sold as thin flakes, granules, or powder. You can find it in the spice or condiment section at most grocery stores or in bulk bins of health food stores. It has a pale yellow color and may come packaged in a bag, shaker, or plastic container. It’s low in calories and sodium, dairy-free, soy-free, gluten-free, sugar-free, fat-free and vegan so  it fits into a lot of restrictive diets.

HOW IS IT PRODUCED? 

To produce nutritional yeast, Saccharomyces. cerevisiae (a type of yeast) cells are grown for several days on a sugar-rich medium, such as molasses. Once the yeast is mature, it is heated up to deactivate the yeast (which inhibits its leavening properties), then it is washed, dried, crumbled and packaged into small flakes.

TYPES OF NUTRITIONAL YEAST

There are two types of nutritional yeast: unfortified and fortified:

  • Unfortified: This type doesn’t have any added vitamins or minerals. It only contains the nutrients that are naturally found in the yeast itself.
  • Fortified: This type has vitamins added during the manufacturing process to boost nutrient content. Any additional vitamins are included in the ingredient list. Fortified nutritional yeast is the most common type and offers the most benefits. However, it is important to note that different brands have different concentrations and types of nutrients, so read labels closely and adjust the serving size accordingly.

BAKER’S YEAST vs NUTRITIONAL YEAST vs BREWER’S YEAST

Brewer’s, baker’s and nutritional yeasts are technically made from the same species of yeast (Saccharomyces cerevisiae), they are indeed different products.

  • Brewer’s yeast: Brewer’s yeast can be purchased alive and is used to brew beer. Darker in color. The dead yeast cells leftover from the brewing process can be consumed as a nutritional supplement but have a very bitter taste. Brewer’s yeast is rich in a complex of vitamins, including vitamin B, chromium, selenium, and protein.
  • Baker’s yeast: Baker’s yeast is purchased alive and used to leaven bread. The yeast is killed during cooking but adds an earthy, yeasty flavor to bread.
  • Nutritional yeast: This yeast is grown specifically to be used as a food product. The yeast cells are killed during manufacturing and not alive in the final product. It is used in cooking and has a cheesy, nutty or savory flavor.

WHAT ARE THE BENEFITS OF NUTRITIONAL YEAST?

Nutritional yeast gets its name from the nutrients it contains, including protein and a wide array of vitamins, minerals, and antioxidants.

  • PROTEIN: It’s a great source of plant-based protein, with all 9 of the essential amino acids (complete protein). 2 Tbsp = 8 grams of protein.
  • VITAMIN B12 (COBALAMIN): Most nutritional yeasts are fortified with B12. It’s essential for the production of of red blood cells and nerve health. It’s largely found in animal products so if you follow a vegan or plant-based diet, you may not be getting enough.
  • OTHER B VITAMINS: You’ll also find vitamin B1 (thiamine), B2 (riboflavin), B3 (niacin), B6 (pyridoxine) and B9 (folate). They help to convert food into fuel to keep us energized and while many of them work together they each play their own role in our health as well, from healthy skin and hairs, to working as antioxidants, to their role in mood, sleep and brain health
  • MINERALS: Fortified nutritional yeast also includes zinc, selenium, manganese and molybdenum, which are involved in gene regulation, metabolism, growth, and immunity
  • ANTIOXIDANTS: Glutathione and Selenomethionine can help protect your cells from damage caused by free radicals and heavy metals and help your body eliminate environmental toxins.
  • BETA-GLUCAN (a type of fibre): It may help to lower cholesterol levels, which may benefit heart health. It may also boost the immune system.

WHAT DOES NUTRITIONAL YEAST TASTE LIKE?

It has a nutty, cheesy, salty, umami flavor and is often used to add a cheesy flavor to dairy-free or vegan dishes. Also, it helps to thicken dressings, sauces and soups.

IS NUTRITIONAL YEAST HEALTHY FOR BABIES?

Nutritional yeast is not a common choking hazard and not considered a common allergen. Therefore, it can be a healthy addition to a baby’s diet, especially in families that prefer vegan and vegetarian cooking.

If your baby has a MTHFR genetic mutation, it may be best to avoid nutritional yeast that has been fortified with folic acid, the synthetic form of vitamin B9. The MTHFR mutation causes impaired folic acid metabolism.

HOW DO YOU USE NUTRITIONAL YEAST?

Aside from its many health benefits, nutritional yeast is affordable, easy to use and can be sprinkled on just about anything to produce a delicious nutty, cheesy flavor

It’s versatile and here are some fun ways to use it:

  • Add to soups, stews, chili or sauces
  • Sprinkle on top of pasta dishes, casseroles, baked potatoes, mixed green salad, and roasted vegetables
  • Toss it with homemade fries before baking
  • Toss it into a tofu scramble or scramble eggs
  • Mix it into mashed potatoes or mashed cauliflower
  • Spread toast with olive oil and then sprinkle on top
  • Sprinkle over popcorn or kale chips (no popcorn for children under 4)
  • Combine with soaked cashews, lemon, garlic, salt, pepper, and water to make vegan cashew cheese sauce

Serving sizes for nutritional yeast depend on the recipe, but you typically use 2–4 teaspoons (5–10 grams).

BOTTOM LINE

Nutritional yeast is a really great versatile food. It’s such a great addition to a variety of healthful dishes and can be added to a variety of snacks and meals while providing a delicious umami flavor! Nutritional yeast is very high in Vitamin B12, a nutrient that of often difficult to find in most adult diets as well as a child’s diet. But remember, not all nutritional yeast is fortified with vitamin B12, so it is important to check the label for ingredients.

Does your family use nutritional yeast? What are some of your children’s favorite ways to eat it?

adding-herbs-and-spices-to-baby-foods-photo

Adding Herbs and Spices to Baby Foods

Herbs and spices provide our foods with a multitude of flavours, fragrances, and colours. However, many parents worry about adding flavour this way to their babies’ food, believing that spices are hot and not suitable for little ones’ taste buds.

Baby food doesn’t have to be bland!

There is a big difference between hot spices and aromatic ones. Aromatic spices, such as turmeric, garlic, ginger, dill, cumin, nutmeg, garlic, dill, and cinnamon, are perfectly fine to introduce to baby after 6 months.

This guide explains why I recommend parents adding herbs and spices to baby’s food, the benefits of adding them and gives some ideas on how to start introducing them to your baby.

WHY YOU SHOULD INTRODUCE HERBS AND SPICES TO BABIES

If your baby doesn’t have any digestive problems, I always encourage parents who are just starting weaning their babies, either by purees or baby led weaning (around 6 months of age), to experiment with herbs and spices from the beginning. The more you expose your baby to a variety of tastes and flavours, between 6-12 months, the more likely it is that they’ll accept a variety of food later on in life! This means adding herbs and spices right from the beginning helps reduce the chances of pickiness.

In fact, breastfed babies are often introduced to a variety of spices even before starting solids. Breast milk can change its flavour, depending on a mum’s diet. If mum enjoys spicy and flavoursome food, then her baby will be exposed to this through her milk, helping create and develop a taste for flavoured foods. Therefore, by flavouring food with a variety of herbs and spices, you’ll continue the benefits of flavour exposure found in breastmilk.

What about exclusively formula fed babies? We know that babies are made to handle various flavours from the first day of their life, they were capable of experiencing various spices without any issues. So bland food is actually not a requirement for them and it’s natural for them to experience different flavours. If your baby is exclusively formula fed, then they wouldn’t have that exposure, and so beginning with some herbs and spices when they start solids is a great way to get those taste buds primed for new flavours.

As salt and sugar should be limited in baby food, spices and herbs are a great way to flavour food.

BENEFITS OF INTRODUCING HERBS AND SPICES AT AN EARLY AGE 

  • Trains the baby’s taste buds to enjoy variety flavors and will set the foundation for healthy eating habits.
  • Teaches the baby to expect change with food. Offering a plain mashed banana one day and a mashed banana with a dash of cinnamon the next can have a valuable influence on the child’s evolving palate.
  • Fresh herbs are packed with antioxidants, vitamins and minerals.
  • Herbs and spices are great flavour enhancers without adding unnecessary sugar and salt.
  • Helps babies transition to family food, as your baby will be familiar with those tastes and more likely to accept them.

WHAT ABOUT HOT SPICY FOODS?

Hot spicy foods (cayenne pepper or jalapeño) can hold off for a while. But, it is recommended to use aromatic spice first, such as curry, cumin, oregano, turmeric, cinnamon, mint, basil, allow them to experience those flavours first, before adding small amounts of hot spices. We live in Malaysia, the 3 major cultures that have influenced Malaysian food are Malay, Chinese and Indian. A lot of Malaysian dishes can be classified under the hot and spicy category. So, once you start, use mild spices in small dosages, therefore, you can cook a dish that the whole family can enjoy.

POPULAR FLAVOUR COMBINATIONS 

Here is a list of baby friendly herbs, spices and natural flavor enhancers and the foods that pair well with them:

Vegetables 

  • Asparagus: Parmesan cheese
  • Banana: rolled in unsweetened coconut
  • Broccoli: nutritional yeast
  • Butternut squash: cinnamon, nutmeg, allspice or ginger
  • Carrots: basil and garlic; or cinnamon
  • Cauliflower: curry powder
  • Green beans: garlic powder
  • Mashed potatoes: dill or garlic
  • Pumpkin: cinnamon, nutmeg, or ginger
  • Sweet potato: cardamom, cinnamon, cajun spice or nutmeg

Fruits 

  • Applesauce: cinnamon, nutmeg, allspice, or ginger
  • Avocado: cilantro or parsley
  • Bananas: cinnamon or allspice
  • Pears: ginger or cinnamon

Grains/Cereals

  • Oatmeal: cinnamon and nutmeg
  • Pasta: basil, oregano, or garlic
  • Rice: cinnamon, nutmeg, cardamom, or ginger
  • Quinoa (sweet): cinnamon, nutmeg, cardamon, or ginger
  • Quinoa (savory): garlic powder, pepper, onion powder, basil, or oregano

Dairy

  • Plain yogurt: cinnamon or mint

Meat 

  • Chicken: ginger; rosemary, sage and thyme; lemon zest and pepper; or basil and oregano; paprika
  • Beef: garlic and pepper; or onion powder and pepper
  • Salmon: dill, lime or lemon

TIPS TO ADD SPICES & HERBS TO BABY FOOD

When adding herbs and spices, make sure to start simple and try not to add too much so as to overpower the food. Start out by adding one herb or spice to your baby’s food and then building it up from there by mixing with other flavours.

  • Storage: Store spices in airtight containers away from light and heat. Whole spices will keep for around 1-2 years but after around six months, ground spices will start to lose their aroma and flavour. So buy in small amounts and use often!
  • Pre-mix spice blends: Always read the packaging when using pre-mix spice blends (as they often have added sugar and salt), try making your own blends.
  • Start slowly: Start with plain foods so baby can try the taste of the food on its own.
  • Use small amounts: Once baby has tasted the food plain, you can gradually add spices and herbs you use when cooking for the rest of the family. Use small amounts to start with to allow your baby to get used to different flavours. You don’t want to overpower the food. Start out by adding just a pinch.
  • Prepare fresh leafy herbs properly: Wash fresh herbs and then puree or finely mince before adding to baby food. Large leaves can be a choking hazard
  • Don’t give up: If your baby rejects the flavour of the spices/herbs just remember that it can take up to 10-20 exposures for a new flavour to be accepted.

Let’s give our babies something other than tasteless mush or finger foods to eat!  I’m a firm believer that babies deserve the tasty goodness we feed ourselves. When you implement these tips, you will create a change in taste and expectation for your baby. When babies learn to accept change with food, they become less likely to get stuck in food ruts.

If you’ve added herbs and spices to your baby food, what’s your little one’s favourite combinations?

Frozen Yogurt Bark

Frozen Yogurt Bark

My son has always loved Frozen Yogurt Bark and although it can get very messy, I like the fact he is getting a healthy snack yet he thinks he is getting a “treat”.

What is Frozen Yogurt Bark?

Frozen yogurt bark is simply yogurt frozen on a tray with lots of different foods stirred through and/or added to the top of the yogurt. It is very simple to make and can be easily customized to suit taste.

What Yogurt Should You Use?

Any yogurt will work but I prefer to use plain greek yogurt and sweetened it with fruit.

Make it Healthier?

Like most foods, not all frozen yogurt bark is created equally. It will all depend on the yogurt used and the toppings/stir-ins that you choose to add.

  • Don’t offer very often – If your yogurt bark is made from an added sugar yogurt with toppings such as candy and chocolate.
  • If you use a plain yogurt with toppings, such as fruit and nuts, then you have yourself a healthy snack.

Can I Give it To a Baby?

Once your baby has started solid foods then YES you can offer frozen yogurt bark. One word of warning though, prepare for a lot of mess! The yoghurt melts fast and tends to go everywhere!

Things to consider when making frozen yogurt bark for a baby:

  • Do not add honey to sweeten the yogurt. Babies under one should not consume honey. If you wish, you can use a different sweetener, such as maple syrup, but I don’t encourage adding sweeteners to babies food. I’m sure they will be more than happy with this snack unsweetened.
  • Do not add whole nuts or big pieces of nuts to the bark, they can increase the choking risk.
  • Cut fruit into small pieces, to the size that your baby is used to eating (blueberries, raspberries, bananas, shredded apples, grapes, etc).

Enjoy!

Notes
Best if enjoyed right away as it melts very quickly.

What toppings would you put on your frozen yogurt bark?


Frozen Yogurt Bark

Frozen Yoghurt Bark is a great after school snack or after dinner dessert. It takes minutes to prepare and is ready after 4 hours of freezing. Store pieces in a ziplock bag for an instant frozen snack.
Prep Time 10 minutes
Cook Time 4 hours
Total Time 4 hours 10 minutes
Course Snack
Servings 6 people

Ingredients
  

  • 2 cups plain yogurt
  • 2 tbsp honey (optional)
  • 1 tbsp vanilla extract (optional)

Toppings

  • Berries
  • Dark Chocolate chips
  • Nuts/Seeds
  • Dried Fruits

Instructions
 

  • Mix together the yogurt, honey and vanilla.
  • Spread onto a parchment lined baking sheet and sprinkle with desired toppings.
  • Freeze for at least 4 hours or overnight, then break into pieces and serve.
  • Place broken pieces into a resealable container or bag, store in freezer up to 3 months.

Notes

Best if enjoyed right away as it melts very quickly.

why-you-should-start-a-garden-with-your-kids-photo

Why You Should Start a Garden with Your Kids

As a mother and a dietitian, I understand how difficult it can be to encourage your children to eat enough fruits and vegetables. One way to spark their interest is by teaching them where food comes from. In today’s world, many of use are disconnected from the process of growing food. By involving your kids in gardening, you can bridge that gap and help them appreciate the effort behind every meal.

Gardening gives children hand-on experience, showing them that food doesn’t just come from the supermarket – it grows from the soils. Research (here, here) has consistently shown that when children participate in growing fruits and vegetables, they are more likely to eat and enjoy them. They also become open to trying new types of produce, turning mealtime into an exciting adventure.


YOU CHILDREN CAN BE PART OF THE PLANTING AND GROWING PROCESS 

Gardening is an activity that can captivate children of all ages. Younger kids, like preschoolers, are often fascinated by the hands-on fun of digging in the dirt, planting seeds, and watering with a garden hose. Older children, on the other hand, may be more intrigued by watching a tiny seed transform into an edible plant.

To make it engaging, ask your children which fruits or vegetables they’d like to grow. Assign age-appropriate tasks like watering, weeding, or harvesting to teach them responsibility. Being involved in every step of the process—from planting to picking—gets kids excited to taste the fruits and vegetables they’ve grown themselves.


ENCOURAGE TASTE TESTING

Gardening introduce your children to a variety of fruits and vegetables so take advantages of the opportunity to encourage taste testing! Let them sample fresh produce straight from the garden (after a quick rinse to remove dirt) or enjoy it together at the dinner table.

Show your children how versatile fresh produce can be. For instance, they might be amazed at how a tomato plucked straight from the vine tastes great on its own or in a homemade pasta sauce.

Children are often drawn to unique shapes and sizes, so cherry tomato plants (in the ground or pot) – just the right height for little hands – are wonderful choice for small gardeners.


INDOOR HERB GARDEN

If outdoor space is limited, herbs are a fantastic starting point for gardening. They’re easy to grow, require minimal space, and thrive in small pots on sunny windowsills. Strat with herbs like parsley, basil, rosemary, or green onion.

If you end up with more herbs than you need, don’t worry!  Excess basil can be turn into pesto, frozen in ice cube trays, and stored for later use. You can also dry herbs for long-term storage and cooking.


START WITH WHAT YOU EAT 

Keep it simple by growing a garden with a meal in mind. For example, plant ingredients for a fresh dinner salad: lettuce, carrots, tomatoes and cucumbers. These crops are kid-friendly and easy to grow.

For faster results, choose plants that grow quickly, like green beans or carrots; or one that produce abundantly, such as cherry tomatoes. Seeing their hard work turn into food on the table motivates children and keep them interested.


GARDENING IN SMALL SPACES 

No yard? No space? No problem! You can still garden in small spaces using large pots, containers or planters. These can be placed on a balcony , car porch, or even by a sunny window. Foods like tomatoes, salad greens, peppers and cucumbers grow well in containers and don’t require much room.


MY GARDENING EXPERIENCE IN CANADA 

Gardening has been rewarding experience for my family, helping us connect with nature and each other. It encourages curiosity, build self-confidence, and teaches resourcefulness. Plus, it’s great way to get outside, enjoy fresh air, and stay active as a family.

Last summer, my husband, 3 year old son, and I decided to try gardening for the first time. Using containers in our backyard, we planted a variety of fruits and vegetables. It was a learning experience filled with trial and error, but it turned out toe be one of the most fulfilling projects we’ve ever done together.


WHAT YOU NEED TO START YOUR INDOOR OR OUTDOOR GARDEN 

Start a garden doesn’t require much. Here’s a simple checklist to get you started:

  1. Pots or Planters: Perfect for small spaces like patios or balconies.
  2. Soil: Look for organic soil, which is widely available at nurseries.
  3. Seeds: Nurseries offer a variety of seeds to choose from.
  4. Water: Essential for keeping your plants healthy.
  5. Sunlight: Ensure your garden gets plenty of light, whether indoors or out.
  6. Space: A backyard, balcony, or even a sunny windowsill will work.
  7. Patience: Gardening is a process, but the rewards are worth it!


Summer 2017

After a few months, your hard work will pay off with fresh and delicious fruits and vegetables for the whole family to enjoy.


MAKE IT FUN AND MEMORABLE

Summer 2017

Gardening isn’t just about the results, it is about enjoying the process. Whether your carrots turn out perfectly or look a little quirky, the time spent together is what matters most. Plus, children love getting dirty, so embrace the mess and make it part of the fun!.


Summer 2018

Harvesting roots and tubers , like carrots and potatoes can feel like a treasure hunt. There’s nothing more exciting for a child than pulling a carrot out of the ground, rinsing it, and taking a bite right away.


Summer 2018

Even for younger children, the growing process is magical. Watching low-maintenance, easy-to-grow and brightly colored berries grow and ripen is a thrill. These small victories make gardening a rewarding experience for children of all ages.


ADAPTING TO SHORT GROWING SEASONS

In Canada, the long winters can make outdoor gardening challenging, with a growing season that feels all too short. That’s why this year, we’re focusing more on growing indoor herbs. Herbs are easy to care for, thrive indoors, and can be grown year-round—perfect for adding fresh flavors to meals even when it’s snowing outside.


WHAT ABOUT MALAYSIA? YOU CAN ENJOY A YEAR-ROUND HARVEST 

One of the perks of living in Malaysia is the tropical climate, which allows for gardening all year round. Here are two fun and simple ways to get started:

Start an Herb Garden

  • Herb gardens are great for young children and can be grown any time of the year.
  • Growing herbs doesn’t take much work. All you need is some soil, plenty of sunlight, and regular watering. The process, from planting seeds to using the herbs in cooking, is similar to that of a garden. Children will love experimenting with the flavors they’ve grown themselves!
  • Herbs to try: Oregano, thyme, mint, rosemary, basil, lemongrass, curry leaf, green onion, ginger, and onoin.

Start a Vegetable Garden

  • Let children pick out some of the seeds they want to plant.
  • Use it as an opportunity to teach them about gardening essentials like:
  • Choosing the right fertilizer
  • Managing pests naturally
  • Exploring co-planting techniques to maximize growth
  • Gardening with groups of small children should be fun and engaging. Break up the hard work with creative activities like decorating plant markers, taking garden breaks to relax, or simply enjoying the space together.
  • Vegetables to try: lettuce, long bean, kale, bell peppers, chili, kangkung, choy sum, cucumbers, tomatoes, spinach, cabbage, and okra.

BOTTOM LINE 

Gardening is a fun, hands-on way to teach children where their food comes from while fostering a sense of responsibility and accomplishment.

When children are involved in growing and preparing their own food, they’re more likely to taste and enjoy it, making it excellent activity for encouraging healthier eating habits..

Children who grow food and prepare it are more likely to try it.

Did you know that I offer personalized one-on-one nutrition counselling for children and families? If this is something you’s like to learn more about, check out my service.