Whole Wheat Seedy Crackers

Whole Wheat Seedy Crackers

I’m often asked what is the best crackers in grocery store. This is a very tricky question as it is really difficult to provide one without tons of added salt or refined sugar.

So, I decided to make it myself. This recipe is super simple and easy to put it together. I use 100% whole wheat flour and seeds (pumpkin seeds, sunflower seeds, and ground flax seeds).

DSC_8273

Cut the rolled out dough with knife or pizza cutter. Don’t worry about the size, you can cut into different shapes – square, triangle, love, etc (Have fun!!). Also, make sure they all have the same thickness in order to bake them evenly.

DSC_8279

Here you go….freshly baked crackers!! You can serve these crackers with any snacks you like – cheese cube, hummus, guacamole. Yummy!!

DSC_8290

Enjoy!!

Recipe adapted from Elephantastic Vegan

Whole Wheat Seedy Crackers

Whole Wheat Seedy Crackers

Perfect for appetizer or snack, you can pair with guacamole, hummus, or cheese cubes.
Prep Time 5 minutes
Cook Time 20 minutes
Total Time 25 minutes
Course Snack
Servings 1.5 cups

Ingredients
  

  • 1 2/3 cup whole whear flour
  • 4 tbsp mixture of sunflower, pumpkin and flax seeds (you can see ground or whole)
  • 1.5 tsp baking powder
  • 3/4 tsp salt
  • 1 tbsp olive oil
  • 1/2 cup water

Instructions
 

  • Preheat the oven to 400F
  • In a medium bowl, mix whole wheat flour, baking powder, salt together. Then add olive oil, seeds and water.
  • On a floured baking sheet roll out the dough until thin and evenly.
  • Cut it with a pizza cutter or knife lengthwise and widthwise
  • Bake them in the oven for about 20 minutes (until they get crispy).
  • Serve with some homemade guacamole or hummus or cheese cubes.
Simple Ways to Reduce Added Sugar in Your Child's Diet

Simple Ways to Reduce Added Sugar in Your Child’s Diet

A young mom recently came into my office with her three children—ages 13, 10, and 8. She wanted to learn more about healthy eating habits, portion sizes, and better snack choices for her family. During our nutrition assessment, I noticed that while she was trying her best, her children were regularly drinking soft drinks on the weekends and milk tea during the week. None of them liked plain milk—only chocolate milk.

A few days later, a 23-year-old college student referred by her doctor came to see me. Her HbA1c was 6.9%, indicating prediabetes. She admitted to drinking four cans of soda every day.

Then last week, a client emailed to ask for my thoughts on doing a “sugar detox. Yes, sugar is a hot topic—and for good reason.

LET’S TALK ABOUT SUGAR

Sugar is a type of carbohydrate that adds sweetness to foods. But not all sugar is the same, and understanding the difference can help you make more informed decisions for your family.

1. Naturally Occurring Sugars

These are found in whole foods like fruit (fructose) and milk (lactose). These foods offer essential nutrients like fiber, calcium, and vitamins, and they do not need to be avoided.

2. Added Sugars 

These are sugars and syrups that are added during processing or preparation. They’re often found in:

  • Carbonated drinks, fruit drinks, energy drinks
  • Chocolate milk
  • Sweetened cereals
  • Canned fruit in syrup
  • Granola bars, cookies, cakes, muffins, and donuts
  • Flavored yogurts
  • Sweetened coffee or tea drinks


WHY DOES THIS MATTER?

High intake of added sugar is associated with:

  • Increased risk of obesity, dental cavities, and type 2 diabetes

  • Poor dietary habits—sugar-laden foods often replace nutrient-dense options

  • Fluctuations in energy and mood, especially in children

The World Health Organization and American Heart Association recommend limiting added sugar intake to:

  • 3 teaspoons (12 grams) per day for children

  • 6 teaspoons (24 grams) per day for women

  • 9 teaspoons (36 grams) per day for men


SPOTTING ADDED SUGAR ON LABELS

To reduce added sugar, the first step is becoming a smart label reader.

STEP 1: CHECK THE “TOTAL SUGARS” AND “ADDED SUGARS” 

Both are now listed separately on most nutrition labels. Aim for products with less than 5g added sugar per serving.

STEP 2: SCAN THE INGREDIENT LIST

Sugar goes by many names. Here are common ones to watch for:

  • Agave
  • Brown sugar
  • Cane sugar
  • Coconut sugar
  • Dextrose
  • Fructose
  • Fruit juice concentrate
  • Glucose
  • High fructose corn syrup (HFCS)
  • Honey
  • Maltodextrin
  • Maltose
  • Maple syrup
  • Molasses

The higher up sugar appears on the list, the more the product contains.

STEP 3: COMPARE PRODUCTS

Swapping high-sugar foods for lower-sugar alternatives can make a big difference:

  • Try plain yogurt with fresh fruit instead of fruit-flavored yogurts

  • Choose canned fruit in water or juice instead of syrup

  • Use nut butter or mashed banana as toast spreads instead of jam or chocolate spread


PRACTICAL TIPS TO REDUCE ADDED SUGAR

1. Cut the Sugary Drinks 

Carbonated drinks, fruit drinks, and flavored milk are major sources of added sugar. One can of carbonated drink contains about 9-10 teaspoons of sugar—more than an entire day’s limit for a child. Encourage water, milk, or unsweetened alternatives. If your child only drinks chocolate milk, try gradually reducing the portion, or blend it with plain milk to lower than sugar content and help them adjust to a less sweet taste. .

2. Swap in Natural Sweetness

Use fruit to add sweetness to meals and snacks, e.g., sliced banana in oatmeal, blended mango in yogurt, or dates in homemade muffins. These options come with fiber, vitamins, and minerals.

3. Make Treats Occasional, Not Forbidden

You don’t need to ban treats completely. Making sweets an occasional part of meals—not rewards or punishments—helps children develop a balanced relationship with food.

4. Involve Your Children

Let your children help choose healthier snacks at the store or help prepare meals. When children are involved, they’re more likely to try and enjoy new foods.

5. Know That It’s Not All or Nothing

Reducing added sugar is a journey. Even small changes—like replacing one sugary snack a day with a healthier option—can make a meaningful difference over time.


WHAT ABOUT “SUGAR DETOX” DIETS?

The idea of cutting out all sugar overnight might sound appealing, but it’s usually not sustainable—especially for families. Instead of a strict detox, focus on making gradual, evidence-based changes that support your child’s growth, development, and long-term health.

BOTTOM LINE

Sugar isn’t the enemy—but the amount we consume matters. Many families, even with the best intentions, are consuming far more added sugar than they realize. The goal isn’t to create fear around food, but to build awareness and habits that nourish your children and set them up for a lifetime of healthy eating.

Remember:

  • Prioritize naturally sweet foods like fruits and milk
  • Read food labels carefully
  • Reduce sugary drinks
  • Teach your children—not just feed them—healthy habits

With the right tools and mindset, cutting back on added sugar is completely doable—and your whole family will benefit.

20-strategies-to-raise-a-mindful-little-eater-photo

20 Strategies to Raise a Mindful Little Eater

After being a new-mom, I continue to research articles, support groups, books on breastfeeding, solid foods, baby led weaning, picky eaters, etc. After reading some paediatric dietitians’ blogs, I found my guru – Ellyn Satter. I don’t have to spend hours searching the web for the perfect healthy recipes that my son will actually eat. (Although I still cook yummy foods for him every single meal).

As a dietitian and a first-time mom, I am attempting to raise a confident, independent, healthy and mindful eater. I’ve discovered the challenges of picky eating (in my personal life and my practice), this sounds like every children can be a picky eater, at some point. However, the more articles or resources I’ve read, the more knowledgable and confident that I am now. Aiden is neither a good eater nor picky eater. He has good and bad days. Following the Division of Responsibility for Feeding, I have successfully made it through the first 2 years (fingers crossed !!).

WHAT IS DIVISION OF RESPONSIBILITY FOR FEEDING 

The “Feeding Relationship” is a concept developed by Ellyn Satter, a dietitian and social worker. There are separate roles in feeding for the parent and for the child, and if these roles are respected, then the child will be less likely to be picky and will grow up having a healthy relationship with food. Also, it can help to decrease the power struggles and stress around your family table by respecting this relationship.

Successful feeding is when your child willingly participate in family meals, enjoys herself and feel safe and confident enough to taste and eat foods of her choosing (that you’ve provided) in amounts that feel right to her. 

PARENT’S FEEDING RESPONSIBILITIES 

Three things that you can control as a parent:

What is served – Offer foods from each food group at every meal if you can – Vegetables or Fruit, a Grain Product, and a Meat & Meat Alternatives, and/or Milk & Milk Alternatives.

Example: 1/2 banana, a slice of whole grain bread with peanut butter, and 1/2 glass of milk.

When it is served – By 1 year, the child should be offered three regular meals and 2 or 3 snacks per day. Do not feed constantly throughout the day or the child will not build up an appetite for the next meal. Parent often try to get their child to eat more or increase in weight. However, it backfires, as research has shown grazers can eat up to 50% less than those with more regular meal and snack times.

Where it is served – The child should be eating at the table with the family, with no distraction like TV, IPad, IPhone, etc.

CHILD’S FEEDING RESPONSIBILITIES 

The child’s role is to choose whether or not to eat, what to eat from what’s provided, and how much to eat.

Whether If – You child may choose to eat nothing at all (Yay, sound very familiar). If they refuse a new food or a meal, that is ok. Offer a new food with a familiar food so they do have something to eat. Try new food again in a few days. It might take up to 15-20 tries before the baby or child will actually eat the food. Of course, you can be creative to present it in different ways – cooked, steamed, mashed, baked, fresh/raw, etc.

How Much – Allow the baby or child to take the lead role in eating, let them play with the food (it doesn’t matter you are using BLW or TW). If they are finished do not force them to eat more. Many parents are concerned their child is not eating enough, however, child are good at regulating their appetites and will not starve themselves. They may eat a lot one day and almost nothing the next and that is ok. This way you do not set up power struggles with eating.

It is absolutely not your job to make your child eat.

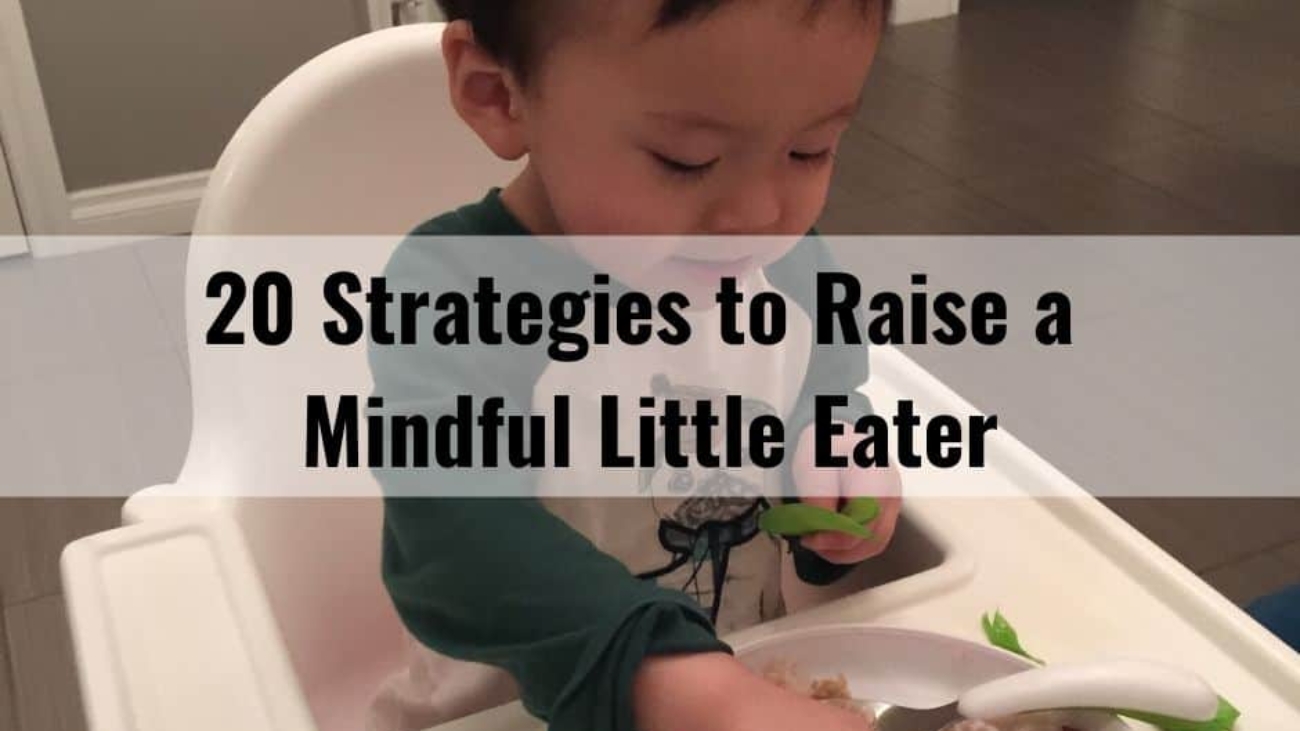
SIMPLE & EFFECTIVE STRATEGIES THAT YOU CAN TRY AT HOME

Here are some simple, yet so effective strategies that you can try at home.

Offer balanced, nutritious, appealing meals and snacks

These will cover your child’s nutrient requirements and allow him to see many different foods, which is part of readying him to try new foods. If you do your job at FEEDING, your child will do their job at EATING.

Don’t cater to your child’s preferences

Don’t narrow the menu to what your child will eat because you will get stuck doing this, perhaps for many years! Offer at least one “safe” food per meal. A safe food is a food like rice, vegetables, or fruit, which you know your child will likely be fine with eating if they are hungry.

Keep the food variety coming, even if your child rejects it

Studies show it takes children 6 to 15 food exposure before they will try to like a food. Don’t get disappointed. Eventually he may touch it, next time he may lick it, next time he may chew a bit and spit it out…. learning to eat can be a slow process.

Don’t be a sneaky chef

Hiding food in other foods can build mistrust in children. Be honest about what is in the food your child eats.

Keep a smile on your face and a positive attitude

Even when you are frustrated, overwhelmed or angry, your young child should not see you lose your temper, as this may change the situation and tempt your toddler to keep getting negative reactions out of you. It may take at least a few weeks to few months to practice the Feeding Relationship.

Don’t show your emotions

No anger, frustration, or annoyance! Your goal is to be steady and not react to any antics.

Be role model 

Parents are the greatest role models, so you should eat a variety. Children offered variety will eat a variety

Don’t give negative comment

It can be very harmful. We all have personal tastes (yes, I understand we have some foods that we dislike too). Personal tastes can be influenced (positively or negatively) by parent’s food preferences. So, stop making negative comment about meals at the table. I am sure kids will say “it’s gross or yucky” after hearing someone comment about the foods. Soon, they will refuse to eat it, despite whether they’d been eating it before the negative comment.

Stay on a meal and snack schedule

Staying on a schedule means your child will have plenty of opportunities to eat during the day, which takes the pressure off when he skips a meal. When your child choose to eat very little or not to eat at all at a scheduled opportunity to eat, allow him to be done and remind him when the next opportunity to eat is scheduled.

Don’t push your child to eat more

Pushing extra bites or sips often backfires, especially when children are picky. Nag him to try something new? The effect is the same as pushing for more eating. I personally discourage the “1, 2, or 3 bite” rule. It may work for some children, but for the majority (who are super taster and stubborn). If your child knows they are going to be forced to try a bite of a new food, they already dislike it before they try it. Making them try a bite will not likely get a “I like it” reaction, whether they truly do like it or not, as now it has become a battle field. We also want children to make healthy food choices when they are older and make these decisions on their own. If they were forced to eat certain foods when younger, they are more likely to develop a dislike for that food throughout life.

Try new foods

Eventually, your child will probably be excited about new and different foods, especially if he is conditioned to see a variety of unfamiliar foods early on. Offer food in another form. For example: boiled egg, scrambled egg, fried egg, etc. Be patient and give your child time to explore, touch and taste his food.

Don’t reward your child with dessert or other food

While this can be an effective tactic in getting your child to eat couple more bites or something you want him to, over time, research has shown it doesn’t help children like food. From my personal experience, the more random, the better. I try to stay neutral when it comes to treat foods.

Require your child stay at the table during meals

He doesn’t have to eat. While your child doesn’t have to eat, he does need to learn to politely stay at the table while others are finishing their meal. Children eat better when they stop and sit down to eat. By setting some appropriate mealtime rules with your kids, you can gain control over mealtimes (what’s where’s and when’s feeding) and allow your kids to take care of the rest (whether and how much they eat).

Don’t punish, discipline, shame him for not eating

Children can develop a negative association with eating and food when they are punished for not eating certain foods, or enough. This will not only create negative associations with food, but will also hurt his self-esteem, perhaps encourage long-term picky eating, binge eating or other forms of disordered eating.

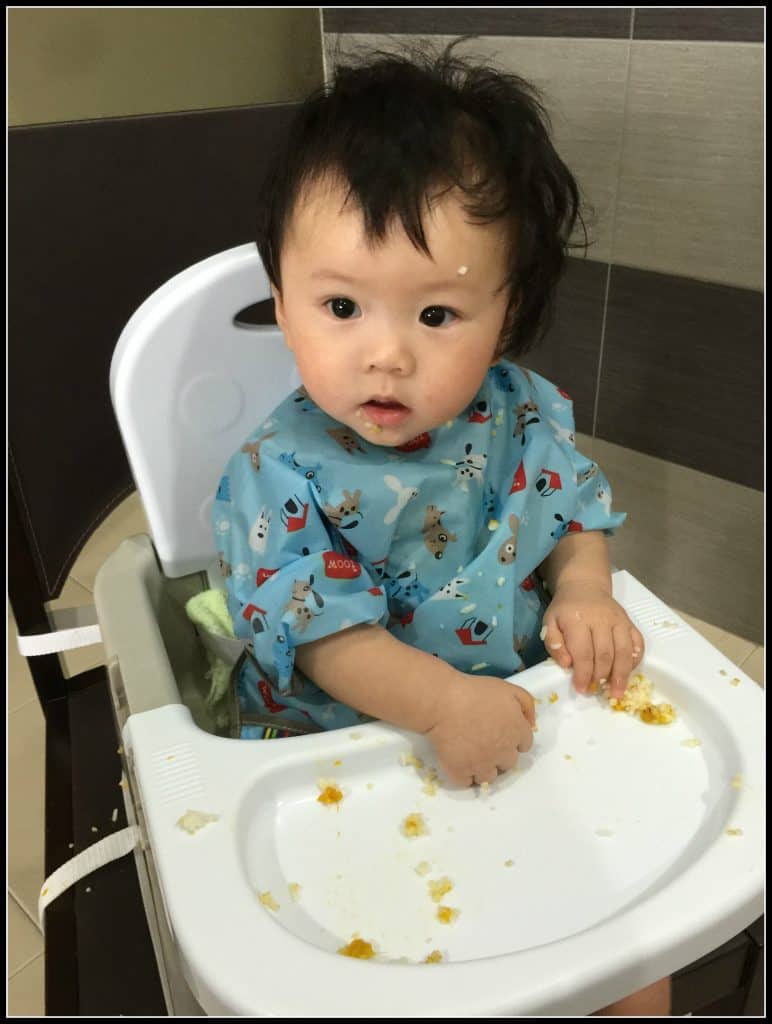
Allow self-feeding, even if it is messy

 This is the control your child wants. Trust him. The goal is to raise a healthy confident eater. We want our kids to feel capable at the table – grow to be independent eaters, able to choose from the foods provided and how much of each to eat. Also, we want them to develop the fine-motor skill necessary to eat independently.
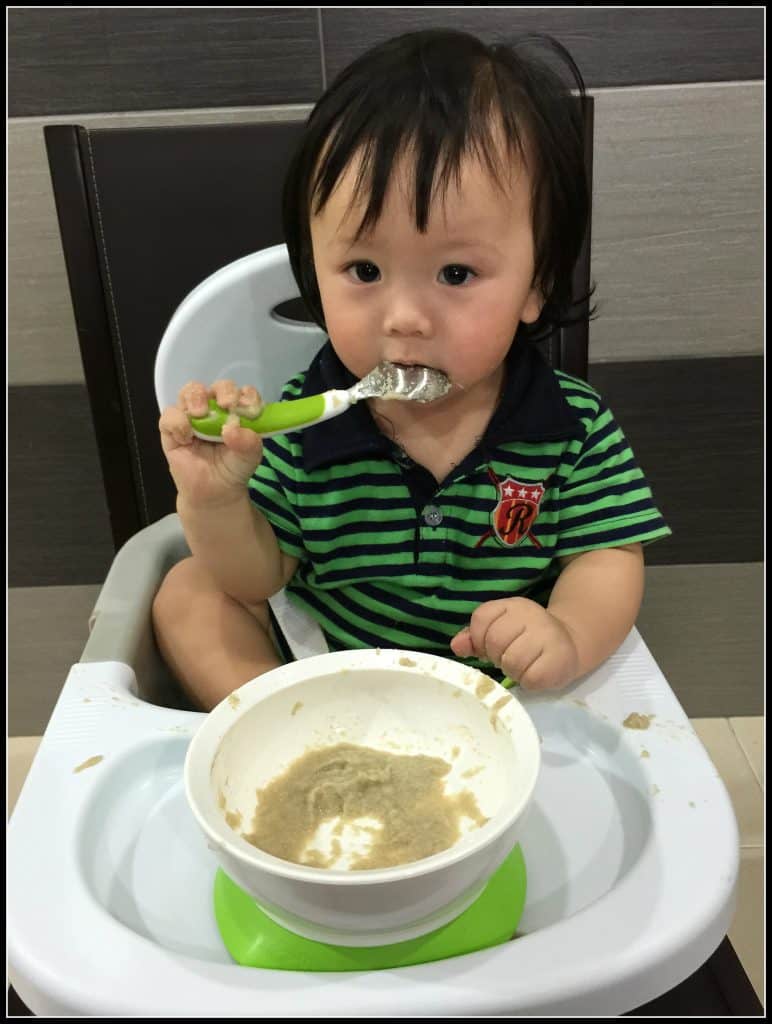
No force-feeding

This takes all control away from your child, and most children do not respond well to force-feeding or parents taking control of feeding, especially as they get older. If we spoon/force-feeding them, they will not feel capable, nor develop the skills to feed themselves at the appropriate pace.

Invite your child in the selection and preparation of the food

Some kids feel like they have no enough say. Kid might feel bored or no control over what they’re fed, or perhaps they don’t like the way that their foods are placed on their plate or lunch box. I know it is important to set mealtime boundaries and meet your responsibility of – what, where and when, but it is ok to let your kids be part of the “what’s”. I realize that involving kids in meal planning (structure choices), preparing(washing), and cooking (mix ingredients) can make the process longer and maybe a bit more frustrating (kitchen is messy!!). But the benefits are huge and it’s worth it.

Don’t offer large portions 

Serve smaller amounts of food. Large amounts can be overwhelming.

Reassure your child

If your child decides not to eat, let him know when the next meal or snack is scheduled.

Don’t label your child “Picky”

Children live up to expectations. If you label your child picky, he will be more likely to live up to it. There are no “good” or “bad” eaters. A good eater eats when they’re hungry, and does not finish his plate for praise, we would like them to continue practicing this mindful eating as long as possible.

REMEMBER

It is absolutely not your job to make your child eat.

For more information:

visit Ellyn Satter Institute or read one of Ellyn’s books:

  • Secrets to Feeding a Healthy Family: How to Eat, How to Raise Good Eaters, How to Cook
  • Child of Mine: Feeding with Love and Good Sense
  • Your Child’s Weight: Helping Without Harming

Please comment below and let me know if you have any questions about picky eating and which strategies work best for you and your family?

Honeyberry Muffins

Honeyberry Muffins

I always love to plan to go to UPick Farm in the Summer at least couple times. Because I know how much we love fruits, especially it is organic. We went to a UPick Farm last month, we picked the honeyberries and strawberries.

DSC_7505

This was my first time to try honeyberries. It has a very unique flavour, you can compare it’s taste to blueberries, raspberries, blackberries, and saskatoons. The flavour seems to vary with varieties. There are most often compared with blueberries, but without the seeds. The seeds are similar to that of kiwis, so you don’t even notice them.

13690939_954974936738_5134069452278519103_o

Going to a local farmer market and a field trip like this – UPick Farm, Corn Maze, Pumpkin Patch will help your kids  or even picky eaters to learn different variety of vegetables and fruits. This may encourage them to try new vegetables or fruit.

DSC_7494

With a very thin skin, the zesty berries melt in your mouth. Aiden just can’t stop picking and eating them.

DSC_7480

This is the Strawberry farm. The strawberries are super sweet and juicy.

DSC_7508

These healthy berries can be eaten fresh off the bush, or used fresh to frozen in some blueberry recipe.

DSC_8172


Honey Berry Muffins

Honeyberry Muffins

Prep Time 10 minutes
Cook Time 25 minutes
Total Time 35 minutes
Servings 12

Ingredients
  

  • 3 tbsp Acovado Oil, or more for the pan
  • 2 cups whole wheate flour
  • 1/2 cup brown sugar
  • 1.2 tsp salt
  • 1.5 tsp baking powder
  • 1 tsp ground cinnamon
  • 1 egg
  • 1 cup milk or more if needed
  • 1/2 tsp grated lemon zest
  • 1 cup honeyberries (blueberries, or raspberries)

Instructions
 

  • Heat the oven to 375F. Grease the muffin tins with a little oil or line it with paper or foil muffin cups.
  • Mix together the flour, sugar, salt, baking powder, and cinnamon in a medium bowl.
  • Beat together the egg, milk, and oil in a large bowl.
  • Add the dry ingredients to the wet ingredients and stir just enough to combine everything. If the batter is very dry and does not come together easily, add another 1 to 2 tbsp milk.
  • Gently fold the honeyberries into the batter.
  • Distribute the batter among the muffin cups, filling them about 2/3 full.
  • Bake for 12-13 minutes (mini) and 20-25 minutes (large), until the muffins are browned on top and a tooth-pick inserted in the centre of a muffin comes out clean.
  • Remove the pan from the oven and let rest for 5 minutes before removing the muffins. Serve warm or at room temperature (or cover tightly and keep at room temperature for up to a couple days).
  • Yield 6 muffins (large) and 24 mini muffins.
How to Start Solid Foods

How to Start Solid Foods

Last blog we discussed When to Introduce Your Baby Solid Foods. It is important to wait until healthy babies are at least 6 months old before starting solid foods to maximize exclusive breastfeeding and ensure their digestive systems are mature enough to handle solid foods.


START FROM HOW 

Today, let’s talk about HOW to introduce solids. Get your camera ready, you’ll want to capture those funny faces your baby makes. Here are some tips to help make the transition to solids easier:

1. Choose a Good Mood

Introduce new foods when your baby is alert, relaxed and happy. Offering food after breastfeeding (waiting 60-90 minutes) or after a nap can increase the chance that your baby will try a new food.

2. Introduce 1 New Food a Day

Offering  a variety of foods can set your baby up to be a more adventurous eater. The ONLY exception is highly allergenic foods. You can start introducing them around 6 months, but wait 1-2 days before adding another allergenic food to monitor for potential allergies.

3. Start with Small Amounts

Offer just 1-3 tsp (5-15 mL) of food. If baby shows signs of hunger, you can offer more.

4. Follow Baby’s Cues

Sit your baby in a high chair at approximately eye level. Hold the spoon a few inches in front of their mouth and wait for them to open up. Feed as slowly or quickly as they prefer and stop when they show signs of fullness. If you’re following  Baby-Led Weaning approach, let your baby take the lead in eating.  NEVER FORCE YOUR BABY TO EAT, AND REMEMBER NOT TO COMPARE YOUR BABY TO OTHERS.

5. Start with Once a Day

Begin by offering solid foods once daily. Soon, baby will be ready to eat more often. Gradually increase to 2 times per day, then to 3 times.

6. Offer New Flavours

Some babies are cautious eaters and need time to trust that a new food is safe. It can take multiple attempts (approximately 15 times) before they’re willing to eat a particular food.

7. Let Your Baby Explore

Expect a bit of a mess. Messy hands and faces help babies get used to new foods. So let them have fun with it.

8. Be Aware of Changing Appetite 

Baby’s appetite will vary daily. From 6-12 months, they will gradually drink less breast milk and eat more solids.

Be mindful of your baby’s hunger and fullness cues. Avoid forcing or over-feeding.

HUNGER SIGNS 

  • Smiles, gazes or coos at the parent during mealtimes to show they wants to continue
  • Leans toward the spoon or food and opens their mouth
  • Reaches for or points to food
  • Shows excitement when food is offered
  • Focuses on and follows food with their eyes
  • Sucks or smacks lips
  • Uses words, sounds, or hand signs to indicate hunger or wanting more (older babies)

FULLNESS SIGNS 

  • Slows pace of eating
  • Get distracted easily or shows uninterested in food
  • Moves head away from spoon or closes mouth
  • Bats at spoon or pushes it away
  • Pushes food away or throws it on the floor
  • Plays with food or fidgets
  • Closes or purses lips when offered food
  • Spit food out
  • Tries to leave the highchair
  • Uses words or signs to signal “all done” (older babies)

FEEDING ESSENTIAL TOOLS 

With so many baby-feeding products available, it can feel overwhelming to decide what you truly need to start solids. Here are the TOP 6 essential tools to help you get started:

1. High Chair or Booster Seat

  • I believe an actual high chair is a must-have. It’s helpful to have a dedicated seat for your baby, and the large high chair tray makes a great food-catcher. The IKEA Antilop high chair with tray is totally affordable.

0339304_PE527619_S5

  • A booster seat can easily strap onto your own chairs. This seat is foldable for easy storage. I’ve taken it along for visits to the grandparents and to restaurants – it’s super handy.

pTRUCA1-12732984dt

2. Bibs

  • You can certainly use the  drooler/cloth bibs. However keep in mind they’ll need to be washed after each use.

IMG_0216

  • I recommend getting a set of larger, waterproof, easy-to-clean feeding bibs. I prefer ones with big front pocket to catch any dropped food.

IMG_1491

  • If your baby is an active explorer, your may prefer the Kushies Long Sleeved Waterproof Bib. It allows your little one to fully enjoy mealtimes without the worry of ruining their clothes.

IMG_0900

3. Spoons

  • Make sure that any spoons you use are BPA-free. BPA is a harmful chemical found in some plastics that can leach into food when heated.
  • Munchkin 6-Pack Soft Tip Infant Spoon: These small, plastic-coated options are much gentle on tender gums. It’s helpful to have several on hand during feedings, one for you and one for baby, to encourage their sense of independence and avoid power struggles.

d31e24_de724fd8d5464c4b8bd0fa0e18cbbfd0

  • Once your baby is ready to try self-feeding, consider getting the OXO tot Fork & Spoon Set. This set makes it easy for young eaters to transition their food from bowl to mouth.

6104300T1

4. Dishes

  • When you first introduce solids, you will need a handful of small, BPA-free plastic bowls.

61aH+gliv-L._SX466_

  • Calibowl. This deep bowl makes it easier for your baby to scoop up their food, while the super suction cup on the bottom prevents it from being tossed to the floor. It also includes fitted lids, making food storage a breeze.

15047230IMG_2870

  • Once your baby is ready to try self-feeding, consider picking up a divided plate like the OXO tot Divided Plate. I like the removable, raised outer ring. which helps keep food on the plate and guides it into utensils.

6113700T1

5. Straw Cup or Open Cup with/without handles

  • My son wasn’t a big fan of bottle, so I was very anxious to introduce a straw cup around 6 months. He would often bite on the straw, but he would sip from it occasionally. Using a straw cup does not present the same concerns as a sippy cup. In fact, It can help with oral motor skills development and reduce the risk of dental caries since the liquid doesn’t bathe the baby’s teeth. Here are three straw cups that I recommend:
    • Playtex Sipsters Stage 1 Straw Cuptrainingtime_out_of_pack_green_blue_straw_290x334
    • Munchkin Click Lock Weighted Flexi Straw Trainer Cup71MMm8ir4EL._SY355_
    • Playtex Sipsters Stage 3 Insulated Spill Proof Straw Cup
      00078300058571_cf_dinosaurs__gs1_jpeg
  • Offer water in an OPEN CUP as soon as your baby starts eating solids. Babies learn quickly how to drink from an open cup.

IMG_4928

6. Snack Catcher

  • No more spilled snacks on the floor. This is the perfect solution for on-the-go situations, whether it’s a doctor’s appointment, shopping trip, grocery run, or evening walk.

IMG_5030

A HEALTHY FEEDING RELATIONSHIP 

Babies learn by observing those around them. When families eat together, it teaches babies that mealtime is a time to connect, share, and enjoy food.

  • As a PARENT;, your role is to choose WHAT foods to offer. As baby start to eat solid foods, your are responsible for WHEN and WHERE baby is fed.
  • It is your BABY’S job to determine HOW MUCH they want to eat.

Trust your baby to recognize their hunger and fullness cues. This fosters mindful eating. 

Introducing solids to your baby can be lot of fun. Be PATIENT and remember that it might take time for your baby to warm up to new foods; this is completely normal. If your baby enjoys every food from the first bite! Congratulations! you have a wonderful little eater.

Bon Appétit babies!

Happy Shopping Mommies!!

When Is The Right Time to Start Solid Foods 1

When Is The Right Time to Start Solid Foods

As a dietitian and a mom, one of the most common questions I hear is: “When should I start my baby on solids?”

It’s no wonder parents feel confused. You might hear from friends, family, or even health professionals that you can start at 4 months. Some websites still say “between 4 and 6 months.” And if you were born in the 80s, chances are you were started on solids as early as 2 to 4 months because that’s what the guidelines recommended back then.

So which advice should you follow? Let’s look at what the evidence says today.


WHY DO BABIES NEED SOLIDS?

Introducing solids to babies isn’t just about giving babies “real food”, it’s critical step for both nutrition and developmental reasons. Breast milk or formula will still be a main source of nutrition during the first year, but starting solids around 6 months helps meet growing needs that milk alone can’t fulfill.

1. Nutritional Reasons

  • Iron needs rise: Babies are born with iron stores, but by about 6 months, those stores start to deplete. So they need iron-rich foods to support healthy growth and brain development.
  • Critical nutrients: Protein, zinc, omega-3 fatty acids, and extra energy all become important to fuel your baby’s rapid growth and curiosity.

2. Developmental Reasons

  • Learning to chew and bite: Solids help strengthen jaw muscles and lay the foundation for speech development.
  • Oral and motor skills: Feeding supports hand-eye coordination, fine motor skills, and learning to move food around the mouth safely.


COMMON REASONS PARENTS START EARLY?

I often hear parents say:

  • “My baby is so big, he must need food.” 
  • “My baby too small and tiny.”
  • “My baby seems hungry all the time.” (increased breastfeeding demand)
  • “My baby wakes up multiple times a night, maybe solids will help him sleep.”
  • “My doctor recommended to start at 4 months.”
  • “My baby grabbed food off my plate, he must be hungry.”
  • “I wanted to offer something (iron-rich foods) alongside breast milk or formula.”

It’s completely understandable to think these are signs of readiness. But here’s the truth: breast milk (or infant formula) still provides more calories and nutrients than solids before 6 months. Increased hunger is usually growth spurt, not a sign to start solids early. And waking up at night is normal infant behavior, not a reason to rush into feeding.


THE RISKS OF STARTING SOLIDS TOO EARLY 

Starting solids too early before 4 months (17 weeks) can pose several health risks. Research shows that introducing solids TOO EARLY can increase the chances of:

  • Infections and Digestive Issues: Babies’ digestive systems are still maturing, and introducing solids too soon may cause gastrointestinal discomfort and infections.
  • Food Allergies: Introducing certain foods too early can increase the risk of developing food allergies later on.
  • Obesity: Early solid feeding can influence long-term eating behaviors, potentially contributing to a higher risk of childhood obesity.
  • Kidney Strain: Babies’ kidneys aren’t fully developed in the first few months, and early solids can strain these organs, leading to imbalances in minerals they’re not yet ready to process.
  • Reduced Breast Milk Intake: Solids may replace breast milk in the baby’s diet, potentially reducing milk supply and lowering access to the essential nutrients and antibodies breast milk provides.
  • Choking Risk: Babies’ swallowing and chewing reflexes are not fully developed before 4 to 6 months, increasing the risk of choking on solid foods.

Waiting too long to introduce solids, beyond 7 months can present its own set of challenges. By this age, babies start needing additional nutrients that breast milk or formula alone may not fully supply. Research shows that delaying solids past 7 months can increase the risk of:

  • Iron Deficiency: Babies’ iron stores begin to deplete around this time, and solids provide essential dietary iron that helps prevent deficiency.
  • Food Allergies: Both early and delayed introduction to certain foods are associated with a higher risk of developing allergies.
  • Texture Sensitivity and Food Fussiness: Delayed exposure may make it more challenging for babies to accept new textures and flavors, potentially leading to picky eating.
  • Difficulty with Essential Nutrients: Waiting too long can mean babies miss out on critical nutrients like iron and zinc, which support growth, brain development, and immune function.


WHAT DO THE GUIDELINES SAY 

Today, there is strong consensus among top health organizations, they recommend introducing solids around 6 months when babies show signs of readiness.

These guidelines advocate for exclusive breastfeeding until around 6 months to ensure the digestive system is mature enough to handle solid and to protect against gastrointestinal and respiratory infections (APP 2012, Nylor & Morrow, 2001).

Breast milk or formula should remain the primary nutrition source until 12 months, with solids gradually becoming a bigger part of your baby’s diet.


DEVELOPMENT SIGNS FOR READINESS

Rather than watching the calendar, look for developmental cues that your baby is ready:

DSC_2602 2

IMG_0707


IMG_0133

  1. Around 6 months of age
  2. Able to sit up with minimal support (with pillow or towel)
  3. Good head and neck control, able to hold head upright and steady
  4. Bringing hands to the mouth
  5. Chewing on non-food items, such as toys or teether
  6. Show interest in food, possibly by reaching for or leaning forward towards food
  7. Diminish tongue thrust reflex

PREMATURE BABIES  

It’s important to consider your baby’s gestational age when deciding when to introduce solids. Premature babies may not be neurologically or physically ready for solids until approximately 6 months after their original due date, rather than their birth date. For instance, my elder son, born 2 weeks early, began solids about two weeks after turning 6 months. Similarly, Audrey and Avery, born 4 weeks early, started solids around 6.5 months. Adjusting based on gestational age allows babies to begin solids when their developmental milestones and readiness are more in line with their age-adjusted peers.

What you can do If your baby is showing obvious signs of being ready for solids before 6 months?

It’s very common for babies around 4 to 5 month to show interest in mealtimes such as reaching for food. However, this curiosity doesn’t necessarily mean they’re ready for solids. In fact, it is part of their normal development to explore by putting objects in their mouths. Here are some ways to involve your baby in mealtimes without introducing solids:

  1. Include Them at the Table: Let your baby join family meals in a booster seat or high chair. This gets them used to mealtime routines and sitting in their designated seat, preparing them for when it’s time to start solids.
  2. Provide Safe Utensils: Give your baby spoons, cups, or bowls to play with during mealtimes. This helps them get familiar with eating utensils in a fun and exploratory way.
  3. Introduce Open Cups: Offering small amounts of water or expressed breast milk (1-3 oz) in an open cup starting at 6 months is considered beneficial. This lets your baby practice drinking skills while engaging at the table without starting on solid foods.

BOTTOM LINE

Most babies are developmentally and physiologically ready to start solids around 6 months (sometimes a littler later, depending on corrected age for preemies). Starting too early can pose risks, while delaying too long can also create challenges.

It’s important to look for signs of readiness rather than strictly following a calendar. Remember, the decision to start solids shouldn’t come from pressure from parents or in-laws but should be based on your baby’s cues.

Baby, Bon Appétit !! 

My children love making a mess during mealtime, and that’s perfectly normal! It’s all part of the learning process as they explore new textures and flavors.

IMG_0662
Aiden
Avery and Audrey

As you embark on this exciting journey of introducing solid foods to your little one, remember that patience and observation are key. Every baby is unique, so trust their cues and enjoy the experience of discovering new flavors and textures together.

Struggling with introducing solids or worried about your baby’s nutrition? Baby’s First Bites online course gives you step-by-step support to help your little one explore food safely and confidently.


Update: August 22, 2025

Oatmeal Cranberry Chocolate Chip Cookies

Oatmeal Cranberry Chocolate Chip Cookies

You may hear that eating chocolate is good for your health because of compounds call FLAVONOIDS. Flavonoids are antioxidants that help the body repair damaged cells, which may reduce the risk of heart disease and other chronic disease.

Types of Chocolate

  • Cocoa Powder and Dark Chocolate: they are the least processed, have the highest levels of flavonoids and may offer the greatest potential health benefits.
  • Milk Chocolate and White Chocolate: they are not the good sources of flavonoids , therefore, they only offer a little health benefits.

I crave for chocolate once in a while. There is no cookies left in the freezer, I think it is time to make another batch for my son and myself. This recipe is so easy and quick that you can have a batch of healthy cookie done by nap time is over. I use whole wheat flour and rolled oats instead of white flour; dark chocolate instead of milk chocolate. These would be perfect for when you are craving for chocolate but still have a healthier cookie.

DSC_6964

DSC_6969

Enjoy!!

Recipe adapted from fANNEtasticfood.

It is good to know that chocolate contains ingredients beneficial to your health. However, it does not mean you should go ahead and eat more chocolate products. Chocolate candies and bars are often high in calorie, fat and sugar. MODERATION is the key. It is okay to have a small piece of chocolate once in a while, you can choose dark chocolate (at least 60% cocoa solids) for its higher flavonoid content.

DSC_6986

I was extremely busy for the past two weeks. No time for baking and trying new recipes. Last two weekends were busy on the photography workshop. Also, I am trying to plan a busy weekend for Aiden, we decided  to go swimming every Sunday. He loves to play in the water. This entire week, I attend some free yoga classes like Aerial Yoga and Acro Yoga. I love trying new thing, especially yoga, it allows me to find my own potential.

If you like this recipe, you might also want to try this delicious Cranberry and Dark Chocolate Chip Cookies.

Oatmeal Cranberry Chocolate Chip Cookies

Prep Time 15 minutes
Cook Time 15 minutes
Total Time 30 minutes
Course Dessert, Snack
Servings 35

Ingredients
  

  • 3/4 cup rolled oats
  • 1 cup whole wheat flour
  • 1/2 tsp baking soda
  • 2 tsp cinnamon
  • 1/2 tsp salt
  • 1/4 cup non-hydrogenated margarine or butter
  • 1/4 cup olive oil
  • 2/3 cup brown sugar
  • 1 large egg
  • 1 tsp vanilla extract
  • 1/2 cup cranberries
  • 1/4 cup dark chocolate chips
  • 1/4 cup walnuts (optional)

Instructions
 

  • Preheat an oven to 350F
  • Grind rolled oats in a food processor. In a small bowl, mix the whole wheat flour, baking soda and salt and oats together until well blended.
  • In another large bowl, beat non-hydrogenated margarine with an electric mixer until fluffy. Add olive oil, brown sugar, egg and vanilla. Beat on low speed until smooth and creamy.
  • Add the dry mixture to the wet mixture, beating on low speed until well combined. (I just do all this by hand.)
  • Once it is mixed, stir in cranberries until well blended. You can also stir in the dark chocolate now but I prefer to add them at the same time when I am forming the cookie dough, I can control how many chocolate chips in one cookie. I made few cookies without chocolate chips for my son.
  • Chill for 1 hour.
  • Drop the dough by heaping tablespoonfuls (15 mL), about 1 inch apart, onto baking sheet lined with parchment paper.
  • Bake for 15 minutes until firm around the edge and golden on top. Make about 30-35 cookies.
  • Let cool slightly on the baking sheet then transfer to a wire cooking rack.

Notes

It is good to know that chocolate contains ingredients beneficial to your health. However, it does not mean you should go ahead and eat more chocolate products. Chocolate candies and bars are often high in calorie, fat and sugar. MODERATION is the key. It is okay to have a small piece of chocolate once in a while, you can choose dark chocolate (at least 60% cocoa solids) for its higher flavonoid content.
Constipation above 6 months

How to Manage Constipation in Your Child (6 months or above)- Part II

Constipation in children is extremely common. I don’t deal with constipated children a lot in my practice, even my son, he is such a “regular” boy. Most parents are overly concerned about how often their child has bowel movement, because they have been taught that a healthy child should have a bowel movement every day. This is not TRUE.

WHAT IS NORMAL? 

It is very important for parents to recognize there are many “normal” patterns for bowel movements in children.

  • Bowel movements decrease down to about 1 or 2 each day from age 2 months to 3 years.
  • Children 3 years or older have about 1 bowel movement each day (here).
  • Bowel movements change in thickness, number and colour when a change is made to what your child eats (e.g., when babies are starting solid foods or cow’s milk).

Your child is not constipated if his or her stools are soft and pass easily, even if it has even a few days since last bowel movement.

WHEN YOU SHOULD WORRY? 

When the bowel movements are 1) dry and hard 2) difficult or painful to pass.

The frequency of bowel movements is not as important as whether the child can pass stools easily.

CONSTIPATION IN INFANT 6-12 MONTHS

In infants, any changes in diet may result in stool inconsistency and/or change in frequency of bowel movements.

COMMON CAUSES OF CONSTIPATION 

  • Changing from breast milk to formula or cow’s milk.
  • Introducing new formulas. Some formulas may be more constipating than others.
  • Incorrect formula-to-water ratio (preparation method).
  • Introducing solid food(s) – Breastfed babies may be more prone to constipation when solid foods are introduced (at 6 months). This is because their tiny tummies are used to process the easily and highly digestible breast milk.

CONSTIPATION IN CHILDREN AGE 1 YEAR AND OLDER

Constipation can make bowel movement painful, so your child may try to prevent having one. Once a child begins to be afraid of passing bowel movements, the cycle of chronic constipation has begun and bowel movements become more and more abnormal.

COMMON CAUSES OF CONSTIPATION 

  • Toilet training. Refuse going to toilet, due to not wanting to take a break from play or not wanting to use certain facilities such as the school toilets or travelling.
  • Diets low in fibre.
  • Lack of fluid intake. Sometimes the normal amount of fluid a child drinks is not enough, such as when the weather gets hot or the child increases his or her physical activities.
  • Excessive intake of dairy products. Milk does count as part of the fluid but be aware that too much milk can be a contributing factor to constipation as it means that a child will be eating less foods and thereby less fibre.

If high intakes of any foods create a lack of fibre or fluid intake, then constipation may result.

MANAGEMENT OF CONSTIPATION

Bathroom Routine

  • Children who are toilet trained should practice sitting on the toilet for 5-10 minutes every day after each mealtime (same time every day).
  • No distraction. Make sure parents or siblings aren’t coming in and out the bathroom when it is “their toilet time”, so that they can relax and make sure that they sticks to their morning bathroom routine consistently every morning. It usually takes up to weeks or months for them to start going consistently.
  • Do not ignore the “urge” to go to toilet as this can lead to harder, larger and drier stool. Make sure they have enough privacy and time to pass stools comfortably.
  • It is important to teach your toddler to “listen to your body” or “listen to your bottom” and go to toilet when they get the message. Then , you can take them to the bathroom right away. Parents should listen or watch the signs:
    • Suddenly stop whatever activity they are doing
    • Suddenly squat or sit down
    • Leave the room or hide in a corner
    • Stiffen up, extend their bodies upright, stand on their tip toes and tighten the muscles in their bottom
    • Face turns red or change tone of their voice
    • Unable to pay attention to you
  • Make sure your child’s feet are resting on something, such as a foot stool. It helps relax the pelvic floor muscles, which can help move the bowels.
  • Keep some reading or picture books in the bathroom and encouraged your child to look at them and try to relax.

Increase Fibre Intake 

It is important your child eat a healthy and balanced diet. The recommended intake of fibre are 19 g of fibre per day for a 1-3 year old and 25 g per day for a 4-8 year old (here).

  • Offer at least one serving of vegetables or fruit at each meal or snack.  In this way, your kids should get adequate fibre daily.
  • Gradually increase fibre intake. Going from a low fibre intake to their desired goal too fast can cause symptoms include abdominal pain, bloating, and gassiness.
  • Choose whole grains – e.g. whole grain bread, whole wheat pasta, brown rice, whole grain cereal, oat, quinoa, barley, etc.
  • Choose legumes – e.g. beans and lentils.

The best way to introduce more fibre to your child’s diet is to do so by adding some of those fibre-containing foods slowly. For example, provide a serving of fruit at lunch for a few days, then add a high fibre cereal (at least 3 g of fibre per serving) at breakfast until you reach the goal. Also, If your child is constipated and you are feeding him the rice-based infant cereal, then try bran- or oat-based cereal instead.

Avoid Binding Foods

Avoid white starchy foods, banana and cheese. Most white starchy foods are low in fibre, e.g., white rice, white bread, white pasta and breakfast cereals. These foods will bind the stool so that it is harder to pass and this can also cause pain when passing.

Increase Fluid Intake 

  • Water is the only things that helps your child get over their constipation.
  • Babies 6 – 12 months:
    • Offer up to 1 oz (30 mL) of fruit juice between feedings to a maximum of 4 oz (125 mL) in 24 hours.
    • Sips of water from an open cup (about 2-3 oz or 60 – 90 mL at a time).
    • Note: Juice and water should not replace regular feedings.
  • 1 – 3 years Children:
    • Recommended total fluid intake: 4 cups (900 mL) per day (here).
    • Offer 500 mL (2 cups) of milk per day with meals and snacks.
    • Offer water throughout the day.
    • Limit 100% fruit juice to 1/2 cup (125 mL) per day (OPTIONAL).

Natural Laxatives 

Why juice? Juices containing high amounts of sorbitol can help draw water into the bowels to make stool easier to pass. Prunes, pears and apple juices usually contain higher amounts of sorbitol compared to other juices and therefore can have some benefit in relieving constipation.

  • Offer “juice water” (diluted fruit juice) which mean 95% of water and a tiny splash or real 100% fruit juice. Limit 100% fruit juice intake to no more than 1/2 cup per day.
  • Mix prune puree with a favourite food (cereal or crackers).
  • Ground flax seed. Mix in cereal, soup, smoothie, baked goods, or yogurt. Dosage: 1 tbsp per day (toddler); 2 tbsp per day (older children).

Increase Physical Activity

We all know physical activity is a natural bowel-stimulator. Get your child off the couch, turn off the TV and hide the iPad. Checkout the Physical Activity Guidelines.

Medications & Laxatives & Fibre Supplement 

Talk to your doctor and/or pharmacist before using any of these methods, as doses are weight-dependent. Follow the instructions carefully for the dose and the amount of the time you child should be taking them. As a dietitian, I will focus on “real foods” rather than supplements.

Prebiotic & Probiotics Supplement 

Currently, there is no enough evidence or research to show that pre/probiotics supplement help with constipation. However, foods like cheese, milk and yogurt with probiotics are safe for most people including children.

Do you have a constipated baby at home? If you have any questions please leave me a comment or Contact Me

Easy Salmon Cakes

Easy Salmon Cakes

I am a big fan of fish. I love to make fish cake for my son as it is easy to grab and eat. This recipe is super easy and tasty, it does not require a lot of ingredients. Salmon is rich in Omega-3 fats. Omega-3 fats are healthy fats with many health benefits for children and adult. Omega-3 fats help with brain, nerve and eye development for infants. Also, it helps lower our risk of heart disease.

It is recommended you eat at least 2 servings of fish per week.

One servings is equal to 75 grams (2.5 oz) of half a cup of cooked fish. Choose fatty fish which are rich in Omega-3 fats more often. I find that most of my clients do not meet the recommendation. I think the biggest barriers to eating fish seem to be the cost and not knowing how to cook it. Well, you won’t need to worry about either of those things with these delicious salmon cakes. This recipe uses frozen salmon fillet (you can also use canned salmon), which is much cheaper than buying fresh salmon.

IMG_8071

Enjoy !!


Recipe adapted from The Baby-Led Weaning Cookbook

For more tips and tricks when it comes to feeding your family, head over to my Facebook Page and Instagram Feed

Salmon Cake

Prep Time 15 minutes
Cook Time 30 minutes
Total Time 45 minutes
Course Dinner, Lunch

Ingredients
  

  • A little milk (or water) for poaching (I use homogenized milk)
  • 8 oz salmon fillets (you can use frozen or canned)
  • 1 cup cooked potatoes (no skin)
  • 2 tbsp non-hydrogenated margarine
  • 1 tsp grated lemon or lime zest
  • pinch of black pepper, to taste
  • 1 egg, beaten
  • 2 slices of whole grain bread for breadcrumbs
  • Canola oil or olive oil for frying

Instructions
 

  • Pour some milk into a shallow pan (with a lid), to a depth of about 1/4 inch, and add the fish.
  • Heat until the milk is just beginning to boil, then turn the heat down, cover and simmer for about 5 minutes, until the fish is opaque and cooked in the centre.
  • Drain the fish throughly, then skin and flake it.
  • Mash the potatoes with non-hydrogenated margarine, lemon zest and black pepper.
  • Stir in the flaked fish with a little of the beaten egg. Shape the mixture into 4-5 fishcakes.
  • Dip each fishcake into the beaten egg so it covered on all sides, then roll it in the breadcrumbs, until it is eventful coated. If time permits, place patties on a large plate, cover with plastic wrap and refrigerate for 1 hour (this helps the patties hold their shape while cooking).
  • Heat 1 tbsp of canola oil on a non-stick frying pan to medium-high heat. Add the fishcakes and cook for about 5 minutes on each side, until golden brown.
  • Serve warm, with some roasted baby potatoes and your favourite raw or cooked veggies.
Foods to support your child immune system

Foods to Support Your Child’s Immune System

The immune system plays a very important role in protecting both adults and children from infections. It’s made up of a highly interconnected network of white blood cells, antibodies, bone marrow, the spleen, thymus and the lymphatic system. Together, these systems identify and destroy harmful invaders like viruses and bacteria.

With Covid-19 and seasonal illness in the spotlight, many parents have searched for ways to “boost” their child’s immunity. But here’s the truth:

There’s no magic supplement, product, or food that can “boost” the immune system.

In fact, an “overactive” immune system is linked to autoimmune diseases like lupus or multiple sclerosis. The term immune boosting is a marketing phrase, not a medical one. Instead, what matters most is supporting the immune system so it functions normally and effectively.


THERE IS NO SINGLE PRODUCT THAT CAN BOOST IMMUNITY

Scientists are still uncovering how all the pieces of the immune system work together. While we can’t “boost” it, we can provide the right conditions for it to thrive.

There are many things we can do to “support” immunity, such as getting enough sleep, being physically active, minimizing stress and eating nutritious foods. As a busy mom, I love finding foods that are not only nutritious and convenient, but also immune supporting.

The easiest way to get these nutrients is by eating a healthy and balanced diet.

Certain nutrients, such as zinc, selenium, iron, protein, vitamins A, C, D and E are critical for the function of immune cells. However, I can’t promise you that you can totally shield your children from getting sick by eating foods with these nutrients.  In fact, you can build up your children’s immune systems with nutrient-dense foods. Certain foods have the exact nutrients that can help your children’s immune systems be as strong as possible, so when they are exposed to the inevitable germs, they are ready to fight. 


NUTRIENTS & FOODS THAT SUPPORT IMMUNITY 

Let’s dive into some of the foods and nutrients that play an important role in immune health.

Orange Vegetables and Fruits 

Carrots, sweet potatoes, pumpkin and cantaloupe are rich in beta-carotene, a precursor of vitamin A. Beta-carotene has several health benefits, including the antioxidant activity that protects cells from free radical damage and help enhance immune function (here). In fact, beta-carotene helps form white blood cells, which track down and destroy pathogens.

Pairing these foods with a healthy fat, such as olive oil, avocado, or nuts and seeds, can help your child absorb the nutrients more effectively.

Berries 

Berries are packed with antioxidants that reduce oxidative stress and keep immune cells functioning well. Strawberries, blueberries, raspberries, cranberries, and blackberries – fresh or frozen.  Add them to yogurt, oatmeal, or enjoy as snack.

Dark leafy greens

Kale, spinach, bok choy and gailan contain carotenoids, another antioxidant group linked with immune health. If your children not a fan of salads, just blend them into smoothies, stir into pasta sauces, or add to muffins.

Nuts

Almonds, peanuts and hazelnuts contain vitamin E, which helps increase T-cell count (T-cells directly kill infected host cells and regulate immune responses) (here).

Walnuts also stand out for their omega-3 fats. Offer a mix for variety, but remember: for toddlers, use thin nut butter spreads or finely chopped/slivered nuts to reduce choking risk.

Seeds

Pumpkin, sunflower, sesame, hemp, and flax seeds contain vitamin E, zinc, and omega 3 fatty acids.

Sprinkle on yogurt, blend into smoothies, or spread seed butter thinly on toast.

Oatmeal

Oats contain immune-supporting nutrients like selenium and zinc. But they also contain a special type of fibre called beta-glucan, which increases immune defense by enhancing macrophages (cells that detect and destroy bacteria and viruses) (here). A warm bowl of oats makes an easy immune-supporting breakfast.

Eggs

Eggs are a high-quality protein source, often used as the gold standard for measuring protein quality. Eggs contain selenium and vitamins A, D and E, all important for immune cell development and function.

Fatty Fish

Salmon, tuna, trout or sardines provide vitamin D and omega-3 fats. Vitamin D deficiency is linked to higher infection risk (here), while omega-3 fats are part of the structure of all immune cells (here). Try canned tuna in a sandwich or salmon in sushi rolls.

Fermented Foods 

Kefir, fermented vegetables (sauerkraut or kimchi), kombucha and yogurt contain probiotics that support gut health, which is closely tied to immune function (here). While research continue to identify which probiotic strains are most helpful, including fermented foods is a safe and beneficial choice.

Tumeric 

This golden spice contains curcumin, which has been linked to enhance immune responses. Because curcumin isn’t easily absorbed, pair it with black pepper to increase bioavailability by up to 2000% (here). Use in curries, soups or even a turmeric latte, known as golden milk.

HYDRATION MATTERS TOO

Water helps regulate body temperature, keeps cells functioning properly, and supports the clearance of irritants from the lungs and nasal passages. Especially in hot, humid climates like Malaysia, staying hydrated is essential for immune health.


SEASONAL FLU SHOT 

One important way to help protect children from getting seriously sick is the seasonal flu shot. Because flu viruses change from year to year, the vaccine is updated annually to match the strains most likely to circulate. That’s why experts recommend getting the flu shot once every year, usually before the flu season starts. While it doesn’t “boost” the immune system in the way marketing often suggests, it does train the immune system to recognize and fight the flu more effectively,  reducing the risk of severe illness, complications, and hospitalisation in children.


WHAT ABOUT PROBIOTIC SUPPLEMENTS

Currently, there isn’t enough strong evidence to recommend routine probiotic supplements for children. Not all probiotic strains have the same effects, and in some cases, the wrong strain could suppress immunity instead of supporting it. For most families, probiotics from food sources are the safest and most beneficial option.


BOTTOM LINE

You don’t need a special pill, powder, or “immune-boosting” food to protect your child. Instead, focus on the basics:

  • A balanced, varied diet rich in fruits, vegetables, protein, and healthy fats
  • Enough sleep, physical activity, and hydration
  • Including a mix of the nutrient-dense foods above in daily meals

These habits won’t prevent every cold or flu, exposure to germs is part of childhood. But they will give your child’s immune system the support it needs to respond effectively.

If mealtimes with your little one often feel like a battle, you’re not alone. My online class Peaceful Mealtimes is designed to give you practical tools, proven strategies, and confidence to help your child eat better without the stress and power struggles. Join today and bring calm back to your family table.


Update: August 25, 2025