The Best Banana Nut Bread

The Best Banana Nut Bread

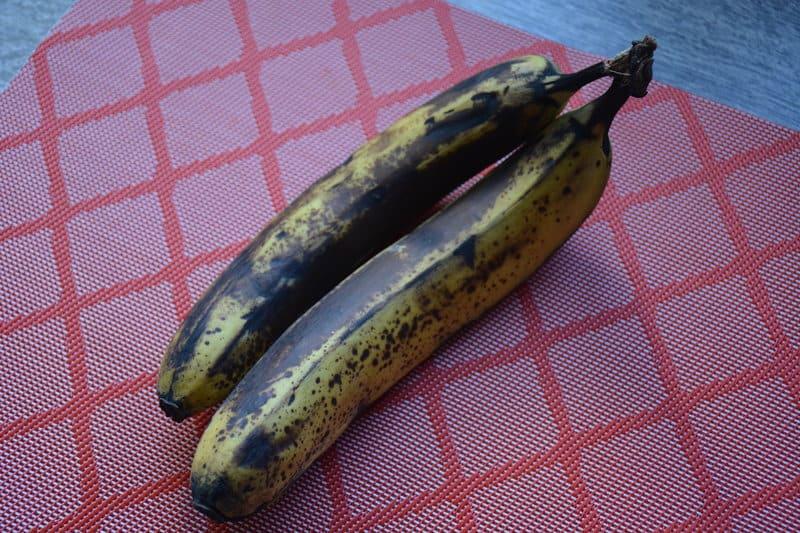
Bananas alone are nutritional powerhouses, loaded with potassium and other important nutrients. They are routinely on my grocery list – between using in smoothies, eating with peanut butter and toast for breakfast, or just plain, we go through bunches each week! When they get overly ripe, I toss them in my freezer for future baking – usually some kind of muffin or loaf.

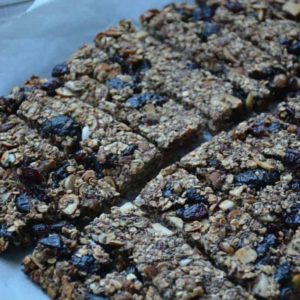
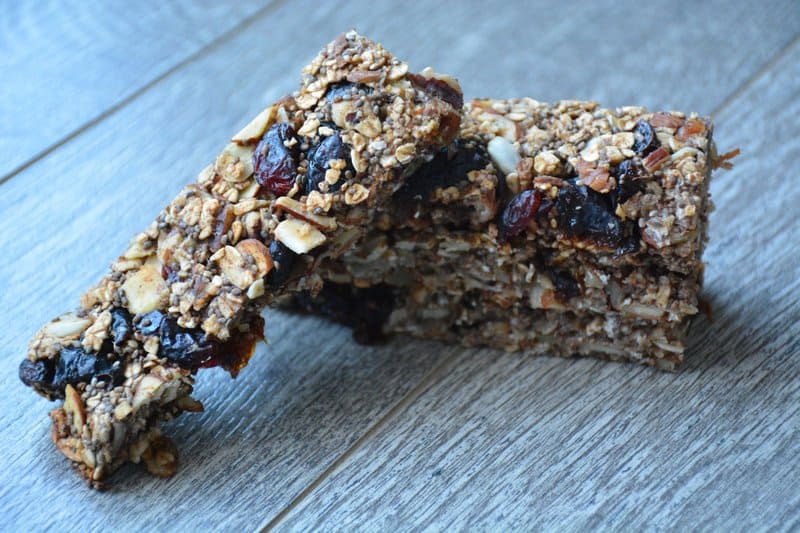
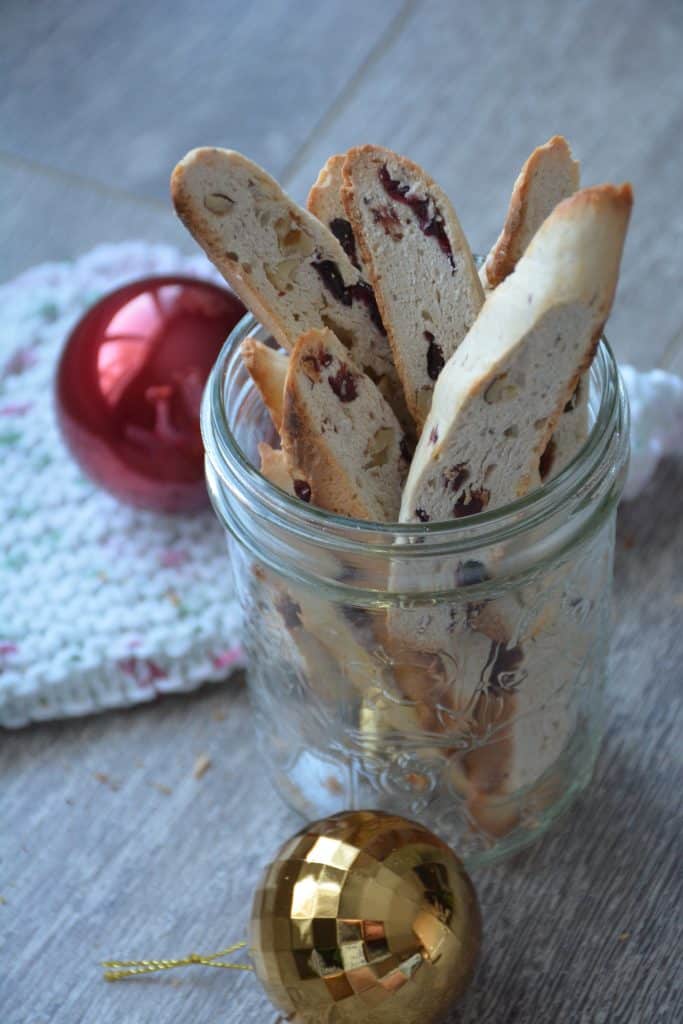
This recipe would be perfect as a healthy lunchbox snack for the kids, enjoyed mid-morning at work for the adults, or even simply warmed up as a delicious after dinner treat!

Baked goods do not have to be a guilty pleasure! When the right ingredients are selected, you can turn sweets into a delicious and nutritious snack option.

Baking Tips for Making The Best Banana Bread

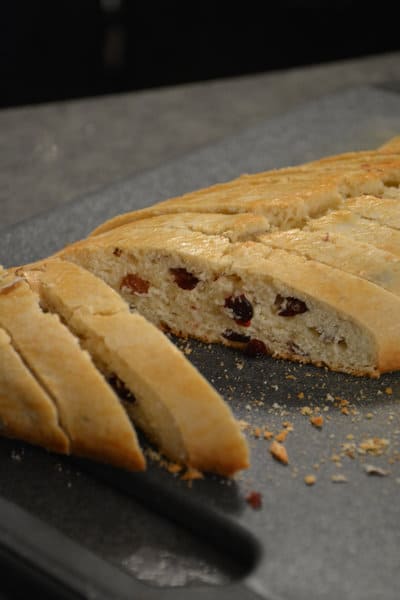
  1. The riper the bananas the better your banana bread is going to be. The bananas are going to be the major sweetness in the bread and the sweeter they are the better the banana flavour is. The banana flavour is going to be stronger and richer if you use really ripe bananas.
  2. Don’t over-bake the banana bread. You want it to be moist and tender crumbed, not dry and tough.
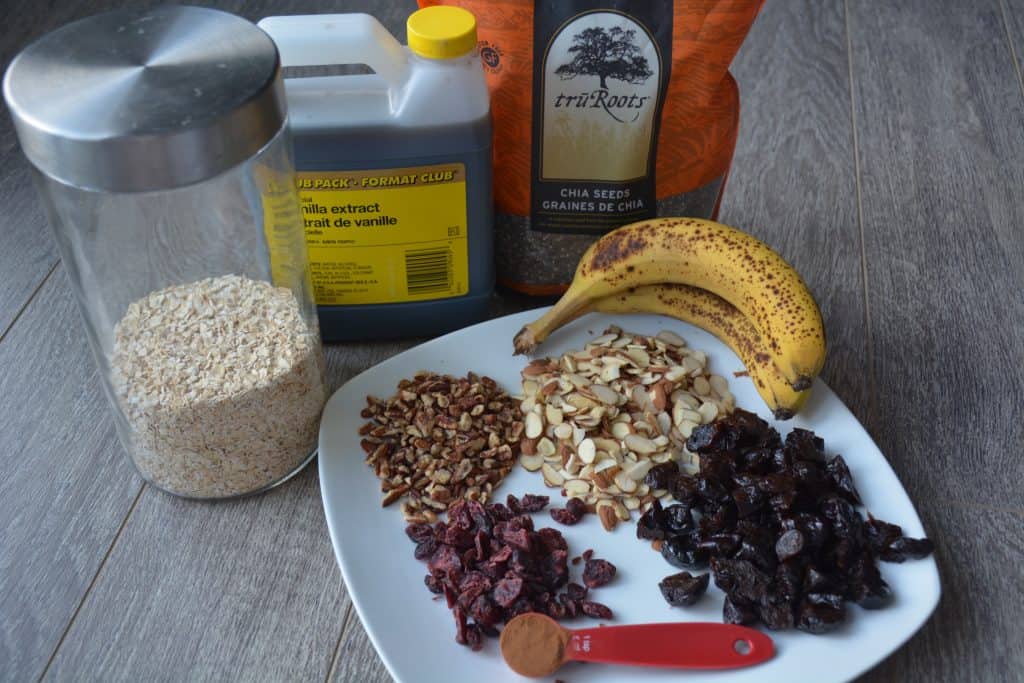
  3. Simple ingredients that you can find from your pantry – ripe bananas, butter, sugar, egg, vanilla, baking soda, nuts, and flour. What is important to know though, is that if you replace these ingredients with nutritious alternatives, banana bread can actually be a healthful and filling snack that could be consumed anytime of day.
  4. Chocolate chips or no chocolate chips, the choice is up to you!

Enjoy !

How do you make your banana bread? Is your recipe similar to this one? For more delicious, kid-tested recipes, check out my Facebook Page and Instagram Feed.

The Best Banana Nut Bread

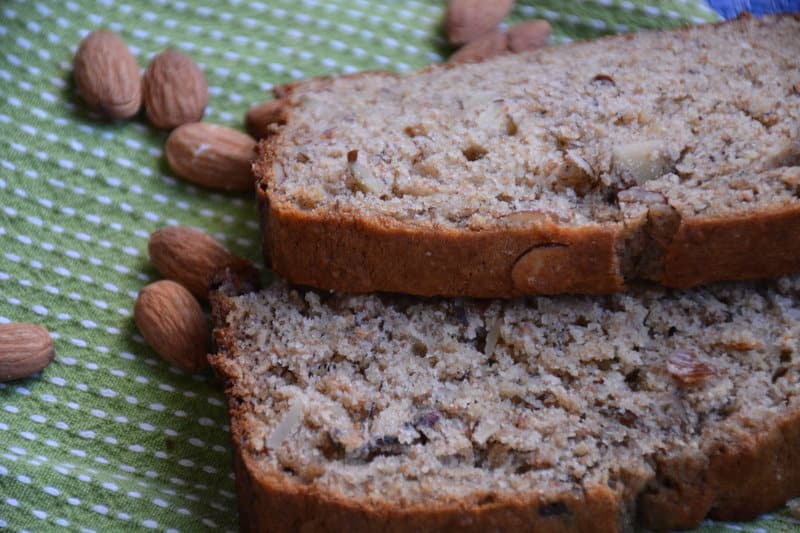
The recipe for moist and delicious banana bread is super easy. It’s truly the best!
Prep Time 10 minutes
Cook Time 55 minutes
Total Time 1 hour 5 minutes
Course Breakfast, Snack
Servings 1 loaf

Ingredients
  

  • 1 cup  all-purpose flour (or whole wheat flour)
  • 3/4 cup whole whear flour
  • 1 tsp baking powder
  • 1 tsp baking soda
  • 1/4 tsp salt
  • 3/4 cup granulated sugar (or brown sugar)
  • 1/2 cup unsalted butter, softened
  • 1 egg
  • 1 tsp vanilla extract
  • 1 cup mashed ripe bananas (2-3 ripe bananas)
  • 1/2 cup plain yogurt
  • 1/2 cup chopped sliced almonds
  • 1/4 cup dark chocolate chips (optional)

Instructions
 

  • Preheat oven to 350°F (180°C), and butter a 9 x 5-inch loaf pan.
  • In a bowl, combine all-purpose flour, whole wheat flour, baking powder, baking soda and salt.
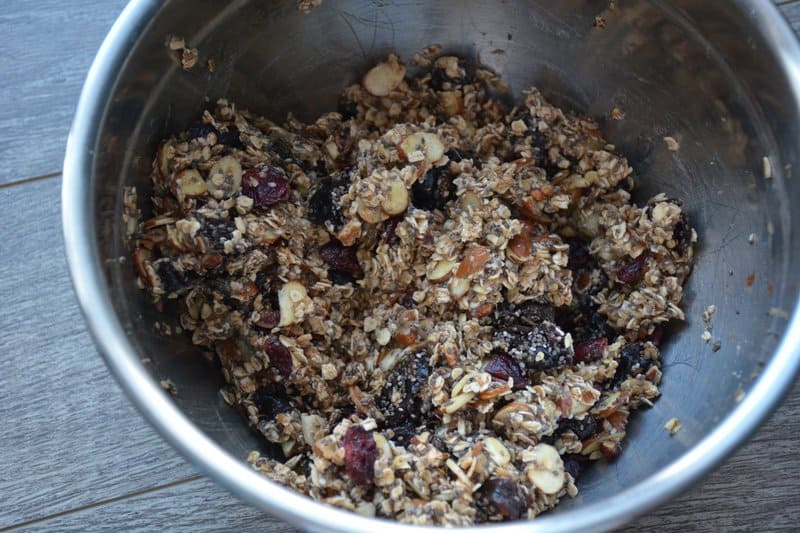
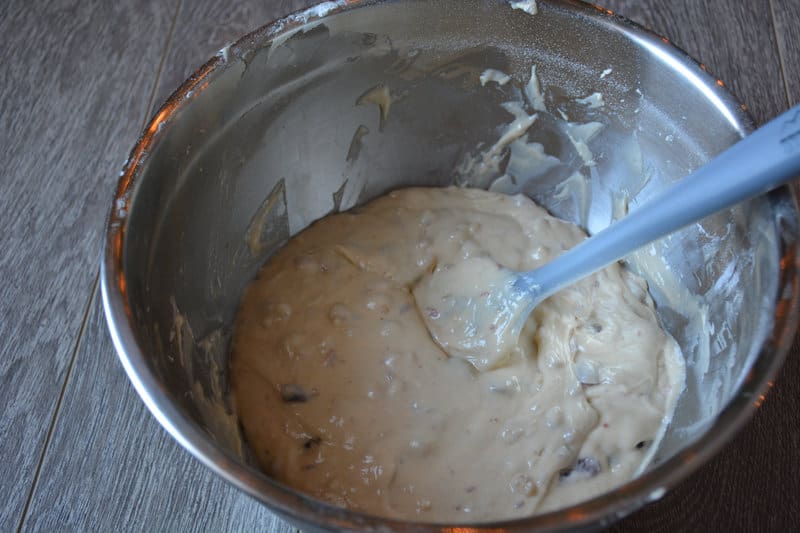
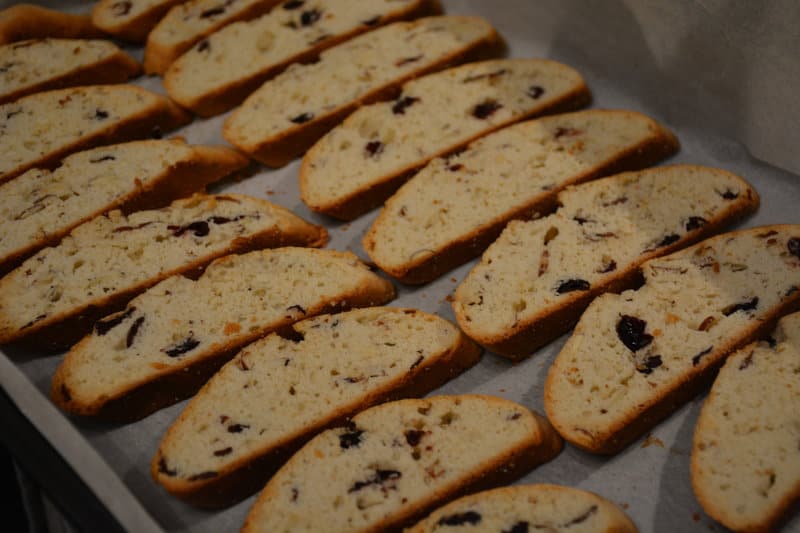
  • In a large bowl, using an electric mixer on high speed, beat sugar and butter until light and fluffy. Beat in egg and vanilla. Stir in bananas and yogurt until well blended. Add flour mixture and beat on low speed until just combined. Stir in dried cranberries and almonds.
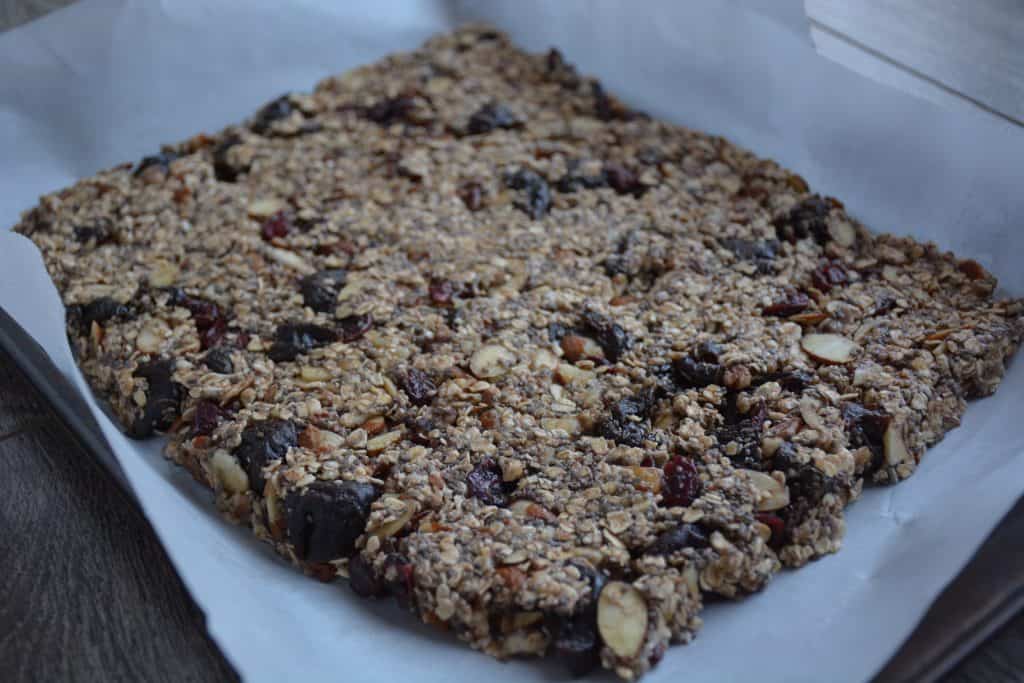
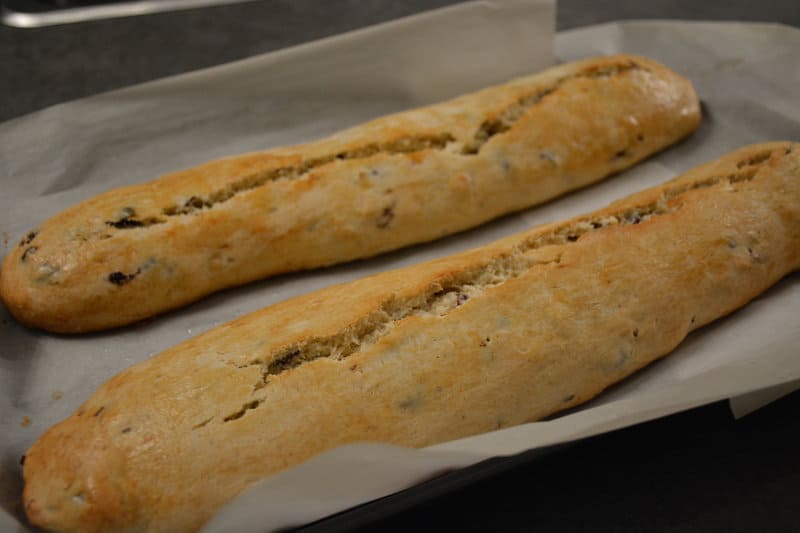
  • Pour batter into prepared pan. Bake in preheated oven for 45 to 55 minutes or until a tester inserted in the center comes out clean. Let cool in pan on a wire rack for 10 minutes, then transfer to rack to cool until just warm or let cool completely.
Super Easy Zucchini Kabobs

Super Easy Zucchini Kabobs

Kabobs is super easy to make. mix and match pieces of summer squash and cherry tomatoes on bamboo skewers to create colourful seasonal kabobs.

Colorful veggies are much more fun and appealing to eat.

Toss the vegetables in olive oil, seasonings, salt and pepper.

Skewer the vegetables in whatever pattern you like. Ask your child to help you in the kitchen.

These kabobs are easy to whip up and they’re sure to give you your daily serving of veggies. Feel free to serve them as a light lunch or as a side dish to any meal.

Enjoy !


Recipe adapted from Easy Italian Zucchini Kabobs.

For easy, family-friendly recipes, check out my Instagram Feed !

Super Easy Zucchini Kabobs

These marinated fresh veggie kabobs are packed with tons of flavor – perfect as a healthy side dish to any meal!
Prep Time 10 minutes
Cook Time 20 minutes
Total Time 30 minutes
Course Dinner, Lunch
Servings 13

Ingredients
  

  • 1/3 cup extra virgin olive oil
  • 3 cloves garlic pressed or finely chopped
  • 1 tsp lemon juice
  • 1/2 tsp oregano dried
  • 1/2 tsp basil dried
  • sea salt to taste
  • ground black pepper to taste
  • 1 zucchini scrubbed and trimmed
  • 1 summer squash scrubbed and trimmed
  • 1 pound cherry tomatoes
  • bamboo vegetable skewers

Instructions
 

  • Preheat the oven to 400 degrees F. Line a baking sheet with parchment paper.
  • In a large bowl, whisk the olive oil, lemon juice, garlic, and seasonings.
  • Slice the zucchini and summer squash into 1/2″ circles. Rinse the cherry tomatoes.
  • Add the vegetables to the olive oil mixture. Mix until all of the veggies are coated.
  • Prepare the skewers by sliding a few cherry tomatoes and zucchini and squash circles onto each stick. You can choose to put them together in whatever pattern you would like. The recipe should yield about 10 skewers but might produce slightly more or less.
  • Add the skewers to the lined baking sheet. bake for 15-20 minutes or until the tomatoes start to blister.
Easy And Healthy Bibimbap

Easy and Healthy Bibimbap

I love Bibimbap, a super popular Korean dish. It’s made of a bowl of rice, sautéed and seasoned vegetables, gochujang sauce and seasoned meat.

Bibim (비빔) translates as “mixed,” and bap (밥) means “cooked rice,” so bibimbap literally means “mixed rice.” Before eating it you’re supposed to mix everything all together.

In Korean, this dish is traditionally served in a stone bowl that was previously heated. This makes the rice and fillings sizzle when they are placed in the bowl. In this recipe, I’ve just used pasta bowls here and only use 5 topping (spinach, cucumber, carrots, mushroom, and ground turkey), please feel free to mix it up or use as many toppings as you like (other common toppings: kimchi, shiitake mushrooms, soy bean sprouts, Gosari (fern brake), bell flower roots (doraji).

The most authentic version of bibimbap is served with a raw egg yolk and gochugang (Korean Chili Paste). You can buy the Gochugang Sauce in any korean market. But I made my own, check out my recipe here.

Prepare and cook the ingredients for bibimbap. Even though we mix up bibimbap before we eat it, each ingredient needs to be prepared with care and individuality, bringing out their unique flavors, textures and colors so they come together beautifully in the bowl and deliciously in your mouth.

Heat up the pan over medium high heat. Add a few drops of cooking oil to the pan and sauté the carrot for 3-5 minutes. Clean the pan with wet paper towel or wash it.

Heat a few drops of cooking oil in the pan and squeeze out excess water from the cucumber (or zucchini). Sauté the cucumber (zucchini) for 3-5 minutes. Clean the pan again.

Heat up the pan. Add a few drops of cooking oil and sauté the mushroom for 3-5 minutes.

All vegetables are prepared and ready to use.

Place a serving of rice in a big bowl. Nicely arrange a small amount of each prepared vegetables and meat over the rice. Drizzle a little sesame oil over. Top with an egg. Serve with Bibimbap sauce.

Gently but firmly mix everything together in the bowl with your spoon.

Enjoy !!


Recipe adapted from My Korean Kitchen

Learn how to make Spicy Gochujang Sauce. If you like this recipe, please head over to my Facebook Page and Instagram Feed

Easy And Healthy Bibimbap

Korean mixed rice with meat and assorted vegetables
Prep Time 30 minutes
Cook Time 30 minutes
Total Time 1 hour
Course Dinner, Lunch
Cuisine Korean
Servings 4

Ingredients
  

MEAT AND MEAT SAUCE

  • 100 g ground meat (I used ground turkey)
  • 1 tbsp soy sauce
  • 1 tbsp sesame oil
  • 1 tsp brown sugar
  • 1/4 tsp garlic powder (or minced garlic)

BIBIMBAP SAUCE

  • 2 tbsp gochujang
  • 1 tbsp sesame oil
  • 1 tsp brown sugar
  • 1 tbsp water
  • 1 tbsp sesama seeds, roasted
  • 1 tbsp apple cider vinegar
  • 1 tsp garlic powder (or minced garlic)

VEGETABLES AND OTHER

  • 1 cup spinach, blanched and squeezed out excess water, seasoned
  • 1 large carrots
  • 1 large cucumber (or zucchini)
  • 1 cup mushroom, cooked
  • 1 cup rice, cooked
  • 4 eggs

Instructions
 

  • Rice: Cook the rice in a rice cooker or following package directions, using a little less water than called for. The rice for bibimbap should be a little drier than usual for best results.
  • Meat: Mix the meat with the meat sauce. Marinate the meat for about 30 minutes while you are working on other ingredients to enhance the flavour. Add some cooking oil into the pan and cook the meat on medium high to high heat. It takes about 5 mins to thoroughly cook it.
  • Sauce: Mix the Bibimbap sauce in a bowl.
  • Spinach: Blanch the spinach in salted boiling water only until wilted, 30-40 seconds. Drain quickly and shock in cold water. Squeeze out excess water. Cut into 3-inch lengths. Toss with 1/2 tsp minced garlic, 1 tsp roasted sesame seeds, 1 tbsp sesame oil and salt and pepper to taste.
  • Carrots: Cut the carrots into matchsticks. Add some cooking oil in the pan. Sauté the carrots for 3 to 5 minutes over medium high to high heat, sprinkling salt and pepper to taste.
  • Cucumbers: Cut the cucumbers into matchsticks. Add some cooking oil in a pan. Sauté the cucumbers for 3 to 5 minutes over medium high to high heat, sprinkling salt and pepper to taste.
  • Mushroom: Add some cooking oil in a wok. Sauté the mushroom to 5 minutes over medium high to high heat, sprinkling salt and pepper to taste.
  • Eggs: Make fried eggs.
  • Assemble: Place a serving of rice in a big bowl. Nicely arrange a small amount of each prepared vegetables and meat over the rice. Drizzle a little sesame oil over. Top with an egg. Serve with Bibimbap sauce.
  • Mix all the ingredients well in the bowl and enjoy.

Notes

Other common toppings for bibimbap include shiitake mushrooms (slices and sautéed), soy bean sprouts, Gosari (fern brake), Kimchi, bell flower roots (doraji – soaked and sautéed).
Spicy Gochujang Sauce

Spicy Gochujang Sauce

Gochujang Sauce is sweet, savoury and a little bit spicy. It can be used in many dishes such as Bibimbap (Korean rice bowls), in soups, stews and marinated dishes.

Enjoy!

If you like this recipe, you might also want to try this delicious Bibimbap 

Spicy Gochujang Sauce

Prep Time 5 minutes
Cook Time 5 minutes
Total Time 10 minutes
Course Sauce
Cuisine Korean
Servings 1 cup

Ingredients
  

  • 1/3 cup soy miso paste
  • 1/4 cup maple syrup (or grace syrup or honey)
  • 1/4 cup cayenne pepper (or less to taste)
  • 1/4 cup tamari sauce
  • 1/2 tsp garlic powder (or 1 garlic clove, minced)
  • water to thin (approx. 1/4 cup)

Instructions
 

  • In a small blender or food processor, add soy miso paste, maple syrup, cayenne pepper, tamari sauce, and garlic powder. Blend together until smooth, adding water to thin into a paste.
  • Taste and adjust flavour as needed. Add more cayenne pepper or chili flakes for spice, tamari sauce for depth of flavour, maple syrup for sweetness, garlic for “zing” or salt for saltiness.
  • Store in the refrigerator up to 2 weeks or in the freezer up to 1 month.
Black Bean Quinoa Salad With Lime Dressing

Black Bean Quinoa Salad with Lime Dressing

Quinoa is an easy grain to love. If you are unfamiliar with quinoa (pronounced KEEN-wah) you can check out my last post that I talked about what it is, where it is found and how to use it!

This Black Bean Quinoa Salad is fresh, delicious and packed with colorful veggies.

Enjoy !

If you like this recipe, you might also want to try this delicious Colourful Edamame Sesame Quinoa Salad.

Black Bean Quinoa Salad With Lime Dressing

Prep Time 13 minutes
Cook Time 15 minutes
Total Time 28 minutes
Course Dinner, Lunch
Cuisine Gluten Free, Vegan
Servings 8

Ingredients
  

  • 1 cup quinoa, rinsed
  • 2 cups vegetable broth (or water)
  • 1 can black beans, drained and rinsed
  • 1 cup orange pepper, chopped
  • 1 cup grape tomatoes, quartered
  • 1 cup corn, cooked

Dressing

  • 3 tbsp lime juice, fresh
  • 2 tbsp extra virgin olive oil
  • 2 garlic cloves, minced
  • 1 tsp cumin, ground
  • 1 tsp oregano, dried
  • 1/2 tsp salt
  • 1/4 tsp black pepper, ground

Instructions
 

  • Rinse the quinoa just before cooking.
  • In a saucepan, bring 2 cups vegetables broth to a boil. Add quinoa and reduce the heat to low. Cover and simmer for 20 minutes until the broth is absorbed and the quinoa is tender.
  • In a small bowl, whisk together all the dressing ingredients
  • In a large bowl, combine quinoa, black beans, orange peppers, tomatoes, corn. Toss with the dressing.
  • Enjoy immediately, or store in a covered container for later.
No Bake Lentil Power Balls

No Bake Lentil Power Balls

Lentil is my favourite plant based protein. Lentils are sustainable, healthy, affordable and incredibly versatile. A fibre-rich, plant-based diet that includes lentils and other pulses is linked to a lower risk of obesity, type 2 diabetes, heart disease and some types of cancer.

I wanted to make a portable savory snack that someone can easily take to work or gym with them. So I came up with these no bake lentil balls.

These nutritious bites are easy to make and perfect for children to get involved with!

Enjoy

Recipe adapted from Lentil Power Bites

If you like this recipe, you might also want to try this delicious Chocolate Chia Power Balls

No Bake Lentil Power Balls

These No-Bake Lentil Power Balls are so delicious and packed full of protein and fibre from lentils.
Prep Time 10 minutes
Cook Time 1 hour
Total Time 1 hour 10 minutes
Servings 3 dozens

Ingredients
  

  • 1 cup dried lentils
  • 1 cup natural peanut butter
  • 1/2 cup coconut oil, melted
  • 2 bananas, ripe
  • 1.5 cup prunces (or Medjool dates)
  • 1 tsp vanilla extract
  • 1/2 cup cocoa powder
  • 1 tsp Allspice (or cinnamon, nugget or your favourite baking spice)
  • 2 cups quick oats
  • 1 cup pumpkin seeds
  • 1/2 cup dark chocolate chips (optional)

Instructions
 

  • Line a baking sheet or two with parchment or wax paper.
  • Rinse lentils and transfer them to a small saucepan. Cover them with 2 cups of water and bring to a boil. Lower heat to medium and simmer for 30 minutes.
  • Drain lentils and transfer them to a small mixing bowl. Set the lentils aside to cool.
  • In a large mixing bowl, stir together the peanut butter, coconut oil, bananas, prunes, and cocoa powder, spice, oats, seeds and chocolate chips.
  • Roll into tablespoon sized balls and and place on the baking sheet.
  • Cover and refrigerate or freeze for an hour. The balls will become more solid and ready to eat.
  • Store in air tight container in the fridge to snack on during the week, or freeze until you are ready to nibble.
Spinach And Cheese Quiches

Spinach and Cheese Quiches

Are you struggling with making healthy breakfast for the family? Quiche is my favourite dish. I am eager to share this quick recipe that you can make ahead of time, which also makes great lunch leftovers!

Gather all ingredients.

Prick pie shells (bottom and sides) all over with a fork.

To prevent shrinkage during baking. Line the crust with aluminum foil, and cover with rice, then pre-bake the crust in your heated oven for about 10 minutes.

In medium mixing bowl – whisk together the eggs and milk.

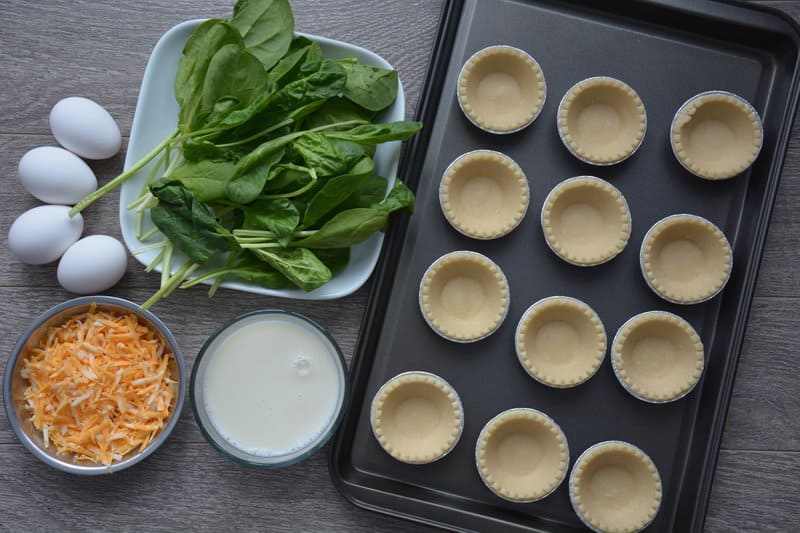
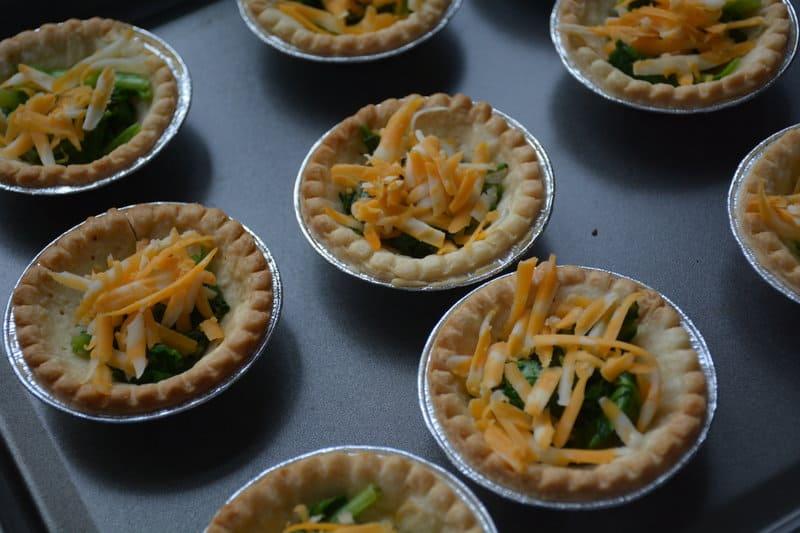
Spread cooked spinach over bottom of cooked pie crust, then sprinkle shredded cheese.

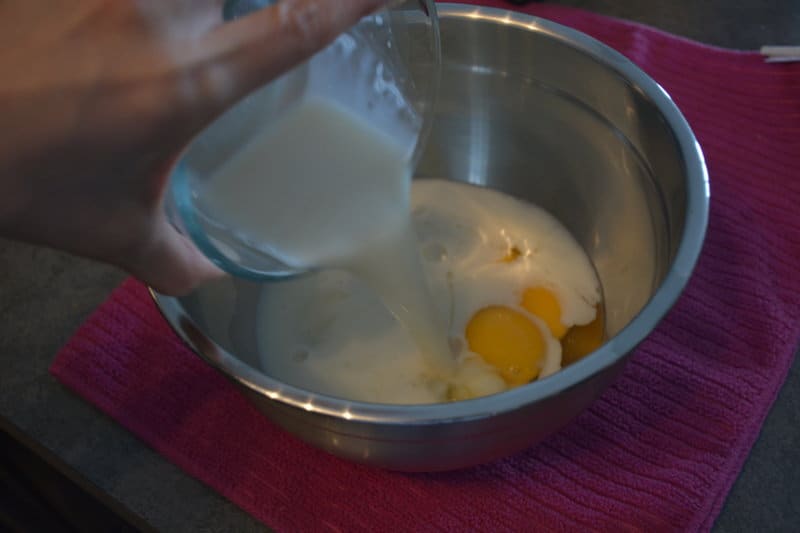
Pour egg and milk mixture over spinach and cheese.

Bake at 350F for 35 to 40 minutes until custard is set and top is lightly golden. Serve hot or warm.

This recipe can be made up to a day ahead of time and refrigerated. TO reheat: cover the quiche with aluminum foil and bake in a preheated 350F over for  35 to 40 minutes or until hot in the centre. The cooled quiche may also be wrapped tightly in foil and frozen for up to 2 months. Let the quiches thaw in the refrigerator overnight before reheating.

This recipe is packed with protein to help you feel satisfied longer. Enjoy the versatility to use your favourite veggie and cheese combinations.

If you enjoyed this post, you may also like this one on Quick Oatmeal Pecan Pancakes

Spinach And Cheese Quiches

Prep Time 10 minutes
Cook Time 35 minutes
Total Time 45 minutes
Course Breakfast, Lunch
Servings 6

Ingredients
  

  • 12 little unbaked pie shells, thawed (or 1 unbaked 9" pie shell)
  • 3-4 large eggs, beaten
  • 1/2 cup milk
  • A handful of spinach, chopped
  • 1/2 cup cheddar cheese, shredded
  • 1/2 tsp salt
  • 1/2 tsp black pepper, ground

Instructions
 

  • Preheat oven to 450F (230’C).
  • Remove pie shells from freezer and thaw until just soft enough to easily prick with a fork. Prick bottom and sides all over with a fork.
  • Line the unbaked pie shells with a small square of aluminum foil. Fill with raw rice or dried beans to minimize shrinkage during baking. Baked in preheated oven until lightly browned at edge, about 10 minutes. Lift out foil and rice. Cool on a wire rack. Turn oven down to 350F.
  • In a frypan, spray with olive oil spray over medium-heat, and sauté spinach until tender.
  • Beat eggs in a small bowl. Add milk, salt and pepper.
  • Layer cooked spinach first into pie shell. Add cheddar cheese. Pour egg mixture over top of the vegetables and cheese in the pie shell.
  • Cook for 35-40 minutes or until a knife inserted into the centre comes out clean.
  • Cook for 35-40 minutes or until a knife inserted into the centre comes out clean.
Quick And Easy Chickpea Hummus

Quick and Easy Chickpea Hummus

Who isn’t always on the search for a great snack food? Something versatile that can be used for both meals and special occasions? One of my favorite solutions for this problem is hummus!

Hummus isn’t just a great snack food it also works well as a spread in addition to being perfect for lunch boxes, parties, or special occasions such as birthday parties, baby showers, holidays, and so much more.

Chickpeas are sometimes known as garbanzo beans. They are a good source of protein, carbohydrates, and fiber.

Nutritionally, hummus is a great source of protein and fiber and as my recipe incorporates extra virgin olive oil it is also a good source of heart healthy monounsaturated and polyunsaturated fats. And why would this be important? Because these nutrients promote satiety and stave off hunger. Powerful antioxidants are provided by the fresh garlic, lemon, and peppers as well as cumin. Hummus is a nutrient powerhouse and these nutritive values are boosted when fresh ingredients are used.

Enjoy your hummus with pita chips, veggies such as carrots, celery, or cucumbers, and hummus is much more nutritious as a spread on your sandwich or wrap than mayonnaise.

Enjoy !!

For easy, family-friendly recipes, check out my Facebook Page and follow me on Instagram

Quick And Easy Chickpea Hummus

Hummus is a tasty and healthy option to have any day of the week as a nutritious snack, spread, or dressing for a side dish. You might want to try and serve it at your next party.
Prep Time 5 minutes
Cook Time 1 minute
Total Time 6 minutes
Course Snack
Cuisine Gluten Free, Vegan
Servings 20

Ingredients
  

  • 1-19oz can Chickpeas, rinsed & drained (or 2 cups cooked chickpeas)
  • 1/3 cup Tahini paste
  • 1 Garlic Glove, minced
  • 1/4 cup Lemon Juice
  • 3 tbsp Extra virgin olive oil
  • 1/2 tsp Cumin, ground
  • 1 tsp salt
  • 1/3 cup water

Instructions
 

  • Place chickpeas in a blender or food processor with tahini, garlic, lemon juice, oil, cumin and salt.
  • Puree, adding just enough water to make the mixture creamy and smooth. Use more than 1/3 cup water if needed.
  • Serve in a bowl with pita cut into wedges.
  • Store in an air tight container in the fridge for up to 3 days.

Notes

Tahini is sesame seed paste sold in the Middle Eastern food section of your grocery store.


Family Friendly On-The-Go Granola Bar

Family Friendly On-the-Go Granola Bar

Finding healthy snacks I feel good about serving, and that my kid love to eat, is not easy. These easy, homemade granola bars are packed with oats, nuts, seeds, dried fruits, As a bonus, these bars are held together by only one nutritious ingredients: mashed bananas ! There is absolutely no added sugar needed. The various seeds that are included offer both protein and fibre – two ingredients that keep tummies full and energy levels steady and stable.

Mix all the ingredients together. Stir to combine.

Spread banana-oat mixture in an even layer on the parchment covered baking sheet.

Bake for 25-30 minutes. Remove from oven and allow to cool 10 minutes before cutting into bars.

If you are not a breakfast person or if you need something to eat every few hours, or if you need something on-the-go, this is the perfect recipe for you and your family. Not only are these chewy bars a sweet portable snack, but they also lend themselves to endless flavour options – feel free to sub in other nuts and dried fruits for a different bar.

Enjoy !


For more tips and tricks when it comes to feeding your family, head over to my Facebook Page and Instagram Feed !

Family Friendly On-The-Go Granola Bar

This snack will nourish you and your kids without the added sugar
Prep Time 10 minutes
Cook Time 30 minutes
Total Time 40 minutes
Course Snack
Servings 20

Ingredients
  

  • 2 ripe bananas, peeled
  • 1 tsp Cinnamon
  • 1/2 tsp Vanilla Extract
  • 1 cup Large Flake Oats
  • 1/4 cup Unsalted Pecans, chopped
  • 1/2 cup chia seeds (or Hemp Seeds)
  • 1/4 cup cranberries, dried
  • 3/4 cup prunes, chopped (or apricots/medjool dates)
  • 1/4 cup unsweetened shredded coconut (optional)

Instructions
 

  • Preheat oven to 350F. Line a 9 x 13 inch baking sheet with parchment paper.
  • In a large bowl, mash the banana until smooth. Add cinnamon, vanilla, oats and stir will.
  • Add the seeds, nuts, cranberries and prunes to the banana-oat mixture and stir until thoroughly combined.
  • Spoon mixture into a baking dish. Press down until compact and even.
  • Bake 25-30 minutes until firm and lightly golden along the edge.
  • Let cool about 10 minutes. Slice into 20 bars.
Cranberry Almond Biscotti

Cranberry Almond Biscotti

This cranberry almond biscotti is yummy and crunchy. It was so perfectly balanced between crisp and tender.

Combine the wet and dry ingredients until it is evenly mixed and it has a similar texture to cookie dough. Then stir in almonds, cranberries or whatever else you’d like.

Form the dough into two seem-flat logs on the baking sheet. Bake the logs for 25 minutes. It should be golden brown and slightly “cracked” on top.

Cut biscotti on the diagonal into 1/2 inch slices. Note: A serrated knife works better for this. Smooth blade knives may cause the cookie to crumble as you cut it.

Place the slices back onto the baking sheet and bake for 6-8 more minutes on each side.

They’re perfect…absolutely perfect ! I will, without a doubt, be making these on a regular basis.

Enjoy !!


For more delicious, family friendly recipes, check out my Facebook Page and follow me on Instagram !

Cranberry Almond Biscotti

Prep Time 15 minutes
Cook Time 1 hour 15 minutes
Total Time 1 hour 30 minutes
Course Dessert
Servings 27

Ingredients
  

  • 3 cups all purpose flour
  • 2 tsp baking powder
  • 1/4 tsp salt
  • 1/2 cup cranberries, dried
  • 1/2 cup boiling water
  • 4 tbsp margarine, non-hydrogenated
  • 1 cup sugar
  • 4 large eggs (3 large eggs + 1 large egg lightly beaten for wash)
  • 2 tsp vanilla extract
  • 1/2 cup almong, chopped (or walnuts)
  • 1/2 cup milk

Instructions
 

  • Preheat oven to 375F.
  • Line a large baking sheet with parchment paper, set aside.
  • Place cranberries in a small bowl, and add boiling water. Let stand until plump (about 15 mins). Drain and set aside.
  • Sift together flour, baking powder, and salt into a medium bowl. Set aside.
  • Use an electric mixer to beat the margarine and sugar on medium speed until light and fluffy (approx. 2 minutes). Add 3 eggs, one at a time, beating to incorporate after each addition and scraping down the sides of the bowl as needed. Beat in the vanilla. Add the flour mixture, and mix on low speed until combined. Mix in the drained cranberries and almond. Add milk to bring the dough together.
  • Turn the dough onto a lightly floured surface; divide in half. Shape each piece into a 12-by-3 inch log, and transfer to prepared baking sheet, about 3 inches apart. With the palm of your hand, flatten logs slightly, Brush beaten egg over the surface of the dough logs.
  • Bake, rotating sheet halfway through until logs are slightly firm to tough, about 25 minutes. Transfer logs on parchment paper to a wire rack and cool slightly, about 20 minutes. Reduce the oven temperature to 350F (or 300F).
  • Place logs on a cutting board. Using a serrated knife, cut the logs crosswise on the diagonal into 1/2 inch thick slices. Place back on to baking sheet. Arrange slices, cut side down. Bake for 6-8 more minutes on each side.
  • Remove baking sheet form the oven, and let biscotti cool completely.
  • Biscotti can be kept in an airtight container at room temperature for 1 week or up to 3 months in the freezer.